Uploading, Appending, and Merging Spreadsheets
|
How to: |
You can upload, append, or merge Excel spreadsheets or CSV files using the Upload wizard. Before uploading a new file, you should review Preparing Data for Upload, to ensure that your upload runs successfully.
After you upload a new file, you can append a file by adding new data to an existing synonym, without changing the structure. This option is useful when you are working with a complex or heavily edited synonym, by allowing you to retain all previous edits and data transformations. You can also merge a file with your data and enhance the existing structure.
The procedures in this section provide step-by-step instructions for uploading, appending, and merging files using the default settings in the Upload wizard.
Procedure: How to Upload Excel Spreadsheets
- Launch the Upload wizard in one of the
following ways:
- On the Home Page, on the actions bar, click Upload Data
 .
.
- In the Open dialog box, in InfoAssist, click Upload Data.
- On the Home Page, on the actions bar, click Upload Data
- Drag the file that you want to upload into the Upload
pane or click Select File, and navigate to
the location of the file on your machine.
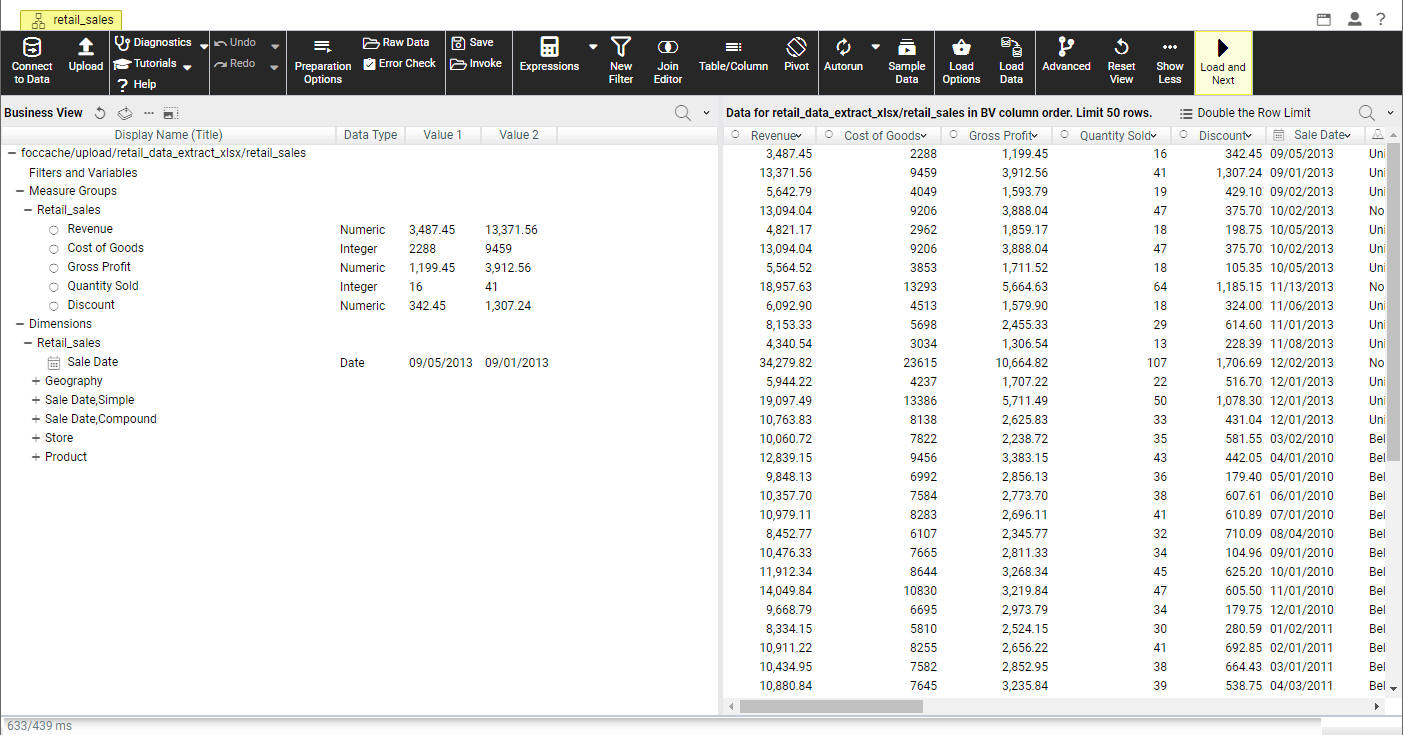
The next screen of the Upload wizard opens, as shown in the image below. You can use the options on this screen to preview and change spreadsheets and delimited data files before you upload them to the target environment. This screen shows you the default breakdown of your data as measures, dimensions, and hierarchies.
- On the ribbon, click Load and Next.
The Target Load Options dialog box opens.
A dialog box opens.
Note: By default, the Bulk Load check box is selected. Clear this check box if you do not have a bulk load program that supports your target environment. For example, if you are using Microsoft SQL Server, you may use a Bulk Copy Program (BCP). If you are unsure about whether you have a bulk load program installed, contact your system Administrator.
- Click Proceed to Load.
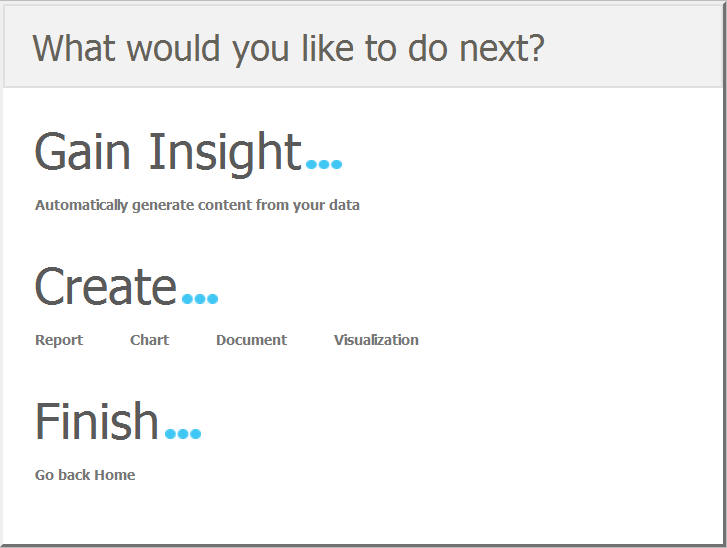
If the load is successful, a window opens, and provides options to automatically generate content from your data, create content using the new Master File, or close the Upload wizard, as shown in the following image.
Note: If there are informational messages or if your upload is unsuccessful, the Status screen opens.
- Select what you want to do next.
Procedure: How to Append New Data to an Existing Synonym
- Launch the Upload wizard.
- Drag the file containing the data that you want to append
into the Upload pane or click Select File,
and navigate to the location of the file on your machine.
The next screen in the Upload wizard opens.
- On the ribbon, click Load Options.
The Target Load Options dialog box opens.
Note: By default, the Bulk Load check box is selected. Clear this check box if you do not have a bulk load program that supports your target environment. For example, if you are using Microsoft SQL Server, you may use a Bulk Copy Program (BCP). If you are unsure about whether you have a bulk load program installed, contact your system Administrator.
- From the Load Option drop-down list, click Append to
Existing.
In the Select Target Synonym dialog box, select the synonym to which you want to append data.
- Click OK.
The Target Load Options dialog box opens.
- Click OK.
The Merge Editor dialog box opens.
- Click OK.
- On the ribbon, click Load and Next.
If the load is successful, a window opens, and provides options to automatically generate content from your data, create content using the new Master File, or close the Upload wizard.
Note: If there are informational messages or if your upload is unsuccessful, the Status screen opens.
- Select what you want to do next.
Procedure: How to Merge New Data With an Existing Synonym
- Launch the Upload wizard.
- Drag the file containing the data that you want to merge
into the Upload pane or click Select File,
and navigate to the location of the file on your machine.
The next screen in the Upload wizard opens.
- On the ribbon, click Load Options.
The Target Load Options dialog box opens.
- From the Load Option drop-down list, click Merge into Existing.
In the Select Target Synonym dialog box, select the synonym to which you want to merge your data.
- From the If the record exists drop-down list, click the action you want to occur when a record in the new spreadsheet matches a record in the existing data. You can choose to reject the matching record, update the existing record, or delete the existing record. By default, Update the existing record is selected.
- From the If the record does not exist drop-down list, click the action you want to occur when a record in the new spreadsheet
does not match the record in the existing data. You can choose to include or reject the record that does not match the existing
record.
Note: By default, the Use Bulk Load to populate and Stage Table + Merge into Target check box is selected. Clear this check box if you do not have a bulk load program that supports your target environment. For example, if you are using Microsoft SQL Server, you may use a Bulk Copy Program (BCP). If you are unsure about whether you have a bulk load program installed, contact your system Administrator.
- Click OK.
- In the Merge Editor dialog box, you can make additional changes to how your data is merged, for each column in the spreadsheet.
You must create at least one matching expression before you load your data.
- Click OK.
- On the ribbon, click Load and Next.
If the load is successful, a window opens, and provides options to automatically generate content from your data, create content using the new Master File, or close the Upload wizard.
Note: If there are informational messages or if your upload is unsuccessful, the Status screen opens.
- Select what you want to do next.
| WebFOCUS | |
|
Feedback |