Preparing Data for Upload
|
Topics: |
Uploading data to Business User Edition can be made easier if you familiarize yourself with the data file first and ensure that it is properly formatted for upload, so geographic data, dimensional hierarchies, and other important aspects of your data are recognized. This is important so that the synonym created for your uploaded data provides the basis for quality analytical content.
You can use the following techniques to prepare your data for the uploading process.
Naming Conventions and Excel Sheet Names
For Excel spreadsheets, the name of the file is not important but the name of the worksheet that contains your data is used to generate the synonym name. For the best results, follow the guidelines below:
- Ensure that the worksheet name is meaningful. For example, Store Sales is better than Sheet1.
- Remove special characters from the worksheet name. Spaces will
be converted to underscores but all non-alphanumeric characters
should be removed from the name, such as:
/`~!@#$%^()-+={}|;,
- Remove or replace NLS characters with standard alphanumeric characters.
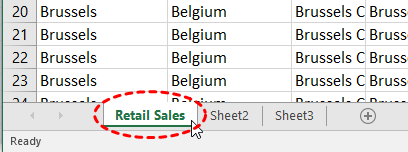
The image below shows a worksheet with a meaningful name, Retail Sales.
While you have an opportunity to edit the worksheet name within the Upload wizard, doing it in Excel may be preferable. Note that your spreadsheet data and column titles may contain National Language Support data and special characters.
For CSV files, there is no worksheet name, so the CSV file name is used to generate the synonym name. For this reason, all of the limitations identified for Excel worksheet names apply to the CSV file name. Be sure to check and adjust the file name prior to the upload.
Removing Introductory Information
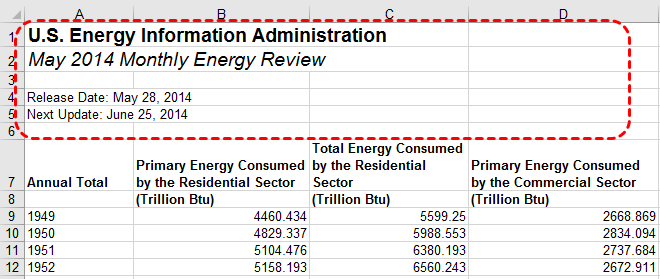
Sometimes, an Excel spreadsheet contains formatted headings in the first few rows. This information cannot be imported into Business User Edition and should be removed. Delete the introductory rows and save the file before uploading. Alternatively, you can define a data range within your worksheet and leave the introductory information in place. The following image shows an example spreadsheet with a heading and subheadings highlighted.
Placing Column Titles in the First Row
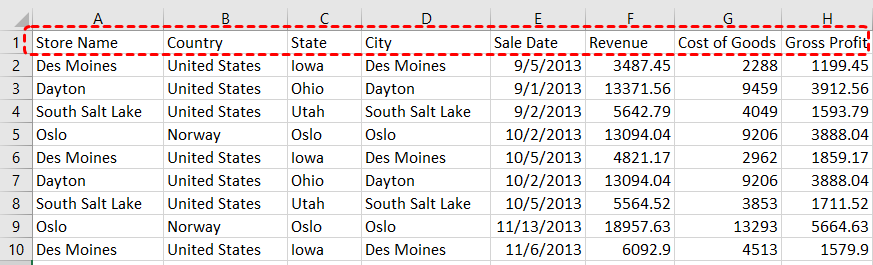
For data to be useful in Business User Edition, your data columns must be identified and properly described in the synonym that is generated during the upload process. You can make this easier by ensuring that the first few rows of your Excel spreadsheet contain column titles that are meaningful to you and to other users who will be using it. An example of meaningful column titles is shown in the following image.
If your spreadsheet has more than one row of column titles, Business User Edition can merge the information when creating the synonym. You will be given an option to specify how many first rows of the Excel file contain title information in the Upload wizard.
Removing Aggregated Information
Excel spreadsheets may contain subtotals, grand totals, and other non-data row information. Data aggregation is performed by Business User Edition, so you should remove these kinds of rows from your spreadsheet and save the file before uploading it.
Using Excel Named Ranges
Data ranges defined within your Excel worksheet can be helpful for the following reasons:
- Your worksheet may have introductory information, such as formatted headings or non-data information, in the first few columns.
- You may not want to import all of the data columns found on your worksheet.
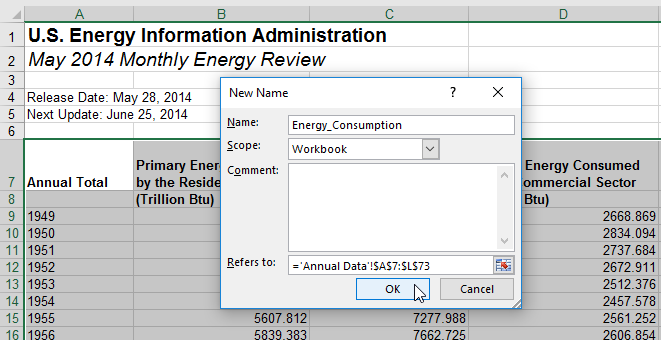
You can define a data range in your worksheet to remove the data that you want Business User Edition to process during upload, and leave your spreadsheet in its original format. An example of this is shown in the following image.
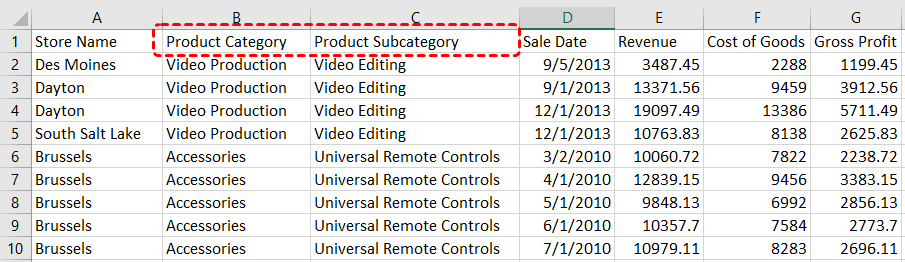
Preparing Hierarchical Data Columns
Business User Edition recognizes columns of data that have hierarchical relationships. This is useful because the field names are arranged more logically in InfoAssist and because it facilitates Auto Drill capabilities in the content. Auto Drill lets you drill up and down a field hierarchy automatically, making the content engaging and useful.
To help Business User Edition recognize hierarchical columns correctly, ensure that the column titles begin with a common word or words and are arranged left-to-right in the correct top-to-bottom direction, as shown in the image below. In the Upload wizard, you can define and edit dimension hierarchies prior to creating the synonym. You can also do this prior to the upload in Excel.
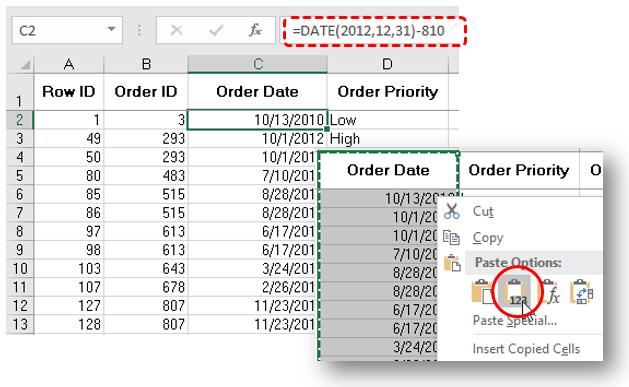
Removing Date Formulas
Spreadsheets may contain a date column where the values are computed by Excel using a formula. You need to convert these computed values into simple values before uploading a spreadsheet. To remove date formulas, select a column, right-click, and then click Copy. Then right-click the selected column again, and click Values. This can be found under the Paste Options menu, which is highlighted in the following image. Menu options may vary by Excel release. Now you can see that each cell contains a date value, and Business User Edition can decompose your dates into useful components for use in InfoAssist.
| WebFOCUS | |
|
Feedback |