Introduction to Wizards
|
Topics: |
The SQL Wizard (also known as the Connect to Data Wizard) leads you through the creation of metadata. The Upload Wizard leads you through the process of uploading a data file from your local machine to the server. Quick Copy lets you load a new file, replace an existing file, or append a new file to an existing file.
After each process is complete, the wizard lets you run or save a test query and schedule or email the final output.
Many of the options available for the metadata creation and upload processes are shared with the Data Assist tool, described in Using Data Assist.
To upload an image file to an application, right-click the application, point to New, and click Upload Image Files.
Using the SQL Wizard
|
How to: |
The SQL Wizard provides a step-by-step process for connecting to data, creating a summary table or cluster synonym and running a report. It can be used to create metadata for different types of data sources. Some of options and parameters vary depending on the type of data source. The wizard enables you to:
- Configure an adapter, create a new connection, or change connection parameters.
- Import metadata.
- Edit metadata.
- Generate a test query.
- Run, submit with email or schedule the report.
- Return to the console.
The SQL Wizard displays these steps as a menu, as shown in the following image.

When you complete a task, the wizard automatically moves to the next step.
To exit the wizard and return to the full console, click Full Console.
Procedure: How to Access the SQL Wizard
- Access the SQL Wizard by clicking the
SQL Wizard icon on the Applications page ribbon.

The SQL Wizard opens, as shown in the following image.

Procedure: How to Use the SQL Wizard to Configure an Adapter, Create a New Connection, or Change a Connection
- Select one of the following options:
- New Adapter/Connection
- Add Connection
- Change Connection
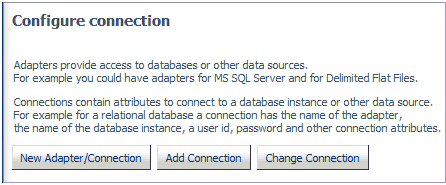
- If you select New
Adapter/Connection, the Configure Adapter page opens.
Select the radio button for the adapter and click Next.
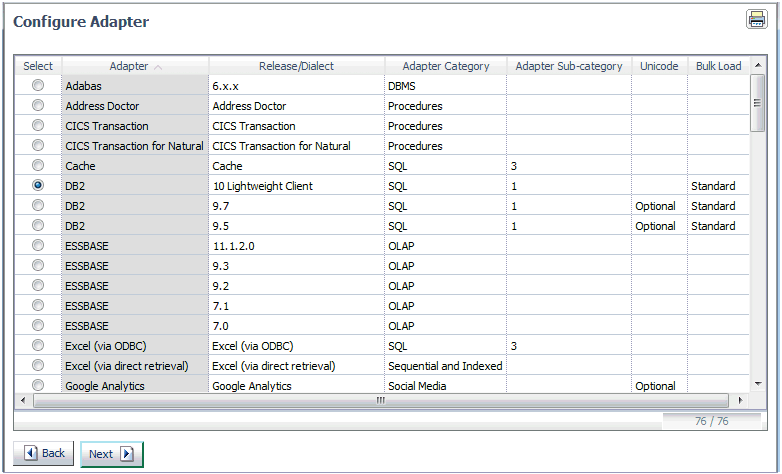
Note: You can click any of the column headings to sort the available adapters.
The Add Adapter to Configuration pane opens. Enter the parameters for the specific adapter and click Configure. For information on the parameters, see the Adapter Administration manual.
- If you select Add
Connection, the Add Connections page opens. Select an
radio button for an available adapter and click Next.
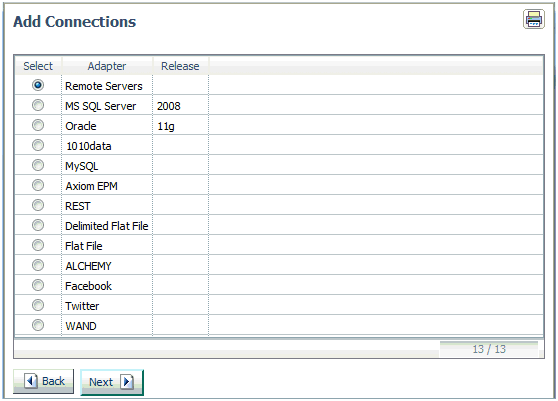
The Add Connection page opens. Enter the parameters for the specific adapter and click Configure. For information on the parameters, see the Adapter Administration manual.
- If you select Change
Connection, the Edit Connections page opens. Select
the radio button for the connection and click Next.
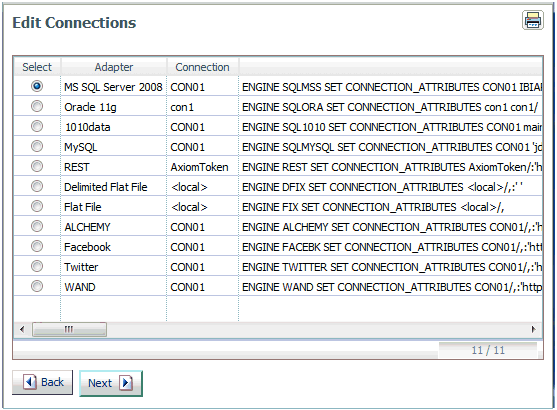
Note: You can click any of the column headings to sort the available connections.
The Change Connect Parameters page opens. Change the parameters for the specific connection and click Configure.
- Click Next to move to the Import Metadata step.
Procedure: How to Use the SQL Wizard to Import Metadata
After completing the Connection step, the wizard moves to the Import Metadata step where you can create one or more synonyms.
The Select connection to create synonyms page opens, as shown in the following image.
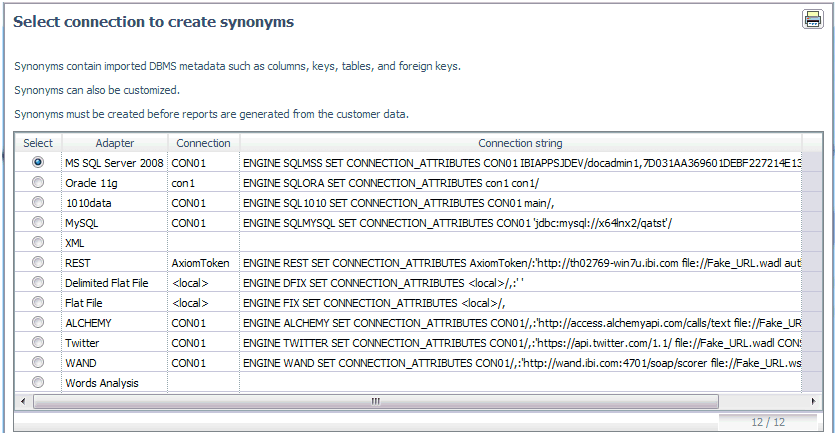
- Select the radio button for the adapter and click Next.
Note: You can click the Adapter or Connection column to sort the available adapters.
The Select Synonym Candidates pane opens.
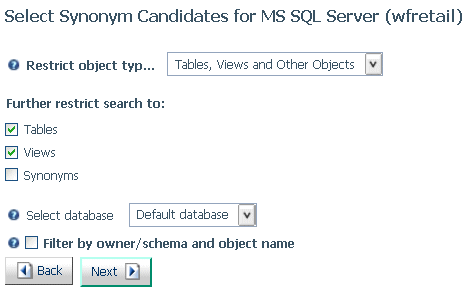
- Select or enter the object types, database, and filtering
conditions, and click Next.
For additional information on the parameters, see the Adapter Administration manual.
The Create Synonym page opens.
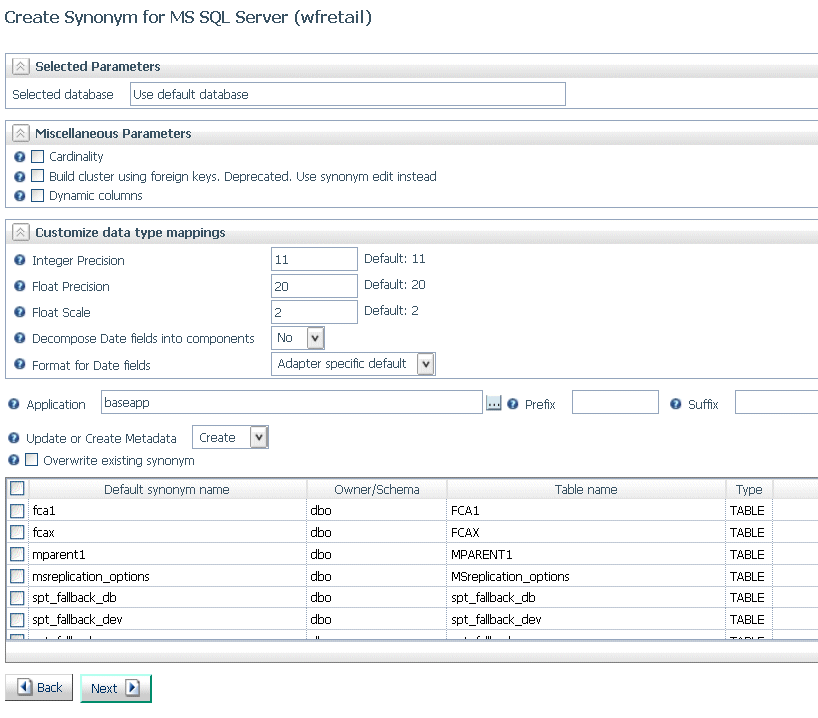
- Select one or more tables,
You can select or enter values for:
- Miscellaneous parameters such as cardinality (whether to reflect the number of rows in a table) and whether to use dynamic columns (retrieve metadata dynamically from the data source).
- Data type mappings.
- Whether to decompose date fields into their components (precision for integer and floating point fields, and scale for floating point fields).
- The date format to use.
- Whether to activate geographic role assignment.
- The target application.
- Whether to create or update the synonym.
- Whether to overwrite existing synonyms with the same name.
- The synonym name.
- Click Next.
The synonyms are created in the application directory, as indicated on the Create Synonym Status page.
For more information about synonym creation parameters, see the chapter for your adapter in the Adapter Administration manual.
- Click Next.
The wizard moves to the Edit Metadata step.
Procedure: How to Use the SQL Wizard to Edit Metadata
After completing the Import Metadata step, the wizard moves to the Edit Metadata step. This step creates a BV+ logical view in the synonym using the Business View pane. For information about BV+, see Business View Plus (BV+).
The Edit Metadata page opens, as shown in the following image.
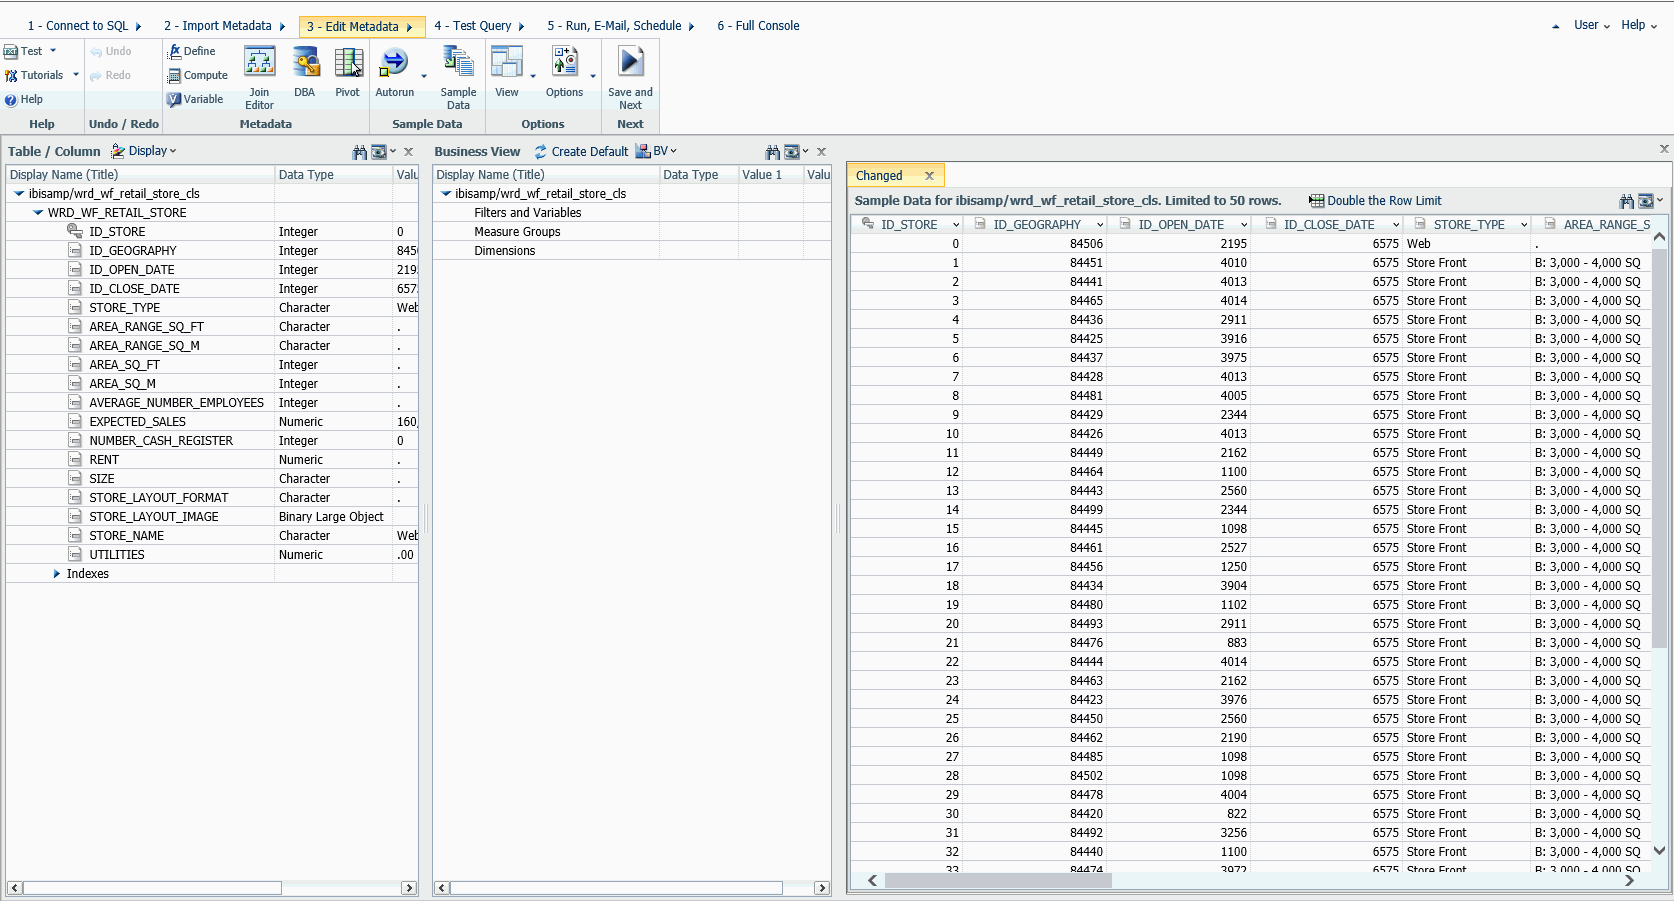
- Use options on the ribbon and right-click options
in the data panes to delete items, insert child tables, add joins,
add geographic roles, and see sample data.
All of the options are described in Wizard Metadata Screen Reference.
- When you are finished editing the metadata, click Save
and Next.
The Save As dialog box opens.
- Enter a name for the synonym in the File Name field
and click OK.
The Test Query pane opens.
Procedure: How to Use the SQL Wizard to Generate a Test Query
The Test Query page has three panes, as shown in the following image.
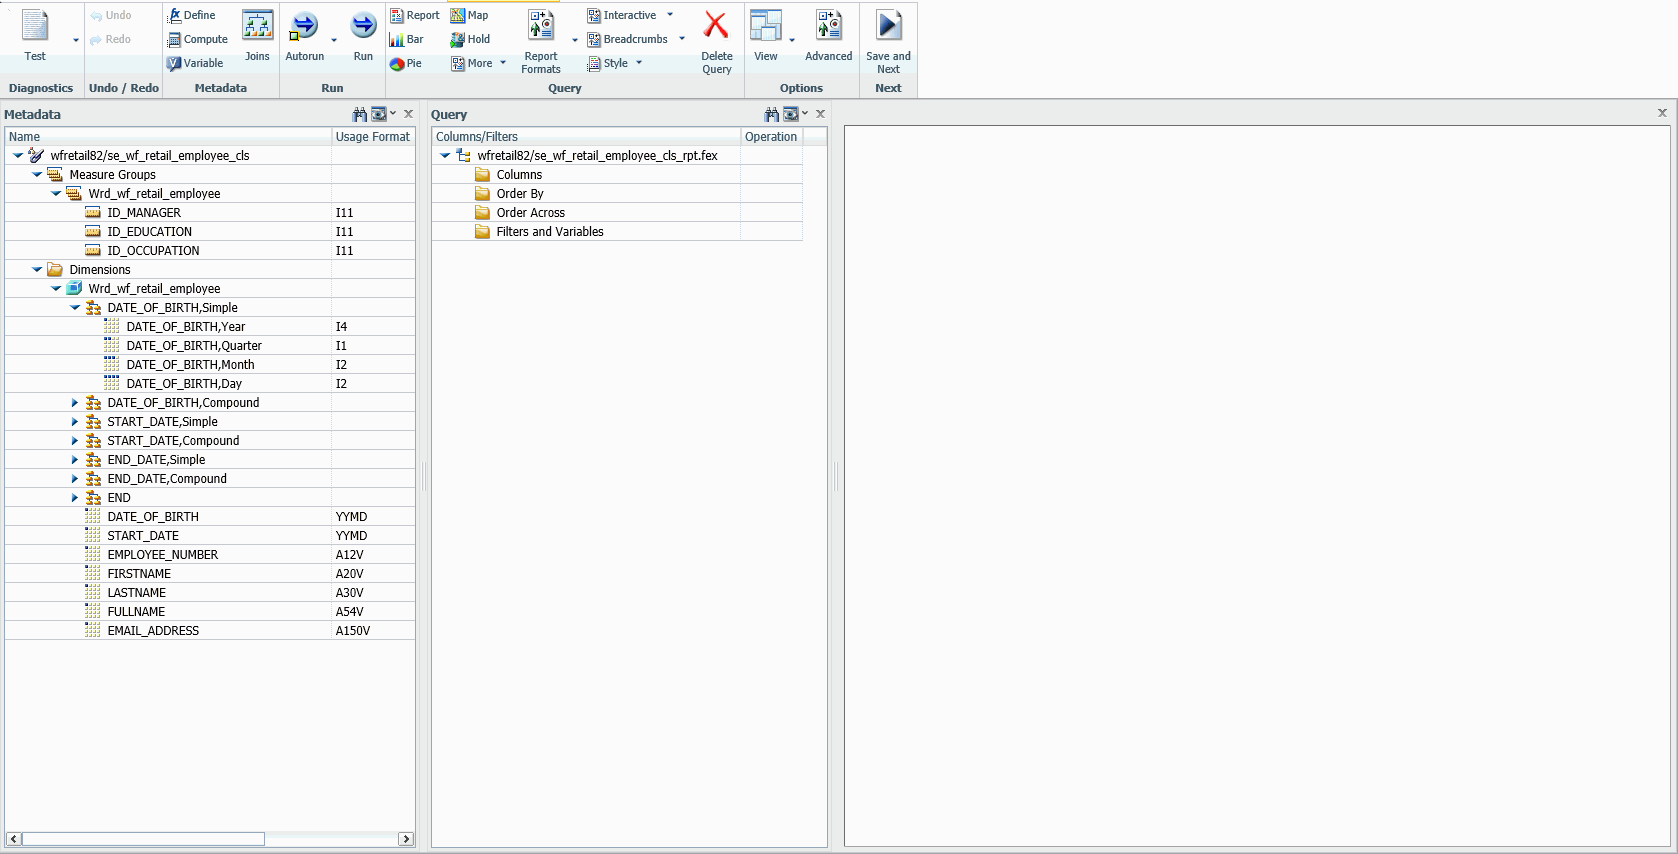
The left pane lists the metadata available for the query. The right pane has categories in which you can place the data for summation, sorting, and filtering.
The ribbon provides Undo and Redo actions.
- Drag fields from the Metadata list to the Query list in the appropriate categories for the query you are designing.
- You can select options for the query in the Query section of the ribbon.
You can generate the query output:
- As a report or a chart. The chart types available are bar chart, pie chart, map, line chart, scatter chart. You can use the Chart View button to change the orientation and style of the chart.
- As interactive (with drilldowns) and with breadcrumbs.
- As a HOLD file.
You can use the Load Options button to specify the target adapter and table, whether to load into a new table using various techniques or to append or merge to an existing table, bulk load (if available), and the application for the target synonym.
- You can add many other options to the query, as described in Upload Wizard.
- Click Save and Next, to save the
query, or choose one of the Run options from the Test button in
the Diagnostics section of the ribbon, to run the query immediately.
If you clicked Save and Next, the Save As dialog box opens. Assign a name for the query, and click OK.
The Run, E-Mail, Schedule page opens
If you selected Run, the query runs and the results display in the output pane.
Procedure: How to Use the SQL Wizard to Run, Email or Schedule a Report
- Click Run, E-Mail, Schedule from
the ribbon or the navigation pane.
The Run, E-Mail, Schedule pane opens, as shown in the following image.
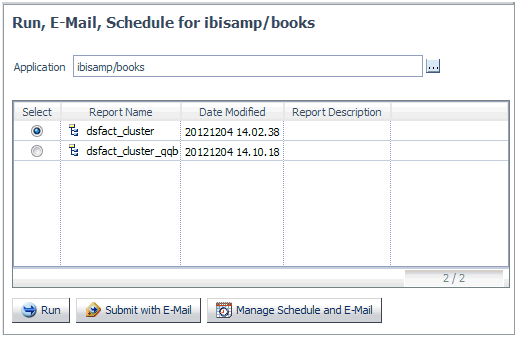
- Select the radio button for a report.
- Click Run to run the report.
- Click Submit with E-Mail to submit
the procedure and specify start or completion email.
The Submit procedure with E-Mail pane opens, as shown in the following image.
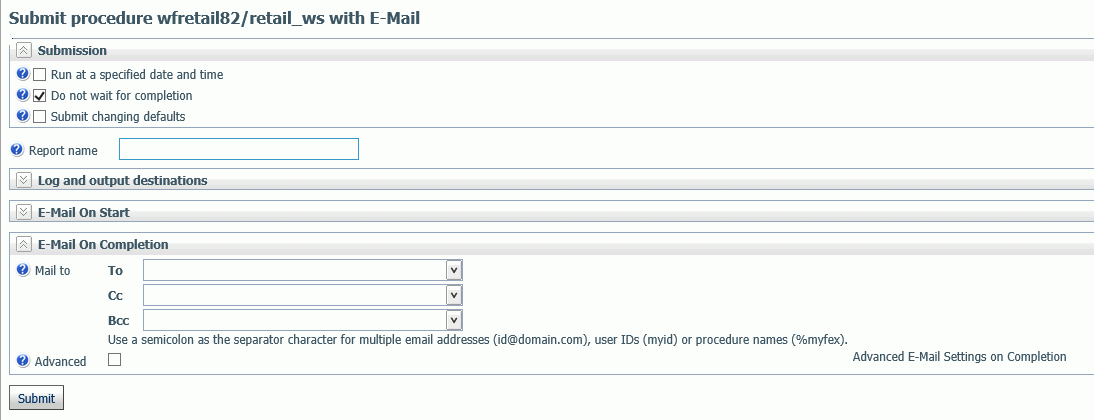
Fill in the appropriate email fields for the email options you want.
- To schedule the procedure, click Run
at a specific date and time, and enter a date and time.
The Manage Schedule and E-Mail for procedure pane opens, as shown in the following image.
- Click Submit.
For information on email and scheduling options, see Sending an E-mail Notification for a Procedure and Scheduling a Procedure.
| WebFOCUS | |
|
Feedback |