Launching the Chart Wizard
|
How to: |
To open the Chart Wizard:
- On the Home tab, in the Content group, click Chart. Use this option to create a chart using the Chart canvas.
- In the Environments Tree panel, right-click an application folder,
point to New, and click Chartpoint to InfoAssist, and click Chart or SQL Chart to create a chart using the chart canvas, or point to Designer and click Chart to create a chart using WebFOCUS Designer.
Note: If you choose to create a new chart using the shortcut menu in the Environments Tree panel, you will skip the first screen of the Chart Wizard. You will not have to specify whether you are creating a chartDesigner chart, InfoAssist chart, or SQL chart, since you already clicked one of these options. You will instead be brought to the Select Data Source window, with the location for your chart already selected.
The Chart Wizard opens, as shown in the following image.
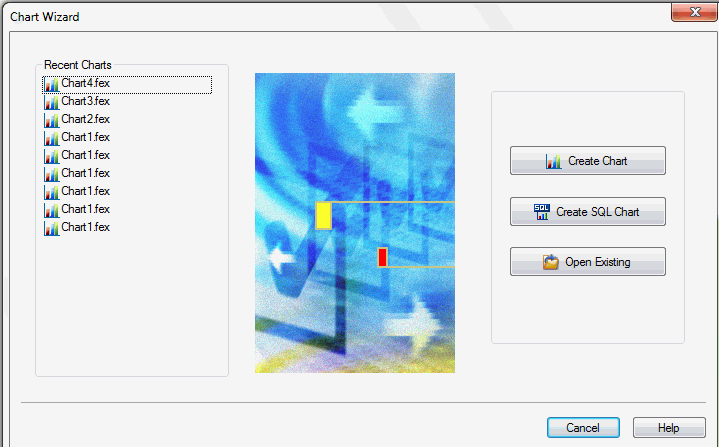
From the Chart Wizard, you can create a new InfoAssist chart or SQL chart procedure or open a recent procedure.
Procedure: How to Create a Chart Using WebFOCUS Designer
Designer charts can only be created from the Environments tree. Designer charts are built using the simple and intuitive Designer interface.
- Right-click the domain or folder where you want to create the Designer chart, point to New, point to Chart, and click Designer Chart.
The Select Data Source window opens.
- Choose an application folder in the application folder tree, and select a Master File to use as a data source. You can select the Use Qualified Path check box if you want to only display the data sources in the data sources in the application folder.
- Click OK.
WebFOCUS Designer opens in the web browser set as the default for App Studio.
- Double-click fields in the Data pane to add them to the chart, or drag each field into the appropriate bucket.
Features and functions to style and format the chart are available in the display options, the Format tab, the Chart Picker, and the WebFOCUS Designer toolbar.
- To save your chart, click the Save button on the WebFOCUS Designer toolbar or Application menu.
- To run the chart, click the Preview button
 on the WebFOCUS Designer toolbar.
Procedure: How to Create a Chart Using the Chart Canvas
After you launch the Chart Wizard, you can begin to create your chart procedure.
Note: If you choose to create a new chart using the shortcut menu in the Environments Tree panel, you will skip the first screen of the Chart Wizard. You will not have to specify whether you are creating a chartDesigner chart, InfoAssist chart, or SQL chart. You will instead be brought to the Select Data Source window, with the location for your chart already selected.
- Click Create Chart to create a chart using the Chart canvas.
The Chart Wizard - Choose location for the new chart window opens.
- Navigate to where you want to create the new chart and
click Next.
The Select Data Source window opens.
- Choose an application folder in the application folder tree, and select a Master File. You can select the Use Qualified Path check box if you want to only display the data sources in the application folder.
- Click Finish.
The Chart canvas opens.
- Double-click fields in the Data Panel to add them to
the chart.
You can use the features and functions on the ribbon that is located in the Chart canvas to format the chart.
- To save your chart, click the Save button on the App Studio Quick Access Toolbar, or select Save from the Application menu.
- To run your chart, click the Run button on the App Studio Quick Access Toolbar.
Procedure: How to Create an SQL Chart From an External .sql File
After you launch the Chart Wizard, you can begin to create your SQL chart procedure.
Note: If you choose to create a new SQL chart using the shortcut menu in the Environments Tree panel, you will skip the first screen of the Chart Wizard. You will not have to specify whether you are creating a chart or SQL chart. You will instead be brought to the SQL Chart Wizard - Welcome window, with the location for your chart already selected.
- Select Create SQL Chart.
The Chart Wizard - Choose location for the new chart window opens
- Navigate to where you want to create the new chart and
click Next.
The SQL Chart Wizard - Welcome window opens.
- Click the Included from an external ‘.sql’ file option. This enables you to browse and select external procedures that exist in any folder in the Data Servers or Domains areas.
- Click Next.
The SQL Chart Wizard - Data access information window opens.
- In the Select the SQL database engine area, select a database from the drop-down list. The drop-down list changes depending on your Reporting Server configuration.
- In the Select the connection area, choose a connection from the drop-down list generated from the engine you selected.
- Click Next.
The SQL Chart Wizard - Include external SQL file window opens.
- Click Browse to select an external
SQL file name or type the external SQL file name in the field.
Optionally, you can run with limited records by clicking Run SQL. By default, the Run with limited records check box is selected so you can test your procedure with a read limit if the engine supports it. There is a field box next to the check box in which you can enter the number of records to be read. 100 is the default limit.
- Click Next.
The SQL Chart Wizard - Summary of SQL options window opens.
- Review your options and click Finish.
The Chart Wizard - SQL Data Source window opens.
- Navigate to where you want to create the new procedure.
- In the Enter a Procedure Name field, type a name for
the SQL chart.
Note: Typing a procedure name is not required to create a new chart. If you do not type a procedure name in the Enter a Procedure Name field, a default procedure name will be provided until you save the procedure.
- Click Finish.
The Chart canvas and the Procedure View panel open. You can now add data to your chart and format the data using the tabs in the ribbon.
Procedure: How to Pass SQL Commands to the RDBMS Using SQL Passthru
After you launch the Chart Wizard, you can begin to create your SQL chart procedure.
Note: If you choose to create a new SQL chart using the shortcut menu in the Environments Tree panel, you will skip the first screen of the Chart Wizard. You will not have to specify whether you are creating a chart or SQL chart. You will instead be brought to the Chart Wizard - Choose location for the new SQL Chart window, with the location for your chart already selected.
- Click Create SQL Chart.
The Chart Wizard - Choose location for the new SQL Chart window opens.
- Navigate to where you want to create the SQL chart and
click Next.
The SQL Chart Wizard - Welcome window opens.
- Click Type SQL statements in the chart request. This enables you to type SQL commands that will be passed on to the RDBMS with the SQL Passthru feature.
- Click Next.
The SQL Chart Wizard - Data access information window opens.
- In the Select the SQL database engine area, select a database from the drop-down list. The drop-down list changes depending on your Reporting Server configuration.
- In the Select the connection area, choose a connection from the drop-down list generated from the engine you selected.
- Click Next.
The SQL Chart Wizard - Enter the SQL statements window opens.
- In the field box, type the SQL statements you want to
pass to the RDBMS.
Optionally, you can run with limited records by clicking Run SQL. By default, the Run with limited records check box is selected so you can test your procedure with a read limit if the engine supports it. There is a field box next to the check box in which you can enter the number of records to be read. The default limit is 100.
- Click Next.
The SQL Chart Wizard - Summary of SQL options window opens.
- Review your options and click Finish.
The Chart Wizard - SQL Data Source window opens.
- Navigate to where you want to create the new procedure.
- In the Enter a Procedure Name field, type a name for
the SQL chart.
Note: Typing a procedure name is not required to create a new chart. If you do not type a procedure name in the Enter a Procedure Name field, a default procedure name will be provided until you save the procedure.
- Click Finish.
The Chart canvas and the Procedure View panel open. You can now add data to your chart and format the data using the tabs in the ribbon.
Procedure: How to Import SQL Commands From an Existing .sql File
You can import commands from existing .sql files.
Note: If you choose to create a new SQL chart using the shortcut menu in the Environments Tree panel, you will skip the first screen of the Chart Wizard. You will not have to specify whether you are creating a chart or SQL chart. You will instead be brought to the Chart Wizard - Choose location for the new chart window, with the location for your chart already selected.
- Open the Chart Wizard and click Create
SQL Chart.
The Chart Wizard - Choose location for the new chart window opens.
- Navigate to where you want to create the new chart and
click Next.
The SQL Chart - Welcome window opens.
- Click Import from an existing ‘.sql’ file and
click Next. This enables you to modify SQL
code after importing it from an external file to the procedure being
built. You can modify the request using bits of the code.
The SQL Chart - Data access information window opens.
- In the Select the SQL database engine area, select a database from the drop-down list. The drop-down list changes depending on your Reporting Server configuration.
- In the Select the connection area, choose a connection from the drop-down list generated from the engine you selected.
- Click Next.
The SQL Chart Wizard - Import external SQL file window opens.
- Type the SQL file name that you want to import or click Browse to
select it.
Optionally, you can run with limited records by clicking Run SQL. By default, the Run with limited records check box is selected so you can test your procedure with a read limit if the engine supports it. There is a field box next to the check box in which you can enter the number of records to be read. The default limit is 100. You can edit these options here or in the next step.
- Click Next.
The SQL Chart Wizard - Enter SQL statements window opens.
- In the field box, type the SQL statements you want to pass to the RDBMS.
- Click Next.
The SQL Chart Wizard - Summary of SQL options window opens.
- Review your options and click Next.
The Chart Wizard - SQL Data Source window opens.
- Navigate to where you want to create the new procedure.
- In the Enter a Procedure Name field, type a name for
the SQL chart.
Note: Typing a procedure name is not required to create a new chart. If you do not type a procedure name in the Enter a Procedure Name field, a default procedure name will be provided until you save the procedure.
- Click Finish.
The Chart canvas and the Procedure View panel open. You can now add data to your chart and format the data using the tabs in the ribbon.
| WebFOCUS | |
|
Feedback |