Migrating WebFOCUS Content
|
Topics: |
This section describes WebFOCUS migration considerations and provides the procedures for migrating WebFOCUS Content.
For information on migrating Reporting Server configuration settings, see the Server Administration manual.
Note: The following special considerations apply to WebFOCUS migration:
- User IDs longer than 64 characters may cause errors during migration.
- The WebFOCUS export utility requires Java version 1.7 or higher.
- If an export fails
with a java.net.ConnectException error, remove the following line from
the drive:\ibi\WebFOCUS7x\webapps\webfocus\WEB-INF\web.xml
file and run the export utility again:
<!DOCTYPE web-app PUBLIC "-//Sun Microsystems, Inc.//DTD Web Application 2.3/EN" "http://java.sun.com/dtd/web-app_2_3.dtd">
- If your WebFOCUS installation uses MySQL Client or MySQL Server, the value for the max_allowed_packet parameter must be at least 32M. For more information, see https://dev.mysql.com/doc/refman/5.7/en/packet-too-large.html.
- If your WebFOCUS installation uses a SQL Server, the database must be case sensitive. The default for creation is case insensitive, but this should be changed before creation.
- In , you must use the Type button on the Series tab instead of the Format tab to change the chart type of a migrated chart procedure that contains bar, line, or area charts. This only affects migrated charts, not charts created after migration.
Migrating Managed Reporting Content
|
Topics: |
|
How to: |
The following types of authentication and authorization models can be migrated from WebFOCUS 7.x releases to WebFOCUS 8.2 Version . Managed Reporting authorization rules from these authorization scenarios are migrated, but the security settings are not.
- Internal authentication with internal authorization.
- Trusted authentication with internal or external authorization.
- Realm driver DBMS/AD/LDAP authentication with internal authorization.
- Realm driver DBMS/AD/LDAP authentication with DBMS/AD/LDAP authorization.
- Realm driver with stored procedures.
In WebFOCUS 8.2 Version , the migration:
- Creates content, users, groups, roles, and rules.
- Handles ReportCaster as a separate migration procedure.
- Migrates WebFOCUS 7.x passwords to WebFOCUS 8.2 Version (SHA-1 salted hash of user passwords).
- Sets User Default Roles.
You can perform migrations of all content or of content selected by a file that lists the Domain HREFs or group HREFs to be migrated. You can also choose whether or not to include deferred tickets or deferred output in the migration.
Note:
- The
following characters are not allowed in usernames in WebFOCUS 8.2 Version :
" | ; / * , ?
During the migration process, these characters will be converted to an underscore (_).
- If you previously had WebFOCUS Administration Console integration, it will be lost. Any user that previously had an Administrator Role is placed into the Administrators group and has access to the Administration Console.
- If provisioning users
externally, using AD/LDAP:
- All of the authorization information is now stored internally.
- You can configure the environment to use external authorization through AD/LDAP using WebFOCUS to AD/LDAP Group mapping.
Pre-Migration Steps for Migrating Managed Reporting Content by Group or Domain
You can migrate all Managed Reporting content, but you can also choose to migrate only the content for specified groups or Domains. Exported content always includes all users associated with the group or Domain. For groups, the content also includes all Domains associated with a group, and for Domains, the content also includes all groups associated with a Domain. In both full and partial migration, all the roles in the system are always exported.
Note: In a partial migration, you can specify content by group or by Domain, but not by a combination of both groups and Domains.
To migrate a subset of groups or Domains, you must create a plaintext file specifying the groups or Domains and place it in the mr directory before you begin the migration process. The file must list the HREF of each group or Domain on a single line. For groups, the HREFs must begin with a pound sign (#). Group and Domain HREFs are case-sensitive.
For example, you would specify the export of multiple groups with the following entries in a plain text file:
#domain1group
#domain2group
You would specify the export of multiple Domains with the following entries in a plain text file:
domain1/domain1.htm
domain2/domain2.htm
To determine a Domain HREF, right-click the Domain folder and select Properties.
The procedure for determining group HREFs varies depending on whether WebFOCUS uses internal or external authorization. If WebFOCUS uses internal authorization, the group HREF information is stored in the user.htm file in the basedir directory. If WebFOCUS uses external authorization, the group HREF information can be obtained from the WF_MRGROUPS table.
In the user.htm file, each group has an entry that includes the HREF, the group name, and the group display name, as shown in the following code example.
<A HREF='#groupname' NAME='GroupName'>Display Name</a>
The group HREF is based on the group name, but all special characters are removed and the HREF is made lower case.
If WebFOCUS uses external authorization, to determine the group HREF, you must first know the group name. You can find the group name by using the MRAdmin tool to view the group properties. Then, use the group name to find the group ID in the WF_MRGROUPS table. The group HREF is the group ID prefaced by a pound sign (#). For example, if the group ID is domain1group, the group HREF is #domain1group.
Once you have created the file listing the Domains or groups that you wish to export, you can begin the migration process.
Procedure: How to Export Managed Reporting Content From WebFOCUS 7.x Releases
The Managed Reporting migration utility exports the current WebFOCUS 7.x basedir, including Domains, procedures, content, users, groups, and role information, to a WebFOCUS7x\utilities\mr\export directory. Any authorization information stored externally using the Realm driver (SQL Repository or AD/LDAP) is also retrieved and extracted.
Note:
- The Managed Reporting authorization rules implemented in Technical Memo 4624, Configuring the Managed Reporting Repository Filter are not migrated.
- If you are using the Realm driver with an SQL repository, you must add your JDBC driver or drivers to the script file.
- If you are
planning a full migration, proceed to step 2. If you are planning
a partial migration, create a file that lists the Domains or groups
that you would like to export.
For more information on creating this file, see Pre-Migration Steps for Migrating Managed Reporting Content by Group or Domain.
- Copy the drive:\ibi\WebFOCUS82\utilities\mr directory into the drive:\ibi\WebFOCUS7x\utilities directory.
- From the
pasted directory, run mr7xto8xexport.bat in a Windows environment
or mr7xto8xexport.sh on UNIX or Linux environments.
You are prompted for the WebFOCUS version from which you are migrating.
- Select the appropriate version.
- You are
prompted to choose whether to migrate Managed Reporting deferred
tickets. Enter one of the following values:
- 1. Yes (the default).
- 2. No.
- q. Quit.
- You are
prompted to choose whether to migrate Managed Reporting deferred
output. Enter one of the following values:
- 1. Yes (the default).
- 2. No.
- q. Quit.
- You are
prompted to choose whether to migrate all content or content for
specific Domains or groups.
- 1. ALL (the default).
- 2. Domain List.
- 3. Group List.
- q. Quit.
If you selected 1, proceed to step 9. If you selected 2 or 3, proceed to step 8. - If you are
performing a partial migration, you are prompted to choose whether
to export MR Administrators. Select one of the following options:
- 1. Yes (the default).
- 2. No.
- q. Quit.
- If you are
migrating all content, the export process begins at once. If you are
migrating content by Domain or group, you will be prompted to enter
the name of the file that contains the list of Domains or groups.
This is the file that you created in step 1.
WebFOCUS notifies you when the export process is complete. By default, the exported files are saved in the WebFOCUS7x\utilities\mr\export directory. The export log, which is named mr_migrate_export.log, is saved in the same directory. The directory also contains a file named reposTree.xml, which lists all the users and Domains that have been exported. The reposTree.xml file is used during ReportCaster migration. For more information, see Migrating ReportCaster Content.
- Copy the WebFOCUS7x\utilities\mr\export directory into the WebFOCUS82\migration_import directory.
Now you can import the exported Managed Reporting content into WebFOCUS 8.2 Version .
Procedure: How to Import Managed Reporting Content Into WebFOCUS 8.2 Version
You must have already created and initialized the database repository with the default values contained within the initial load, using WFReposUtil and the original XML.
When you perform a partial migration, you have multiple choices for how the target environment will handle the newly migrated resources:
-
Skip. Do not import these resources at all.
-
Add new resources (do not update). Import new resources, but do not modify resources that already exist in the target environment. This is the default behavior.
-
Add new resources and update existing resources. All new resources will be added to the target environment. If a resource exists in both the import package and the target environment, the resource in the target will be overwritten with the version in the import package.
You can select individual import behavior for content resources, roles, groups, and users. For example, you can choose to skip content resources, add new roles, and add and update users. Add new resources (do not update), which is the default behavior, is also the most common selection.
- Import the
Managed Reporting content by running the drive:\ibi\WebFOCUS82\utilities\mr\mr_migrate_import.bat
script in a Windows environment or the drive:/ibi/WebFOCUS82/utilities/mr/mr_migrate_import.sh
script in a UNIX or Linux environment.
Note: User IDs longer than 64 characters may cause errors in the import process.
- When prompted, enter a Managed Reporting administrator ID and password.
- Enter the import package name.
- Select one
of the following options to set the logging level:
- 1 for info. This is the recommended setting.
- 2 for debug.
- q to quit the import process.
- Select one
of the following options to determine whether you are performing a
full or partial migration:
- 1 for a full migration (the default).
- 2 for a partial migration.
- q to quit the import process.
If you selected full migration, the import process begins immediately. If you selected partial migration, proceed to the next step.
- Select one
of the following options to determine how WebFOCUS merges imported
and existing content resources:
- 1 to add new resources only, without replacing existing resources (the default).
- 2 to add new resources and update existing resources.
- q to quit the import process.
- Select one
of the following options to determine how WebFOCUS imports roles:
- 1 to skip roles.
- 2 to add new roles (the default).
- 3 to add new roles and replace existing roles.
- q to quit the import process.
- Select one
of the following options to determine how WebFOCUS imports groups:
- 1 to skip groups.
- 2 to add new groups (the default).
- 3 to add new groups and update existing groups.
- q to quit the import process.
- Select one
of the following options to determine how WebFOCUS imports users:
- 1 to skip users.
- 2 to add new users (the default).
- 3 to add new users and update existing users.
- q to quit the import process.
- Select one
of the following options to determine whether to import rules on
resources:
- 1 to skip rules.
- 2 to import rules (the default).
- q to quit the import process.
WebFOCUS notifies you when the import is complete. Files are saved in the drive:\WebFOCUS82\migration_import\export directory, along with the import log file, which is named import_migration.log.
Migrating Favorites and Mobile Favorites
If you need to migrate Favorites and Mobile Favorites from WebFOCUS 7.7 to WebFOCUS Release 8.2, you must install Version 04 or a later version. For more information on migrating Favorites and Mobile Favorites, see the Migration technical content for WebFOCUS Release 8.2 Version 04 or for a later version.
Migrating ReportCaster Content
|
Topics: |
|
How to: |
To migrate ReportCaster content from a WebFOCUS 7.x Repository to WebFOCUS 8.2 Version , you need to export the content from the WebFOCUS 7.x Repository and then import it into WebFOCUS 8.2 Version .
If you are migrating both Managed Reporting and ReportCaster content, you must export the Managed Reporting content before you export the ReportCaster content. When you are importing, you must also import the Managed Reporting content before you import the ReportCaster content.
The Managed Reporting export creates the reposTree.xml file, which lists the users and Domains exported by Managed Reporting. The ReportCaster export includes content for these users and for ReportCaster Administrators. You can also choose to export non-Domain-based content for these users and Administrators.
Optionally, you can filter the Library content by updating the rcLibraryExport2XML.properties file in the rc directory. This filter applies whether or not you are migrating Managed Reporting content. It is recommended that you use the filter in self-service installations where Managed Reporting is not installed.
Filtering Library Migration Exports by Date
|
Topics: |
The rcLibraryExport2XML.properties file, located in the drive:\ibi\WebFOCUS82\utilities\rc folder in Windows or in the install_directory/ibi/WebFOCUS82/utilities/rc folder in UNIX or Linux, contains an optional setting called libraryDateRange. When you assign a range of dates to this setting, the rcExport2XML program exports only those Library Reports that contain a Last Execution Date that falls within that date range.
The ability to limit the export of Library Report content in this way allows you to conduct a series of smaller-scale partial migrations that simplifies and speeds the migration process instead of requiring you to conduct a single lengthy and error-prone, large-scale migration.
Note: When a Library item is selected for migration, all report versions in that Library item are exported. These report versions may include those that with a Last Execution Date outside of the chosen date range.
Understanding the libraryDateRange Value Format
All values use the format:
startDate,endDate
where:
- startDate
-
Is the earliest date in the range. Library reports containing a last execution date that falls on the start date or any date thereafter, up to the end date if defined, or the current date, if no end date is defined, are included in the export.
- endDate
-
Is the most recent date in the range. Library reports containing a last execution date that falls on the end date or any previous date, back to the start date, if defined, or the earliest library report date, if no start date is defined, are included in the export.
The comma between the start date and the end date acts as a date separator.
Dates for the libraryDateRange setting must use the YYYYMMDD format.
No more than two dates can be used for the libraryDateRange setting.
When running the rcExport2XML program, you must clear the placeholder from this value, and replace it with one of the following configurations.
When the libraryDateRange setting contains no date value, the rcExport2XML program includes all Library Report items in the export, as shown in the following example.
libraryDateRange=
When the libraryDateRange setting contains a single date value placed before a comma, the rcExport2XML program includes all Library Report items with a last execution date on or after the date value, as shown in the following example.
libraryDateRange=20160701,
When the libraryDateRange setting contains a single date value placed after a comma, the rcExport2XML program includes all Library Report items with a last execution date on or before the date value, as shown in the following example.
libraryDateRange=,20160701
When the libraryDateRange setting contains two dates separated by a comma, the rcExport2XML program includes all Library Report items with a last execution date on or between the start date and the end date as shown in the following example.
libraryDateRange=20160701,20160731
Procedure: How to Export ReportCaster Content From WebFOCUS 7.7.x and 7.6.x Releases
Prior to migrating your 7.7 ReportCaster content, you can utilize the library purge and schedule purge utilities to reduce the amount of content that you migrate.
To get access to these utilities, contact customer support.
- If you are
migrating from WebFOCUS 7.7.x or 7.6.x releases, copy the drive:\ibi\WebFOCUS82\utilities\rc
directory into the drive:\ibi\WebFOCUS7x\ReportCaster directory.Note:
- If you are performing both Managed Reporting and ReportCaster migrations, and WebFOCUS and the Distribution Server are installed on separate machines, you must copy the reposTree.xml file from the drive:\ibi\WebFOCUS7x\utilities\mr\export directory to the Distribution Server rc directory.
- Migrating a large amount of Library content may affect the speed of migration.
- Run rcExport2XML.bat on Windows or rcExport2XML.sh on UNIX or Linux.
- Enter a
ReportCaster Administrator ID and password.
Note: This is the Administrator ID and password that you configure in the ReportCaster Console.
- When asked whether you
have already migrated Managed Reporting content, select one of the
following options:
- 1 for yes (the default). In this case, the ReportCaster import will require the reposTree.xml file from the Managed Reporting migration extract.
- 2 for no. Select this if there are no users in Managed Reporting.
- q to quit the export process.
If you selected 2, proceed to step 6. Otherwise, proceed to step 5.
- Select one
of the following options to determine whether to include non-Domain-based
Schedules and Library reports for exported users:
- 1 for yes (the default).
- 2 for no.
- q to quit the export process.
- Select one
of the following options to determine how much ReportCaster content
and Library content to include in the export package:
- 1 to export all ReportCaster content, including Library content. Schedules, Distribution Lists, Access Lists, and Library content will be exported. This is the default setting.
- 2 to export ReportCaster content without Library reports. Schedules, Distribution Lists, and Access Lists will be exported.
- 3 to export only Library reports.
- q to quit the export process.
Note: Library content will be additionally filtered by the rcLibraryExport2XML.properties file.
The migration script exports content owned by ReportCaster Administrators and the users specified by reposTree.xml. The following content is exported:
- Domain-based Schedules of report procedures associated with the Domains specified by reposTree.xml.
- Domain-based Library Reports from procedures associated with the Domains specified by reposTree.xml.
- Distribution Lists.
- Library Access Lists.
- Execution IDs.
- Global Blackout Dates and Group Blackout Dates for the groups belonging to the users who are listed in reposTree.xml.
Schedules and Library Reports associated with Domains that are not listed in reposTree.xml are not exported.
If you choose to include non-Domain-based content, ReportCaster will also export non-Domain-based Schedules and Library Reports owned by ReportCaster Administrators and users specified by reposTree.xml.
WebFOCUS notifies you when the export process is complete. By default, the exported data saved in the drive:\ibi\WebFOCUS7x\ReportCaster\rc\rc_export directory, along with a log file named export_migration.log.
The export typically contains the following files and folders in addition to the log file:
- accessList
- addrBook
- blackoutDate
- execId
- library
- schedule
Now you can import the exported ReportCaster content into WebFOCUS 8.2 Version .
Procedure: How to Export ReportCaster Content From WebFOCUS 7.1.x
- If you are
migrating from WebFOCUS 7.1.x releases, copy the drive:\ibi\WebFOCUS82\utilities\rc
directory into the drive:\ibi\WebFOCUS7x\ReportCaster directory.Note:
- Migrating a large amount of Library content may affect the speed of migration.
- Only full migration from release 7.1 is supported. Partial migration is not supported.
- Run rc71Export2XML.bat on Windows or rc71Export2XML.sh on UNIX or Linux.
- Enter a
ReportCaster Administrator ID and password.
Note: This is the Administrator ID and password that you configure in the ReportCaster Console.
- Select one
of the following options to determine how much ReportCaster content
and Library content to include in the export package:
- 1 to export all ReportCaster content, including Library content. Schedules, Distribution Lists, Access Lists, and Library content will be exported. This is the default setting.
- 2 to export ReportCaster content without Library reports. Schedules, Distribution Lists, and Access Lists will be exported.
- q to quit the export process.
Note: Library content will be additionally filtered by the rc71LibraryExport2XML.properties file.
The following content is exported:
- Schedules.
- Library Reports.
- Distribution Lists.
- Library Access Lists.
- Execution IDs.
WebFOCUS notifies you when the export process is complete. By default, the exported data saved in the drive:\ibi\WebFOCUS7x\ReportCaster\rc\rc_export directory, along with a log file named export_migration.log.
The export typically contains the following files and folders in addition to the log file:
- accessList
- addrBook
- execId
- library
- schedule
Now you can import the exported ReportCaster content into WebFOCUS 8.2 Version .
Procedure: How to Import ReportCaster Content Into WebFOCUS 8.2 Version
Note: If you are migrating both Managed Reporting and ReportCaster content, you must perform the Managed Reporting migration before you import ReportCaster content from an earlier release.
When you perform a partial migration, you have multiple choices for how the target environment will handle the newly migrated resources:
- Skip. Do not import these resources at all.
- Add new resources (do not update). Import new resources, but do not modify resources that already exist in the target environment. This is the default behavior.
- Add new resources and update existing resources. All new resources will be added to the target environment. If a resource exists in both the import package and the target environment, the resource in the target will be overwritten with the version in the import package.
You can select individual import behavior for Schedules and other non-Library content and for Library Reports. For example, you can choose to skip Schedules and other non-Library content and add new Library Reports. Add new resources (do not update), which is the default behavior, is also the most common selection.
- Copy the drive:\ibi\WebFOCUS7x\ReportCaster\rc\rc_export directory into the drive:\ibi\WebFOCUS82\migration_import directory.
- Run the drive:\ibi\WebFOCUS82\utilities\rc\rc_migrate_import.bat script in a Windows environment or the drive:/ibi/WebFOCUS82/utilities/rc/rc_migrate_import.sh script in a UNIX or Linux environment.
- If prompted, enter a WebFOCUS administrator ID and password.
- Select whether
to perform a full or partial migration:
- 1 for a full migration (the default).
- 2 for a partial migration.
- q to quit the import process.
- If you are
performing a full migration, proceed to step 7. If you are performing
a partial migration, select one of the following options, depending
on whether the WebFOCUS groups and users for the ReportCaster content
have already been created:
- 1 if WebFOCUS groups and users have already been created. This is the default setting.
- 2 if you want groups and users to be created during the ReportCaster import process.
- q to quit the import process.
- If you are
performing a partial migration, you will be prompted to select one
of the following options:
- 1. Skip Schedules, Distribution Lists, Access Lists, Blackout Dates, and Execution IDs.
- 2. Add new resources (but do not update existing resources). This is the default setting.
- 3. Add new resources and update existing resources.
- q. Quit the import process.
- Select one
of the following options to determine whether you will import Library
reports:
- 1. Skip Library reports.
- 2. Add new Library reports (but do not update existing reports). This is the default setting.
- 3. Add new Library reports and update existing reports.
- q. Quit the import process.
- Select one
of the following options to set the logging level:
- 1 for info. This is the recommended setting.
- 2 for debug.
- q to quit.
WebFOCUS notifies you when the import is complete. The log file created from the import is saved in the drive:/ibi/WebFOCUS82/migration_import/rc_export directory.
Procedure: How to Import ReportCaster Content for a Full Migration
- Select one of the following options,
depending on whether the WebFOCUS groups and users for the ReportCaster
content have already been created:
- 1 if WebFOCUS groups and users have already been created. This is the default setting.
- 2 if you want groups and users to be created during the ReportCaster import process.
- q to quit the import process.
- Select one of the following options, depending on whether
you are importing Library reports:
- 1 to import Library reports. This is the default setting.
- 2 to not import Library reports.
- q to quit the import process.
WebFOCUS notifies you when the import is complete. The log file created from the import is saved in the drive:/ibi/WebFOCUS82/migration_import/rc_export directory.
Procedure: How to Import ReportCaster Content for a Partial Migration
- Select one of the following import options:
- 1 to skip Schedules, Distribution Lists, Access Lists, Blackout Dates, and Execution IDs.
- 2 to add new resources (but not update existing resources). This is the default setting.
- 3 to add new resources and update existing resources.
- q to quit the import process.
- Select one of the following options to determine whether
you will import Library reports:
- 1 to skip Library reports.
- 2 to add new Library reports (but not update existing reports). This is the default setting.
- 3 to add new Library reports and update existing reports.
- q to quit the import process.
WebFOCUS notifies you when the import is complete. The log file created from the import is saved in the drive:/ibi/WebFOCUS82/migration_import/rc_export directory.
Migration in Place
|
How to: |
There is an alternate migration utility that enables a migration in place, that is, a conversion of a WebFOCUS 7.x release repository into a WebFOCUS 8 repository without requiring the export and import of the Report Library. This utility is located in the WebFOCUS82\utilities\WFReposUtil folder and is named upgrade7xDBto8x.bat for Windows and upgrade7xDBto8x.sh for UNIX and Linux. It is available for Oracle, Derby, Microsoft SQL Server 2008 and 2012, and IBM DB2 repositories.
The BOTLDATA table, which contains the report output stored in the Report Library, is the table with the largest amount of data. The new utility allows for migration of existing WebFOCUS 7.x ReportCaster BOT tables to WebFOCUS 8.2 Version without dropping the WebFOCUS 7.x BOTLDATA table.
Note: Since migration in place converts a 7.x repository to an 8.2. repository, your 8.2. installation must be configured to use the 7.x repository at the time the migration in place is performed. If you configured a different repository during the 8.2. installation, you must change the 8.2. repository connection information before performing an in place migration.
Procedure: How to Migrate in Place
- Ensure that there is a database backup of the existing WebFOCUS 7.x ReportCaster repository tables. This is a best practice when running the migration process several times during testing. Ensure that the WebFOCUS 8.2 Version installation is configured to use the 7.x repository.
- If Managed Reporting content is being migrated, follow the WebFOCUS 8.2 Version export steps in Migrating Managed Reporting Content.
- Copy the exported Managed Reporting content (utilities/mr/export) to the WebFOCUS 8.2 Version migration_import directory.
- Follow the WebFOCUS 8.2 Version export steps for ReportCaster in Migrating ReportCaster Data and Settings.
- When prompted for the export library option, enter 2 (false). This option will export the Library report references, but will not export the actual report output.
- Copy the exported ReportCaster content (utilities/rc/rc_export) to the WebFOCUS 8.2 Version migration_import directory.
- Review and
modify the upgrade7xDBto8x script:
- If you are migrating Managed Reporting content, change the value of MR_ENABLED to yes.
- After you complete the above steps and are ready to run the migration script, change the value of run_type to actual.
- Press Enter
to run the upgrade7xDBto8x script.
- When prompted
for repository credentials, enter an ID and password. These credentials
are validated against the repository credentials specified in the WebFOCUS
8.2 Version webconfig.xml file.
- When prompted for valid WebFOCUS credentials, enter a WebFOCUS 8.2 Version administrator ID and password (for example, admin/admin).
- At the following
prompt, enter:
- 1. (yes) if the WebFOCUS groups and users have been created by running the MR import utility or have been manually created (the default).
- 2. (no) if
you want the ReportCaster import processing to create WebFOCUS groups
and users.
Note: This option should be specified if Managed Reporting content is not being migrated.
- q. to quit.
- Even though
the actual reports are not technically being migrated, the Library
report references and links to the reports need to be migrated.
When prompted to import Library reports, select:
- 1. yes (the default).
- 2. no.
- q. to quit.
As the script is running, you will see the output indicating the status of the migration process. This also provides some insight into the specific tasks that are included in this process.
The following standard migration logs should be used for review of any import errors:
- Repository Creation
and Load
drive:\ibi\WebFOCUS82\utilities\WFReposUtil\WFReposUtilCmdLine.log
- Managed Reporting
drive:\ibi\WebFOCUS82\migration_import\export\mr_migrate_import.log
- ReportCaster
drive:\ibi\WebFOCUS82\migration_import\rc_export\rc_migrate_import.log
As is the case for all migrated ReportCaster content in WebFOCUS 8.2 Version , the schedules that run Reporting Server procedures are migrated to the ReportCaster folder. The Report Library content is migrated to the Library Content folder.
Migrated ReportCaster Content
|
How to: |
After migration, ReportCaster content is placed in designated folders in WebFOCUS 8.2 Version . The migration import creates:
-
Two folders named ReportCaster and Library Content.
-
A My Content folder for each user who has migrated ReportCaster content. Schedules, Distribution Lists, and Access Lists that belong to a user are placed in the My Content folder for that user.
-
Folders for Categories under the Library Content folder. Under each Category folder, the import creates a Library item with the name of the migrated report and adds the report versions to that Library item. If the report is burst, a folder is created with the name of the report and a Library report item is created in that folder for each burst value. The report versions for each burst value are placed in the Library item for that burst value.
-
A Library Content folder under each domain folder that has Library report output. If that Library output was stored under a Category, the import also creates a Category folder under the Library Content. The Library item with the name of the migrated report is created under the Library Content or Category folder and the report versions are added to that Library item. If the report is burst, a folder is created with the name of the report and a Library report item is created in that folder for each burst value. The report versions for each burst value are placed in the Library item for that burst value.
-
When a schedule with distribution to a Prepared Report directory is migrated, the FTP Host and Location are set to the values of the Prepared Report directory in the previous installation. This schedule will continue to run, provided that the distribution server in WebFOCUS 8.2 Version has FTP access to this location.
-
If you migrate WebFOCUS 7.x ReportCaster schedules to WebFOCUS 8.2 Version , and the Reporting Server node referenced in a particular schedule has not been defined in WebFOCUS 8.2 Version , the migration process will automatically create a Reporting Server node with that name in the ReportCaster configuration file of the WebFOCUS 8.2 Version installation.
-
Migrated Managed Reporting schedules will display the Name information as the WebFOCUS 7.x path (HREF) value. New schedules created in WebFOCUS 8.2 Version will display the IBFS path value.
-
If a Library report from a domain that has been deleted from Managed Reporting is migrated, the report will be placed in a folder in the repository. The folder is named after the original Domain HREF and appended with the words (Domain not Found).
-
When migrating from WebFOCUS 7.x release to WebFOCUS 8.2 Version , in order to view migrated applet-based graphs in the Report Library, the WebFOCUS 7.x ibi_html alias must exist in WebFOCUS 8.2 Version .
For example, if you have a WebFOCUS 7.x installation with an alias of ibi_html_7x, you will have a report with a src=ibi_html_7x/javaassist reference. If you install WebFOCUS 8.2 Version with an alias of ibi_html_82 and migrate the library from a WebFOCUS 7.x release, you will not be able to view migrated reports that contain applet graphs. To prevent this, add the ibi_html_7x alias to the application server and point that alias to the WebFOCUS 8.2 Version installation. You can have ibi_html_82 for the WebFOCUS 8.2 Version installation, but you must also have ibi_html_77 for migrated reports that contain applet graphs to work.
Procedure: How to Delete Reports From the Report Library
- Run the drive:\ibi\WebFOCUS82\ReportCaster\bin\purgelib.bat script in a Windows environment or the drive:/ibi/WebFOCUS82/ReportCaster/bin/purgelib.sh script in a UNIX or Linux environment.
- When prompted, type a WebFOCUS administrator ID and password.
- Type a cutoff date, in the format YYYYMMDD. Any Library report created before the specified cutoff date will be deleted from the Library.
- Type Y to confirm the deletion.
Post-Migration Steps
|
How to: |
If you are migrating from a WebFOCUS 7.x release to WebFOCUS 8.2 Version , you must take additional steps to enable the display of the User Default Role tab in the Security Center and to configure the public user. If the WebFOCUS 7.x public user is named public, the user is migrated to WebFOCUS 8.2 Version and assigned the WF_Role_Public UDR. However, if the user has been given another name, the account will be migrated but not automatically assigned the WF_Role_Public UDR. You must manually update this account if you wish to continue using it as the public user.
Regardless of the account name, the WebFOCUS Reporting Server credentials for the public user are not migrated from WebFOCUS 8.2 Version . The Reporting Server credentials must always be entered manually.
Procedure: How to Display the User Default Role Tab in the Security Center
- Sign in
to WebFOCUS 8.2 Version as an administrator and select Administration
Console from the Administration menu.
The Administration Console opens
- On the Configuration tab, under the Application Settings folder, click Other.
- Set IBI_Enable_UDR to True, save your changes, and close the Administration Console.
- In the BI
Portal, select Security Center from the Administration
menu.
The Security Center opens.
- Click the New
User button or select an existing user and click Edit
User.
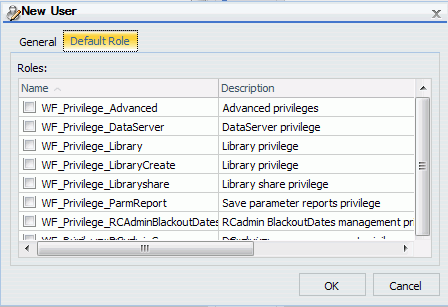
The New User or Edit User dialog box opens, with the Default Role tab enabled, as shown in the following image.
Procedure: How to Configure the Public User In WebFOCUS 8.2 Version Enterprise Edition
The WebFOCUS Reporting Server credentials for the public user are not migrated from WebFOCUS 8.2 Version and must be entered manually. Additionally, if the public user is not named public, the account will be migrated but not automatically assigned the WF_Role_Public UDR. You must manually update this account if you wish to continue using it as the public user.
Note: The public user or Anonymous Access, is only available with a license that supports it.
- Sign in
to WebFOCUS 8.2 Version as an administrator and select Administration
Console from the Administration menu.
The Administration Console opens.
- On the Security tab, expand the Security Configuration folder, and click Advanced.
- If the public user is named public, proceed to step 4. If the public user account has another name, type the name in the Anonymous User ID (IBI_ANONYMOUS_USER) field.
- Type the Reporting Server user ID and password in the Reporting Server Anonymous User ID (IBI_ANONYMOUS_WFRS_USER) and Reporting Server Anonymous Password (IBI_ANONYMOUS_WFRS_PASS) fields respectively.
- Save your changes and restart the application server.
- If the public
user is named public, you have finished configuring the public
user. If the public user account has another name, sign in to WebFOCUS again
and select Security Center from the Administration
menu.
The Security Center opens.
- Select the public user, right-click, and select Edit.
- Click the Default Role tab.
- Select the WF_Role_Public role. If any other roles are assigned to the public user, remove them, then click OK to return to the Security Center.
- Add the public user to the Anonymous group and click Close to exit the Security Center.
| WebFOCUS | |
|
Feedback |