Enhancing a Master File with Expressions
|
Topics: |
Using an expression, you can create virtual columns and store calculations and selection criteria in a synonym. For example, using the Revenue measure, you can create a calculation for Revenue per Square Foot. This is saved in the synonym as an object and is available for use in all subsequent reports derived from the synonym.
Adding Virtual Columns (DEFINE) in a Synonym
|
How to: |
You may create a DEFINE field as a custom field in a synonym. A custom field can be used in a request as though it is a real data source field. Virtual columns (DEFINE fields) are available when the data source is used for reporting.
A virtual column can contain an expression, a constant, or a column name.
Procedure: How to Create a Virtual Column in a Synonym
- From an application directory
in the navigation pane, double-click a synonym, or right-click it
and click Open.
The Metadata canvas opens.
- Right-click a segment (or column), point to Insert,
and then click Define.
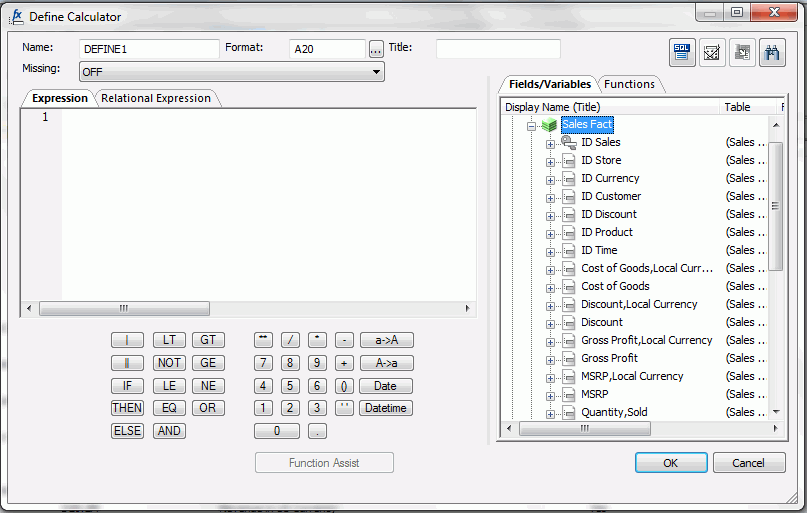
The Define Calculator opens, as shown in the following image.
- From the Define Calculator, type a name for the column in the Name input field, or use the default define name.
- Type a format for the column in the Format input field, or click the browse (...) button at the right of the Format input field to launch the Properties dialog box to enter the information.
- You may
enter a descriptive title for the virtual column (DEFINE) in the Title
input field.
Tip: From the Metadata canvas, click the browse (...) button at the right of the TITLE and DESCRIPTION value fields to specify multiple language titles.
- Specify the Missing Data option for columns that allow null data. You can allow all missing data.
- Use the Expression tab and the calculator buttons to
build the expression for the virtual column (DEFINE).
or
Use the Relational Expression tab to build the expression.
- From the Relational
Expression tab, use the drop-down lists to select the filter Column,
Relation, and Type.
Note: Parameters are not supported.
- Click the browse (...) button
at the right of the Value input field.
The Value Selection dialog box opens.
- Select from the available values and use the arrows to add or remove values.
- Click OK to close the Value
Selection dialog box and return to the Relational Expression tab.
The expression is added to the value field.
- To add another filter, double-click a column or variable
from the Columns/Variables tab on the right side of the Virtual
Column Calculator.The filter is added to the Relational Expression tab, where you can add the expression value.
- To delete an expression, click in the row number column of the expression that you are deleting, right-click, and select Delete Selected Row(s). The expression is removed from the Relational Expression tab.
- From the Relational
Expression tab, use the drop-down lists to select the filter Column,
Relation, and Type.
- You may select the Check Expression and Sample Data buttons, located on the top right of the Virtual Column Calculator, to verify that the expression is valid and to view sample data for the filter.
- Click OK to close the Define Calculator
and return to the Metadata canvas.
Note: To edit the Define, Title, or Expression, you may do so directly from the Metadata canvas, or you may click the browse (...) button at the right of the EXPRESSION value field to relaunch the Define Calculator.
- If no columns from the synonym are used in the expression
or have been defined, you can use the WITH option to identify the
logical home of the defined calculation. You can also use the WITH
option to move the logical home for the virtual column to a lower
segment than it would otherwise be assigned (for example, to count instances
in a lower segment).
Tip: You can click and drag the DEFINE field and move it to a different segment in the Tree View tab, which also changes the segment association.
- Click Save from the Quick Access Toolbar to save the synonym.
Adding Computed Fields (COMPUTE) in a Synonym
|
How to: |
You may create a Computed field as a custom field in the Metadata canvas. The procedure for adding a custom field is similar to the procedure used to add a Defined field. The Computed field is identified as the Master File Computed field and is differentiated from the Defined fields and the other Computed fields.
Procedure: How to Create a Computed Field in the Metadata Canvas
To create a computed column in a synonym
- From
the Projects or Data Servers area, open a synonym by double-clicking
a Master File from the Master Files folder.
The Metadata canvas opens.
- Right-click
a segment (or column), point to Insert, and
click Compute.
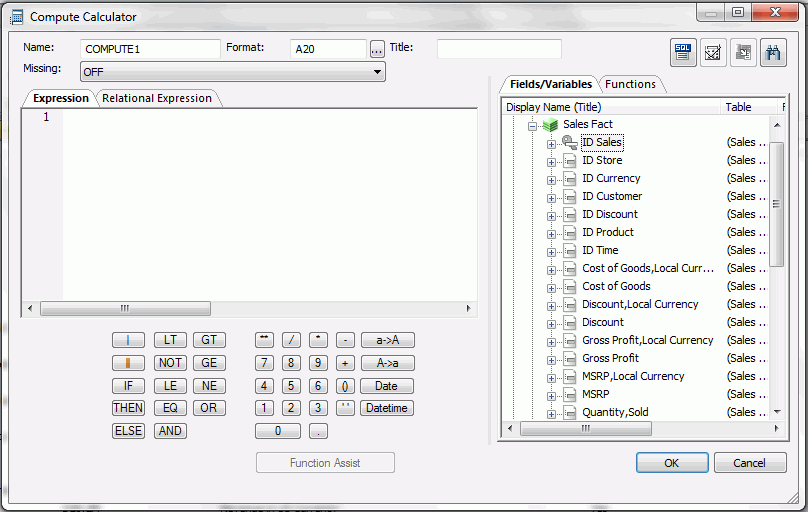
The Compute Calculator opens.
- From the Compute Calculator, type a name for the column in the Column input field or use the default compute name.
- Type a format for the column in the Format input field, or click the browse (...) button at the right of the Format input field to launch the Properties dialog box to enter the information.
- You may enter a descriptive title for the computed field
(COMPUTE) in the Title input field.
Tip: From the Metadata canvas, click the browse (...) button at the right of the TITLE and DESCRIPTION value fields to specify multiple language titles.
- Specify the Missing Data options for columns that allow null data. You can allow all missing data.
- Use the Expression tab and the calculator buttons to
build the expression for the computed field (COMPUTE).
or
Use the Relational Expression tab to build the expression.
- From the Relational Expression tab, click
the Add New Row button
 and use the drop-down lists to
select the filter Column, Relation, and Type.
and use the drop-down lists to
select the filter Column, Relation, and Type.Note: Parameters are not supported.
- Click the browse (...) button at the right of the Value input field.
- Select from the available values and use the arrows to add or remove values.
- Click OK to close the Value
Selection dialog box and return to the Relational Expression tab.
The expression is added to the value field.
- To add another filter, double-click a column or variable
from the Columns/Variables tab on the right side of the Compute
Calculator.
The filter is added to the Relational Expression tab, where you can add the expression value.
- To delete an expression, select the number or field column of the expression and click the Delete button, or right-click it and select Delete Selected Row(s). The expression is removed from the Relational Expression tab.
- From the Relational Expression tab, click
the Add New Row button
- You may click the Check expression and Sample Data buttons, located on the top right of the Compute Calculator, to verify that the expression is valid and to view sample data for the filter.
- Click OK to close the Compute
Calculator and return to the Metadata canvas.
Note: To edit the Compute, Title, or Expression, you may do so directly from the Properties section of the Metadata canvas or you may click the browse (...) button at the right of the EXPRESSION value field to relaunch the Compute Calculator.
- Click Save from the File menu to save the synonym.
For more information about expressions and COMPUTE attributes, see Defining Attributes and Creating Expressions for Custom Fields.
Creating Filters in a Synonym
|
How to: |
Filters are created in the Master File through the Metadata canvas and can be used in a Business View file or in reporting tools. You can also use filters to perform other data checking and validation, and sort data based on the conditions that you create.
Filters are created under a specific segment and, by default, they have association with the selected segment. Filters can also be created without segment association.
Procedure: How to Create Filters in a Synonym
- From
the Projects or Data Servers area, open a synonym by double-clicking
a Master File from the Master Files folder, or right-click
the synonym and select Edit in Synonym Editor.
The Metadata canvas opens.
- Right-click
a segment or field, point to Insert, and click Filter.
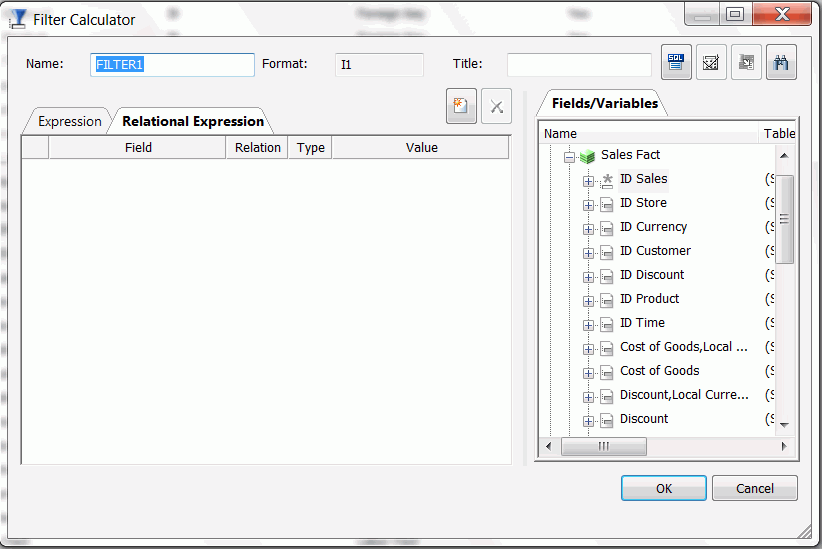
The Filter Calculator opens, as shown in the following image.
- From the Filter Calculator, type a name for the filter
in the Name input field or use the default filter name.
Note: It is recommended that filters have a descriptive name to help identify the filter action during reporting.
- The Format field shows a default value of I1.
Note: The Format field cannot be changed. Values for filters return 0 for false and 1 for true.
- You may enter a descriptive title for the filter in the
Title input field.
Tip: From the Properties panel in the Metadata canvas, click the browse (...) button at the right of the TITLE and DESCRIPTION value fields to specify multiple language titles.
- Use the Expression tab and the calculator buttons to
build the expression for the filter.
or
Use the Relational Expression tab to build the expression.
- From the Relational Expression tab, click
the Add New Row button and use the drop-down lists to
select the filter Column, Relation, and Type.
Note: Parameters are not supported with Master File Filters.
- Click the browse (...) button
at the right of the Value input field.
The Value Selection dialog box opens.
- Select from the available values and use the arrows to add or remove values.
- Click OK to close the Value
Selection dialog box and return to the Relational Expression tab.
The expression is added to the value field.
- To add another filter, double-click a column or variable
from the Fields/Variables section on the right side of the Filter
Calculator.
The filter is added to the Relational Expression tab where you can add the expression value.
- To delete an expression, select the number or field
column of the expression and click the Delete button,
or right-click it and select Delete selected row(s).
The expression is removed from the Relational Expression tab.
- From the Relational Expression tab, click
the Add New Row button
- You may click the Check Expression and Sample Data buttons, located on the top right of the Filter Calculator to verify that the expression is valid and to view sample data for the filter.
- Click OK to close the Filter Calculator
and return to the Metadata canvas.
Note: To edit the Filter, Title, or Expression, you may do so directly from the Properties panel in the Metadata canvas or you may click the browse (...) button at the right of the EXPRESSION value field to relaunch the Filter Calculator.
- To create
a Filter without segment association, use the WITH drop-down list
in the Properties panel to select a blank segment.
Filters are created under a specific segment and by default they have association with the selected segment. Filters can also be created without segment association.
Note: If you are using a field that appears in multiple segments, the WITH segment associated should be the lowest level segment or it should be left empty to prevent errors.
In addition, if no fields from the synonym are used in the expression or have not been computed, you can use the WITH option to identify the logical home of the filter calculation. You can also use the WITH option to move the logical home for the filter field to a lower segment than it would otherwise be assigned (for example, to count instances in a lower segment).
- Click Save from the File menu
to save the synonym.
The filter is saved as part of the synonym.
Defining Attributes and Creating Expressions for Custom Fields
|
Reference: |
A custom field is a field whose value is not stored in the data source but can be calculated from the data that is there. You can create a custom field in your synonym by adding a virtual column (DEFINE), a Computed Field (COMPUTE), and a Master File filter (FILTER). The fields are available whenever you access the corresponding data source in a reporting tool.
You can define attribute values and create expressions for custom fields using the Metadata canvas.
Reference: Custom Field Attributes
The following attributes may be available for custom fields (DEFINE, COMPUTE, and FILTER) in the Metadata canvas.
Note: The attributes available depend on the type of synonym and the type of custom field selected.
Custom fields (DEFINE, COMPUTE, and FILTER) typically have the following attributes:
General
- DEFINE
-
Is the name of the virtual column.
Note: This attribute only appears when a virtual column (DEFINE) is selected.
- COMPUTE
-
Is the name of the computed field.
Note: This attribute only appears when a virtual computed field is selected.
- FILTER
-
Is the name of the Master File Filter field.
Note: This attribute only appears when a virtual filter field is selected.
- EXPRESSION
-
Is the expression that creates the virtual column.
- TITLE
-
Supplies a title to replace the column name that is normally used in reports and enables you to specify multiple language titles for the virtual column.
- FORMAT
-
Describes the data type and format for the virtual column.
Note: This attribute only appears for DEFINE and COMPUTE custom fields.
- MISSING
-
Allows missing data. If not, the transaction value is supplied.
Note: This attribute only appears for DEFINE and COMPUTE custom fields.
Miscellaneous
- REDEFINES
-
A DEFINE expression may not contain qualified field names. REDEFINES enables you to redefine or recompute a column whose name exists in more than one segment.
Note: This attribute only appears for DEFINE custom fields and cannot be used by WebFOCUS.
- WITH
-
If no columns from the synonym are used in the expression or have been defined, you can use the WITH option to identify the logical home of the defined calculation. You can also use the WITH option to move the logical home for the virtual column to a lower segment than it would otherwise be assigned (for example, to count instances in a lower segment).
Note: This attribute only appears for DEFINE and FILTER custom fields.
- DESCRIPTION
-
Contains a description or comments about the virtual column.
- ACCESS_PROPERTY
-
Specifies access options for the column data.
INTERNAL defines a column that does not appear in sample data or in the list of available columns. Restricts the field from showing in any of the Field Lists.
NEED_VALUE defines a column that requires a value to access the data. Indicates that a selection is needed in the report request (WHERE condition).
Select By defines a column by value, range, or multivalues:
- If Value is checked, only one value should be defined for selection in the report request.
- If Range is checked, a range selection should be defined in the report request.
- If Multivalues is checked, multiple values are allowed for selection in the report request.
- GEOGRAPHIC_ROLE
-
Defines the geographic role of the column.
- WITHIN
-
Contains the name of a field to be included in a dimension.
These WITHIN statements are added to the synonym through the Dimension Builder to OLAP-enable WebFOCUS files and relational tables.
Note: This attribute only appears for DEFINE and FILTER custom fields.
- TEMPORAL_PROPERTY
-
Inserts virtual fields in the Master File to show how selected totals progressed through a time period for specified intervals.
- USE_STYLE
-
Are the styles (for example, font and color) to apply to the field.
Note: The attributes available depend on the type of synonym.
Reference: Calculators for Custom Fields
The Define Calculator, Compute Calculator, and Filter Calculator have the following fields and options:
- Name
-
Is the name of the object being created (virtual field (DEFINE), filter, computed field).
- Format
-
Is the field format.
- Title
-
Is the title of a new target table created by a data flow. The title will be included in the synonym that is created.
- Missing
-
Indicates if missing (null) values are allowed in this field. The following options are available:
- OFF. The result is never missing.
- ON. The result is missing only if all missable fields are missing.
- ON ALL. The result is missing if any missable fields are missing.
- Expression tab
-
Location for typing an expression. You can add data source fields from the Columns/Variables tab, functions from the Functions tab, and numbers and operators from the calculator as you type.
- Relational Expression tab
-
Displays the expression building window from which you can add and delete columns, choose the relation and type, and select values for your filter.
- Fields/Variables tab
-
Displays a hierarchical list of available source columns and System Variable folders that you can use in creating an expression.
- Functions tab
-
A function is a program that returns a value. This tab lists the built-in functions that you can use to derive the value of a temporary field.
- Function Assist button
-
Enables you to specify parameters for the function through a dialog box when creating or editing a transformation.
- Calculator buttons
-
Enables you to insert numbers and operators.
The following operators are available:
- | (single concatenation bar)
-
Concatenates two values, retaining any trailing blanks after the first one. For example, if FIRST_NAME and LAST_NAME were both in A15 format, the expression
FULL_NAME = FIRST_NAME | LAST_NAME
would produce a column like the following:
MICHAEL      SMITHSONJ
ANE         JONES
.
.
.
- || (double concatenation bar)
-
Concatenates two values, suppressing any trailing blanks in the first. For example, to construct the full name and insert a comma (,), the syntax
FULL_NAME = LAST_NAME || (', ' | FIRST_NAME)would produce a column like the following:
SMITHSON, MICHAEL
JONES, JANE
.
.
.
The concatenation in the parentheses is done first (preserving the blank space after the comma), and the result is then concatenated to LAST_NAME, suppressing the trailing blanks of LAST_NAME.
- IF
-
Establishes a conditional test.
- THEN
-
Specifies the action to perform if the result of a conditional test is TRUE.
- ELSE
-
Specifies the action to perform if the result of a conditional test is FALSE.
- LT
-
Returns the value TRUE if the value on the left is less than the value on the right.
- NOT
-
Returns the value TRUE if the operand is false.
- LE
-
Returns the value TRUE if the value on the left is less than or equal to the value on the right.
- EQ
-
Returns the value TRUE if the value on the left is equal to the value on the right.
- AND
-
Returns the value TRUE if both operands are true.
- GT
-
Returns the value TRUE if the value on the left is greater than the value on the right.
- GE
-
Returns the value TRUE if the value on the left is greater than or equal to the value on the right.
- NE
-
Returns the value TRUE if the value on the left is not equal to the value on the right.
- OR
-
Returns the value TRUE if either operand is true.
- **
-
Raises a value to the specified power.
- ( )
-
Adds parentheses.
- ''
-
Inserts two single quotation marks. Enter alphanumeric test values between the quotation marks.
- a->A
-
Converts selected text to uppercase.
- A->a
-
Converts selected text to lowercase.
- Date
-
Opens the Date dialog box, where you can change the format for the Date field.
- Datetime
-
Opens the Date Time dialog box, where you can change the format for the Datetime field.
- Check expression button
-
Verifies the validity of the expression.
- Sample data button
-
Produces sample data for the expression.
| WebFOCUS | |
|
Feedback |