Creating Virtual Fields
|
Topics: |
A temporary field is a field whose value is not stored in the data source, but can be calculated from the data that is there, or assigned an absolute value. A temporary field takes up no storage space in the data source, and is created only when needed. DEFINE fields and COMPUTE fields are two different types of temporary fields.
When you create a temporary field, you determine its value by writing an expression. You can combine fields, constants, and operators in an expression to produce a single value. For example, if your data contains salary and deduction amounts, you can calculate the ratio of deductions to salaries using the following expression: deduction / salary.
You can specify the expression yourself, or you can use one of the many supplied functions that perform specific calculations or manipulations. In addition, you can use expressions and functions as building blocks for more complex expressions, as well as use one temporary field to evaluate another.
space ! " # $ & ' ( ) * + , / : ; < = > ? @ [ \ ] ^ _ ` { | } ~
Selecting a Temporary Field
The following information is provided to help you choose the kind of temporary field that you need.
-
Choose a virtual field when you want to:
- Use the temporary field to select data for your report. You cannot use a calculated value, since it is evaluated after data selection takes place.
- Use the temporary field to sort on data values. A calculated value is evaluated after the data is sorted. With the BY TOTAL phrase, you can sort on this type of field.
-
Choose a calculated value when you want to:
- Evaluate the temporary field using total values or prefix operators (which operate on total values). You cannot use a virtual field, since it is evaluated before any totaling takes place.
- Evaluate the temporary field using fields from different paths in the data structure. You cannot use a virtual field, since it is evaluated before the relationship between data in the different paths is established.
Detail (DEFINE)
A virtual field (DEFINE) is evaluated as each record that meets the selection criteria is retrieved from the data source. The result of the expression is treated as though it were a real field stored in the data source.
The calculation that determines the value of a virtual field is performed on each retrieved record that passes any screening conditions on real fields.
You can define a virtual field in the following ways:
- In a Master File. These virtual fields are available whenever the data source is used for reporting. These fields cannot be cleared by JOIN or DEFINE FILE commands.
- In a procedure. A virtual field created in a procedure lasts only for that procedure.
A DEFINE field is an optional attribute used to create a virtual field for reporting. You can derive the virtual field value from information already in the data source (that is, from permanent fields).
You may define fields simultaneously (in addition to fields defined in the Master File) for as many data sources as desired. The total length of all virtual fields and real fields cannot exceed 32,000 characters.
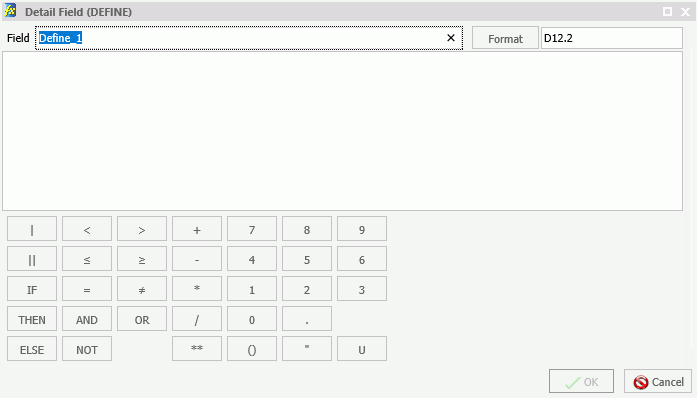
The Detail Field (DEFINE) dialog box allows you to create a defined field, type a name for the field, and enter a format.
The Detail (DEFINE dialog box is shown in the following image.
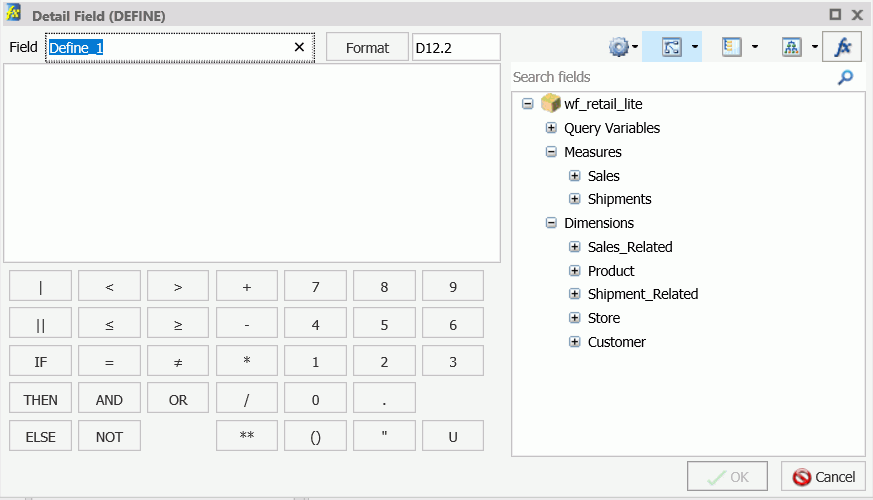
Note: If the order or dependencies within your DEFINE fields changes, InfoAssist will now automatically reorder these fields to ensure they can be correctly processed. Any revisions in the order of the fields will not change how they are presented in the field tree, but can be verified using the View Code option on the Quick Access toolbar or by editing the procedure on the WebFOCUS Home Page.
Summary (COMPUTE)
A calculated value (COMPUTE) is evaluated after all of the data that meets the selection criteria is retrieved, sorted, and summed. Therefore, the calculation is performed using the aggregated values of the fields. Calculated values are available only for the specified report request. You specify the COMPUTE command in the body of the report request, following the display command and optionally, introduced by AND. You can compute more than one field with a single COMPUTE command.
The Summary Field (COMPUTE) dialog box allows you to create a computed field, type a name for the field, and enter a format.
The Field List provides similar functionality, including options
to display data source fields in a Logical, List, or Structured
view. You can also view a complete set of functions, instead of
data source fields, by clicking the Functions button  .
.
Using Field Titles in a DEFINE or COMPUTE
|
How to: |
When working with Defines and Computes, field titles automatically display as you build your criteria in the Define (or Compute) text area.
Field titles are an attribute of a field. They are defined in the metadata and display only when specified for the field that you select. If a field title has not been defined in the metadata, the title that displays will be the physical field name.
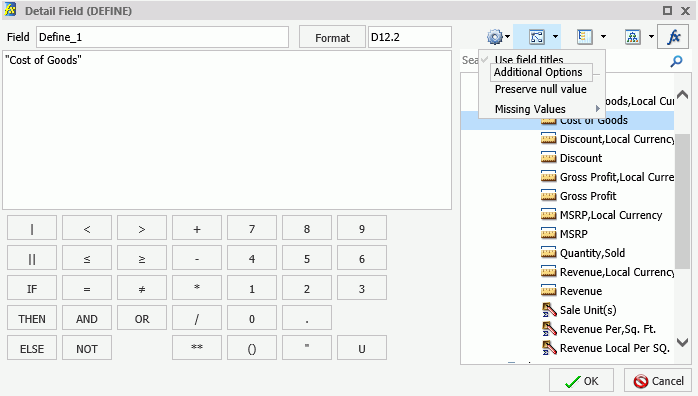
The Use field titles feature enables you to see the field title (for example, Cost of Goods) rather than the fully qualified name of the field (for example, WF_RETAIL_LITE.WF_RETAIL_SALES.COGS_US). This facilitates easy identification of field names while building your Define or Compute. You can switch between the display of field titles and fully qualified field names by unchecking the Use field titles option, which you can access by clicking Additional Options, as shown in the following image.
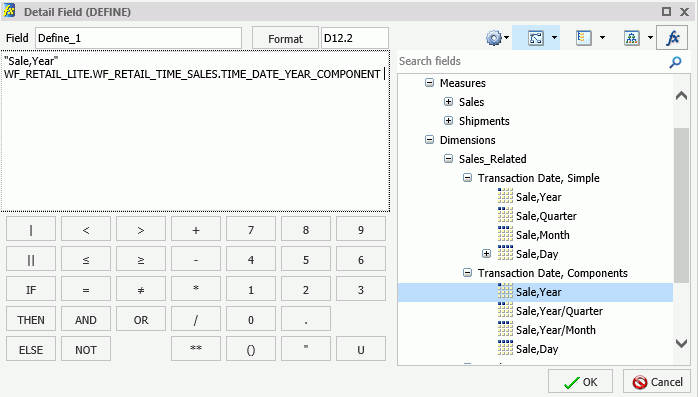
If your Define or Compute uses more than one field with the same title (for example, Sale,Year), then only the first field will be added using field titles. Any other reference to this identical field will use the fully qualified field name. For example, in a sample InfoAssist data source, Sale,Year displays as the field title for two unique fields: WF_RETAIL_LITE.WF_RETAIL_TIME_SALES.TIME_YEAR and WF_RETAIL_LITE.WF_RETAIL_TIME_SALES.TIME_DATE_YEAR_COMPONENT. In this case, only WF_RETAIL_LITE.WF_RETAIL_TIME_SALES.TIME_YEAR would display (using field titles) as Sale,Year. The other field would display using the fully qualified field name, as shown in the following image.
Procedure: How to Use Field Titles in a Define or Compute
- In Report or Chart mode, create a Define or a Compute.
- Add fields by double-clicking them in the metadata tree.
Note: The fields that you select display with field titles, as this is the default option. If you specify a field with a duplicate field title, the fully qualified field name is used for the second (and any subsequent) instance.
- Click Additional Options and then click Use field titles to disable the use of field titles, which results in the display of fields using the fully qualified field name.
Resizing the Text Area of a Define or Compute
|
How to: |
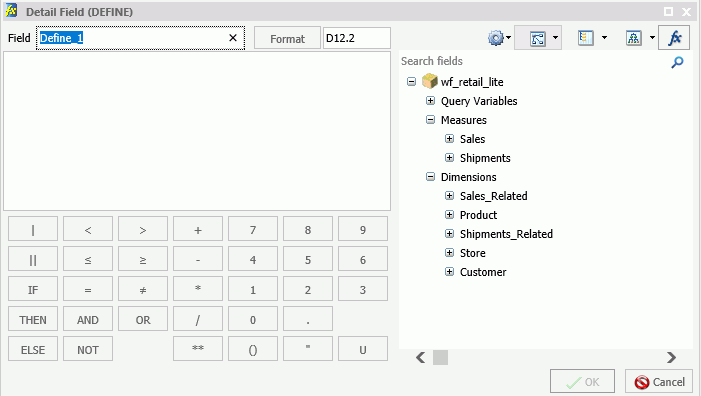
When working with Defines and Computes, you can adjust the width of the text area to accommodate the size of the fields in your query. This is particularly useful if you are using fully qualified names or long formulas, which can span more than the standard width of the text area.
In its original state, the text area is aligned with the calculator, as shown in the following image.
When fully expanded, the text area removes the metadata tree and toolbar from view, as shown in the following image.
Procedure: How to Resize the Text Area of a Define or Compute
- Open InfoAssist in Report or Chart mode.
- Select a Master File.
- On the Data tab, click Detail (Define) or Summary (Compute).The Define or Compute dialog box displays, respectively.
- Hover over the right border of the text area until double arrows display.
- Click and drag the field to the right.
The text area is resized.
Note:- If you expand the text area in a current session, InfoAssist will retain that expanded state for use in other areas of the application. For example, if you expand the text area when creating a Define, the expanded state will be present when you create a Compute.
- When working with the text area in an expanded state, you can reinstate the metadata tree and toolbar by hovering over the right border of the text area until double arrows displays. Click and drag the arrows to the left and right, as needed.
Creating Temporary Fields Independent of a Master File
The temporary fields that you create with the DEFINE and COMPUTE commands are tied to a specific Master File, and in the case of values calculated with the COMPUTE command, to a specific request. However, you can create temporary fields that are independent of either a Master File or a request using the DEFINE FUNCTION command.
A DEFINE function is a named group of calculations that use any number of input values and produce a return value. When calling a DEFINE function, you must first define the function.
A DEFINE function can be called in most of the same situations that are valid for Information Builders-supplied functions. Data types are defined with each argument. When substituting values for these arguments, the format must match the defined format. Alphanumeric arguments shorter than the specified format are padded with blanks, while longer alphanumeric arguments are truncated.
All calculations within the function are done in double precision. Format conversions occur only across equal signs (=) in the assignments that define temporary fields.
Enabling the Display of Missing Values for a DEFINE or COMPUTE
When working with DEFINEs and COMPUTEs, you can use the Missing Values option to enable or disable the display of missing values for a DEFINE or COMPUTE field. This allows you to accurately display missing values in reports, charts, and visualizations. The Missing Values option, which is accessible through the Additional Options button, is shown in the following image.
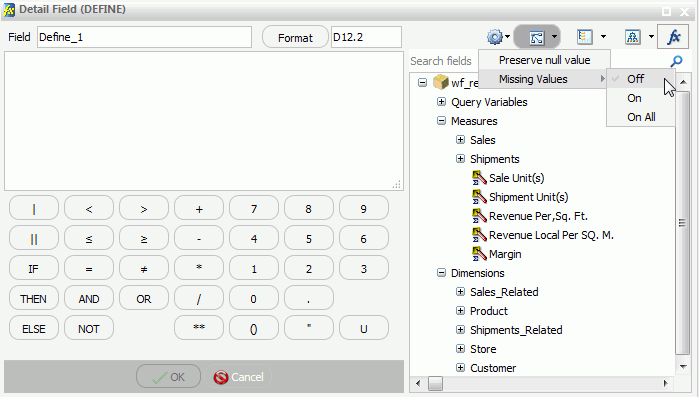
The following descriptions explain each option on the Missing Values drop-down list:
- Off. When selected, MISSING syntax is removed from the DEFINE or COMPUTE field definition. This is the default selection. MISSING treats missing values for numeric fields as zeros and missing values for alphanumeric fields as blanks.
- On. When selected, MISSING ON is added after the format in the DEFINE or COMPUTE field definition. MISSING ON interprets the temporary field as missing.
- On All. When selected, MISSING ON ALL is added after the format in the DEFINE or COMPUTE field definition. MISSING ON ALL indicates that if all fields in the expression have values, then the temporary field has a value. If at least one field in the expression has a missing value, the temporary field also has a missing value.
| WebFOCUS | |
|
Feedback |