Creating Thumbnails for Use With the Home Page
|
How to: |
In InfoAssist, you can create and store thumbnail images for use in the Home page. Thumbnail images allow you to see a snapshot of a report or chart without opening the file. In InfoAssist, you can create a thumbnail image by clicking on the Create Thumbnail icon, which is located on the Quick Access toolbar.
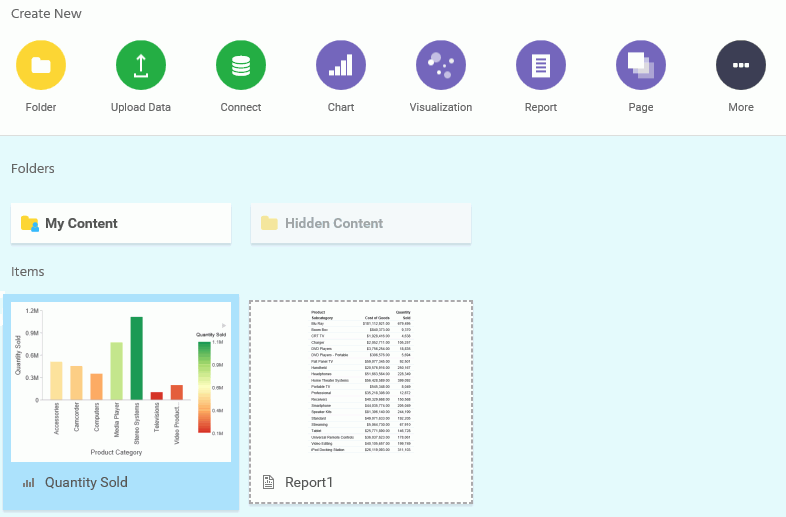
You can create thumbnail images when working in Report and Chart mode in InfoAssist. These images are smaller renditions (220x160px) of your actual report or chart as it displays in Live Preview. Once you create the thumbnail and save the report or chart, you can access the thumbnail image from the file list on the Home page, as shown in the following image.
Note: Thumbnail images are stored as part of the procedure when it is saved in the repository.
Procedure: How to Create a Thumbnail Image of a Report or Chart
- Open InfoAssist in Report or Chart mode.
- Create a report or chart.
- On the Quick Access Toolbar, click Create Thumbnail, as shown outlined in blue in the following image.

The Create Thumbnail dialog box displays, as shown in the following image.
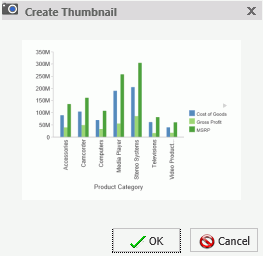
- On the Create Thumbnail dialog box, click OK.
- On the Message dialog box, a message displays stating that the Thumbnail has been created. Click OK.
- On the Quick Access Toolbar, click Save to save the chart or report along with the thumbnail. The thumbnail is stored with the procedure.
Procedure: How to View the Properties of a Thumbnail from the Home Page
- Create a report or chart that contains a thumbnail.
- Save the procedure.
- In the content view on the Home page, locate the procedure.The image that displays is the thumbnail that was saved with the procedure.
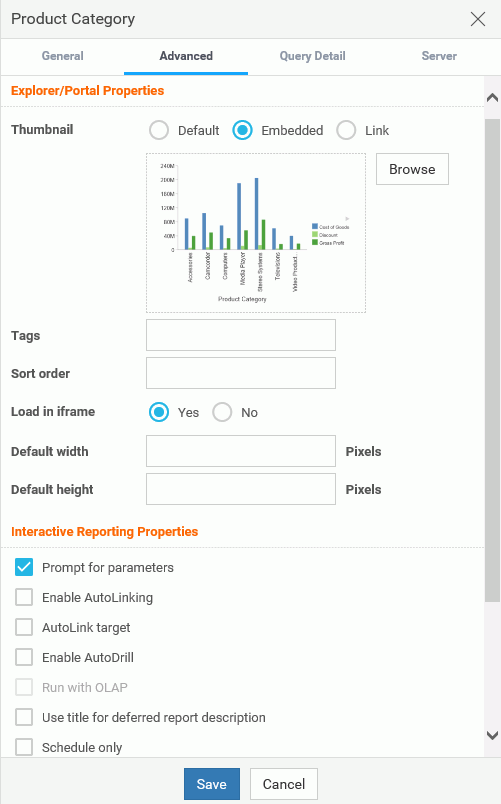
- Right-click the procedure and select Properties to view additional thumbnail options.
- Click the Advanced tab.The thumbnail displays in the Explorer/Portal Properties section of the panel, as shown in the following image.
| WebFOCUS | |
|
Feedback |