Connecting to Data and Editing Data
|
Topics: |
Aside from uploading data, you can create synonyms by connecting to various data sources. The Connect to Data wizard leads you through this process and allows you to establish a connection to many native data sources. The data source being used determines the type of metadata that is required. For example:
- When the server accesses a relational data source, it needs to know how to interpret the data stored there. You must create a synonym that describes the structure of the data source and the server mapping of the data types.
- When the server invokes a transaction or procedure, it needs to know how to build the request, what parameters to pass, and how to format an answer set from the response. You must create a synonym that describes the layout of the request or response area.
Whatever your data source, the adapter you are using manages the synonym creation process for you, creating a synonym that meets your specific requirements.
Note: Although all synonym creation panes have the same look and feel, the parameters are specific to each adapter. To obtain detailed information for an adapter, click the question mark (?) next to a parameter.
Creating a Synonym With the Connect to Data Wizard
|
Topics: |
The Connect to Data wizard lets you configure adapters that connect to data sources that you can use to build reports, charts, and visualizations. InfoAssist
Using the Connect to Data wizard, you can perform the following in a single environment:
- Configure Adapters. Configure an adapter, create a new connection, or change connection parameters.
- Create Base Synonyms. Create a synonym for one or more data objects.
- Create Cluster Synonyms with BV. Create a cluster synonym for select objects assigned as facts or dimensions.
You can launch the Connect to Data wizard in one of the following ways:
-
On the Home Page, on the actions bar, click Connect
 .
.
-
In the portal on the Menu bar, click Resources, right-click a folder or domain on the Resources panel, point to Metadata and then click Edit.
-
In the Open dialog box, in InfoAssist, click Connect to Data.
Configuring Adapters
|
How to: |
The Connect to Data wizard creates a connection to your data, which will allow you to modify your data You can configure a new adapter or connection, add a connection to an existing adapter, or change adapter connections.
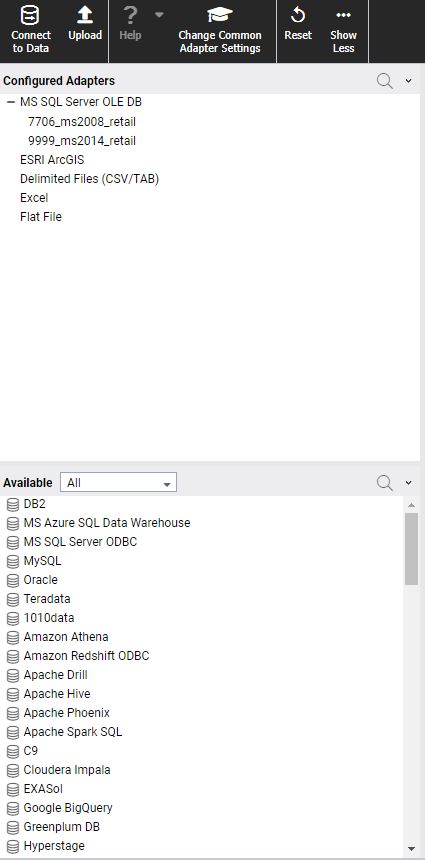
When the Connect to Data wizard opens, it displays a panel for configured adapters and a panel for available adapters, as shown in the following image.
-
Configured Adapters
Displays all adapters and connections that have been configured. You can create synonyms and cluster business views from this panel, add new or duplicate connections, remove connections, and view and edit properties.
-
Available
Displays all available adapters. If a connection has already been configured for an adapter, a check mark is displayed next to the adapter name. If the adapter has multiple versions, you can select which version to configure when you right-click the adapter name or click its drop-down arrow. You can select a category of adapter to display from a categorical drop-down list. A search option is also available.
Procedure: How to Configure a New Adapter/Connection
- From the Available panel, right-click an adapter name or click the arrow, and click Configure.
Note: If the adapter has multiple versions, right-click the adapter name or click the arrow, and select which version to configure.
The Configure Adapter screen opens, as shown in the following image.
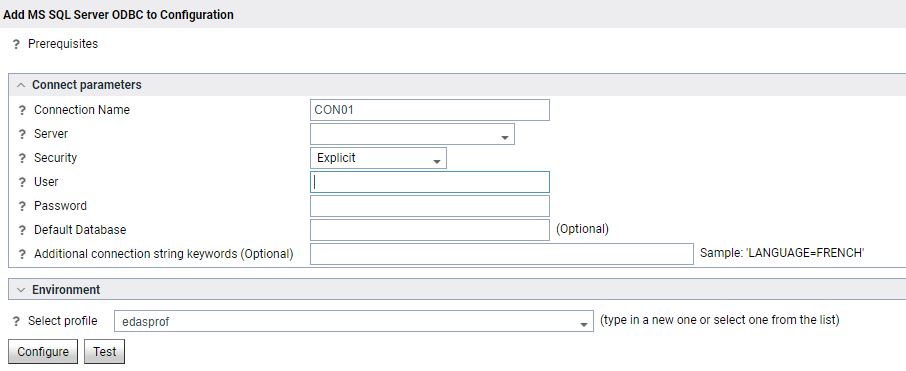
- Enter the parameters for the specific adapter.
- Click Test to test your configuration.
- Click Configure.
Note: Once configured, the adapter displays in the Configured Adapters panel.
Procedure: How to Add a Connection
- From the Configured Adapters panel, right-click an adapter name or click the arrow on an adapter line.
A shortcut menu opens, as shown in the following image.
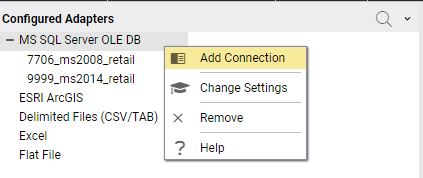
Note: These menu options are for a SQL adapter. Options may differ for different categories of adapters.
- Click Add Connection.
- Enter the parameters for the specific adapter.
- Click Test to test your configuration.
- Click Configure.
Procedure: How to Change a Connection
- From the Configured Adapters panel, right-click an adapter name or click the arrow on an adapter line.
- Click Change Settings.
- Change the parameters for the specific connection and click Configure.
Creating Synonyms
|
How to: |
You can enter all the parameters needed to create base synonyms or create a cluster synonym on a single page.
Procedure: How to Create a Synonym
- From the Configured Adapters panel, right-click a connection name or click the arrow on a connection line.
A shortcut menu opens, as shown in the following image.
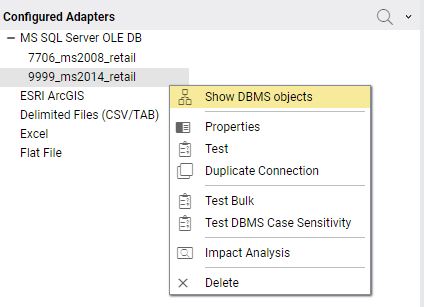
Note: These menu options are for a SQL adapter. Options may differ for different categories of adapters.
- Click Show DBMS objects from the shortcut menu.
The Available Objects page opens, as shown in the following image.
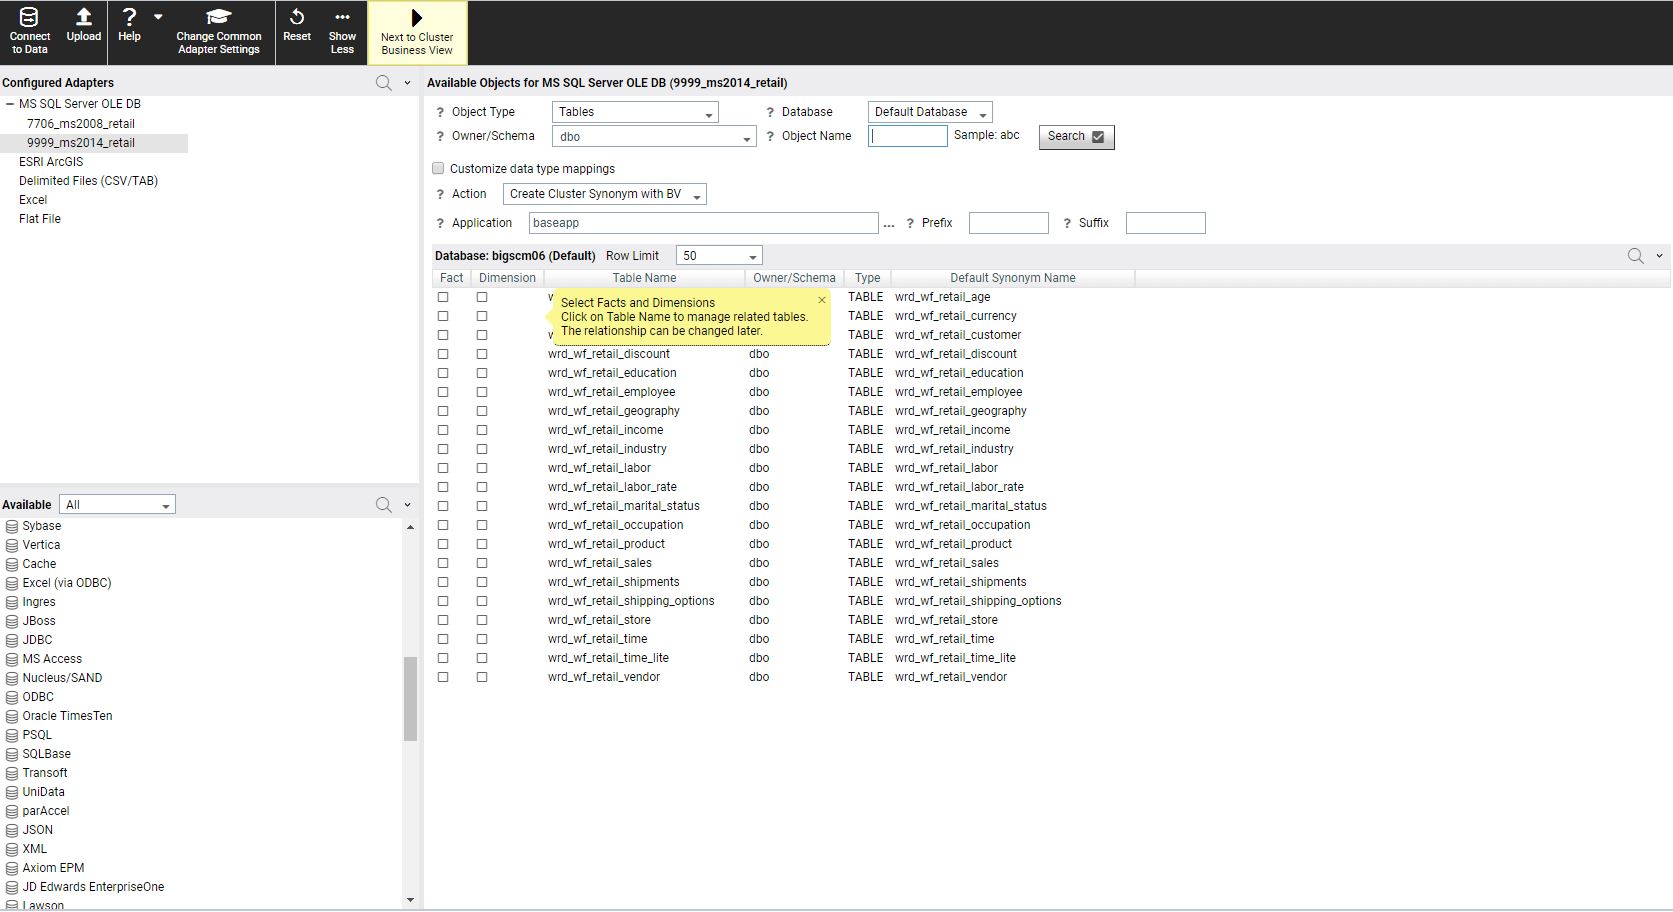
- Select from the Available Objects parameters.
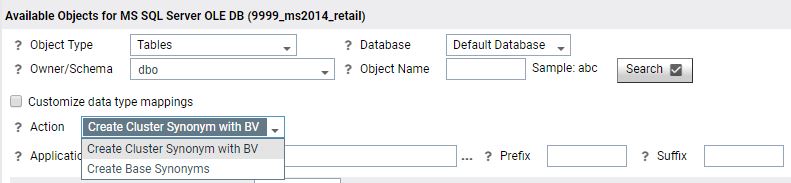
- From the Action dropdown, select Create Cluster Synonym with BV (default) or Create Base Synonyms as shown in the following image.
Procedure: How to Create a Cluster Synonym with BV
- Click Create Cluster Synonym with BV from the Action dropdown.
- Manually select objects as Facts and Dimensions for which you want to create a cluster synonym. To automatically select Facts and Dimensions, proceed to step 3. Otherwise proceed to step 5.
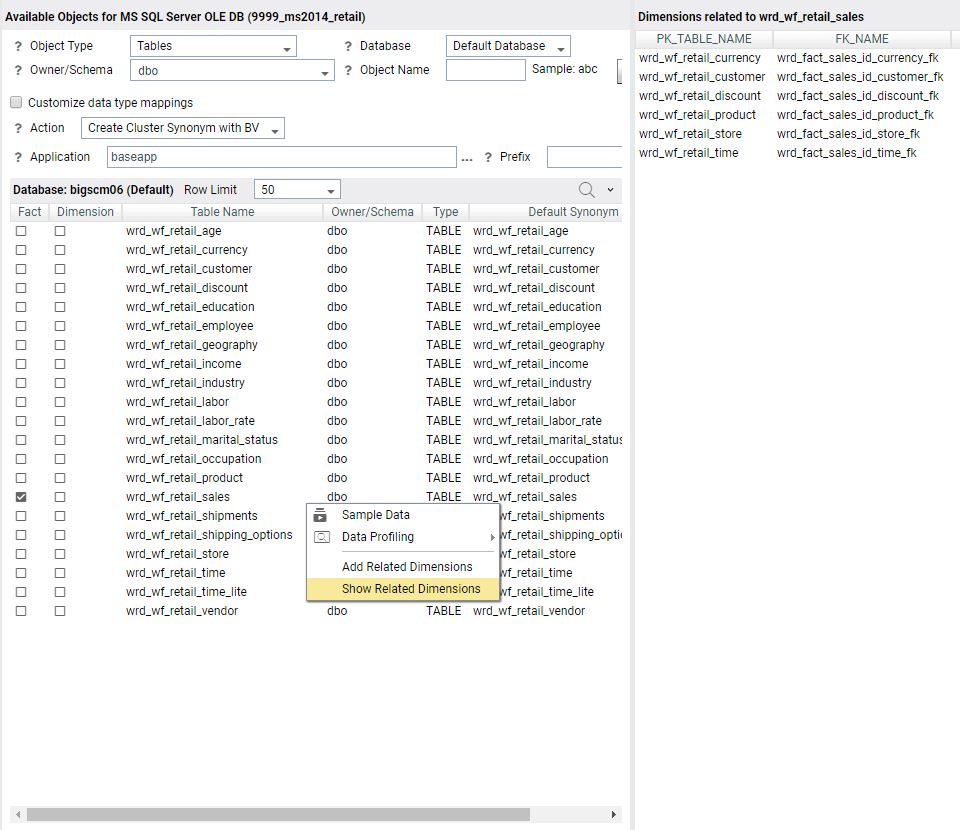
- Right-click a fact or dimension table name or click the arrow next to a fact or dimension table name and select Show Related Dimensions
Note: Option only for Relational data sources if Foreign Key to Primary key information is available in the RDBMS.
A report of related dimensions displays, as shown in the following image.
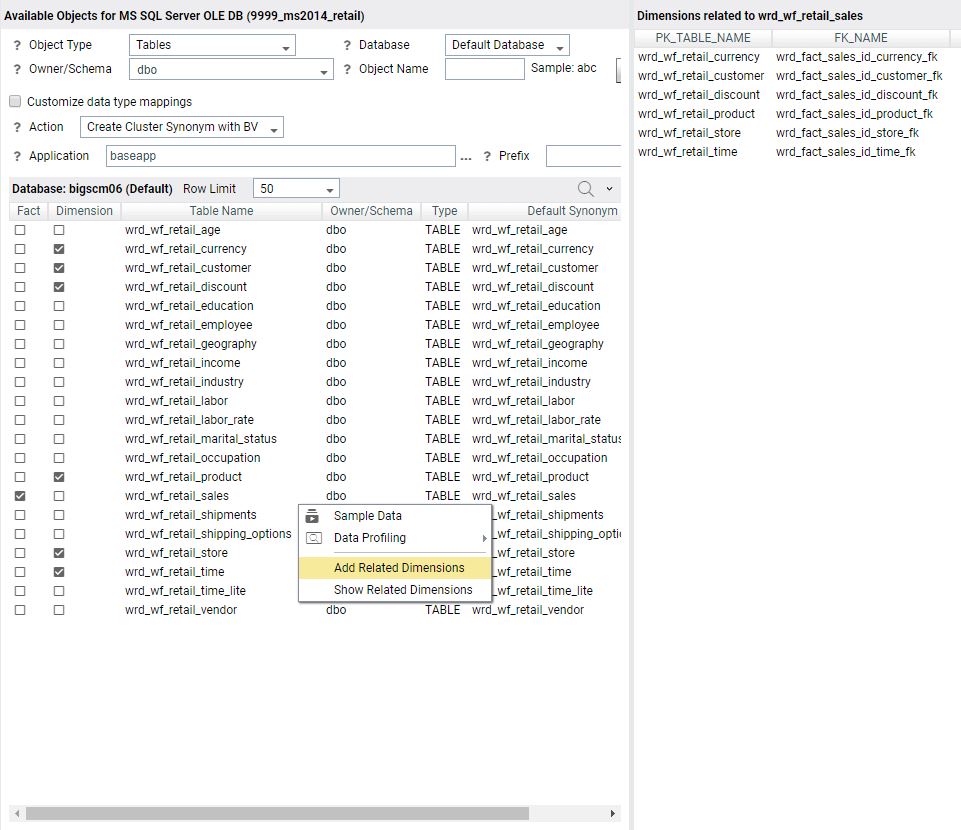
- Right-click a fact or dimension table name or click the down arrow next to a fact or dimension table name and select Add Related Dimensions
Note: Option only for Relational data sources if Foreign Key to Primary key information is available in the RDBMS.
All related dimensions are selected automatically, as shown in the following image.
- Click Next to Cluster Business View on the ribbon.
Your cluster selection displays, as shown in the following image.
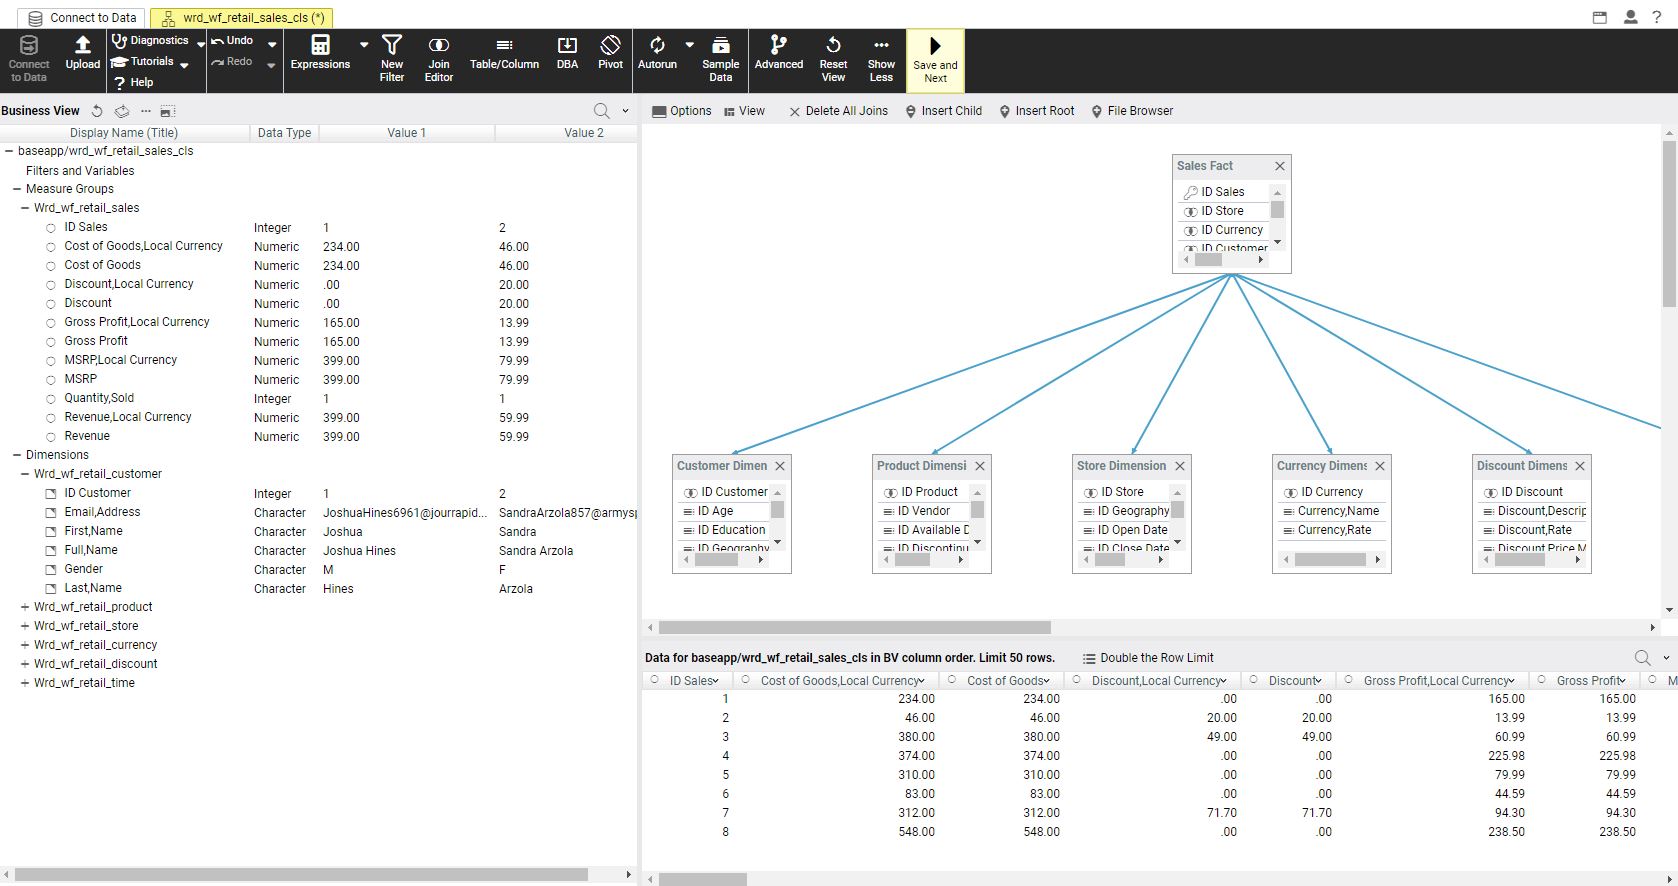
- Enhance your cluster synonym from the panels or ribbon as needed.
- Click Save and Next on the ribbon.
- Change the cluster name in the File Name field of the Save As dialog box if needed.
- Click OK.
Procedure: How to Create a Base Synonym
- Select Create Base Synonyms from the Action dropdown.
- Select check boxes of the objects for which you want to create synonyms, as shown in the following image.
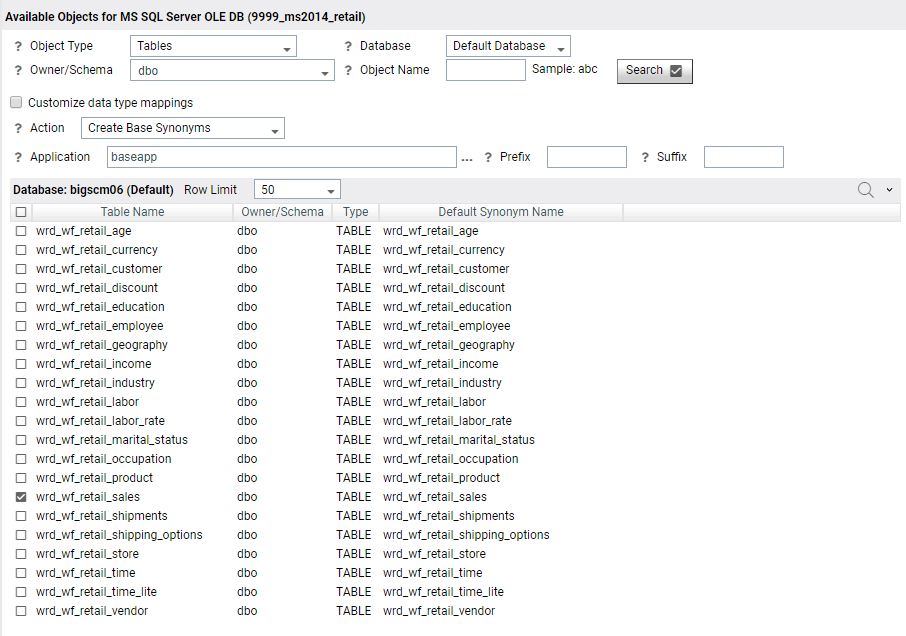
- Select Next to Base Synonyms on the ribbon. Your synonym selection displays, as shown in the following image.
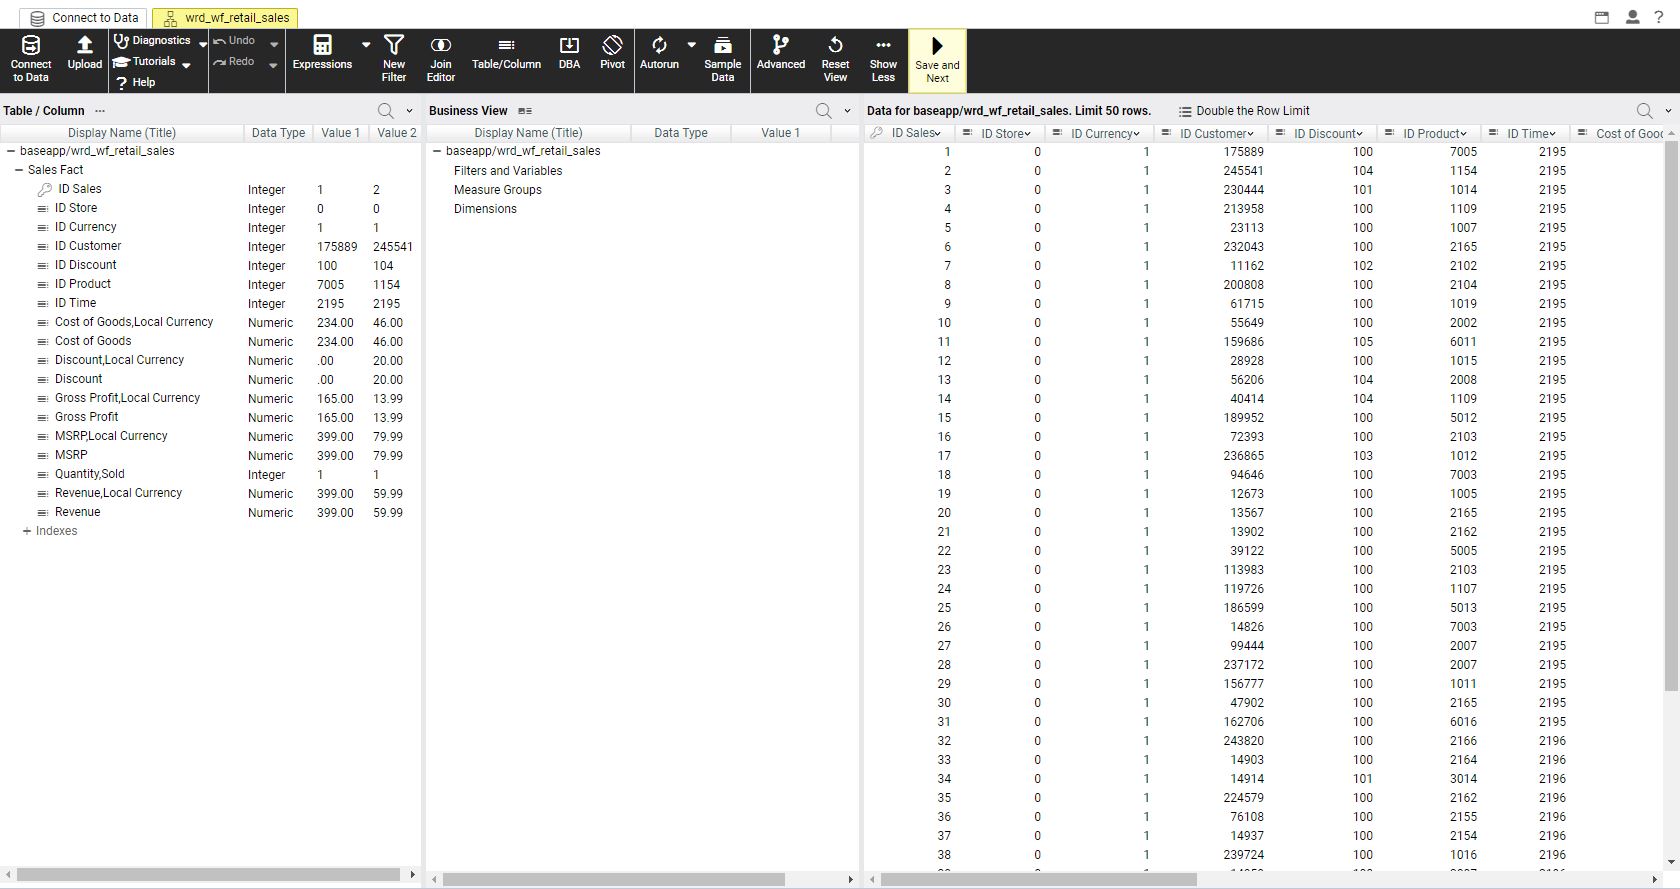
- Enhance your base synonym from the panels or ribbon as needed.
- Click Save and Next on the ribbon.
- Change the base synonym name in the File Name field of the Save As dialog if needed.
- Click OK.
Editing And Deleting Metadata
|
How to: |
You can edit or delete previously created synonyms in one of the following ways:
- On the Home Page, on the actions bar, click Metadata
 .
.
- In the portal on the Menu bar, click Resources, right-click a folder or domain on the Resources panel, point to Metadata and then click Edit.
The Applications page opens, from which you can edit or delete your synonym.
Procedure: How to Edit a Synonym
- From the Applications page, in the Application Directories tree, left-click a folder to expand it, then right-click a procedure
or metadata file in the file panel and select Open, as shown in the following image.
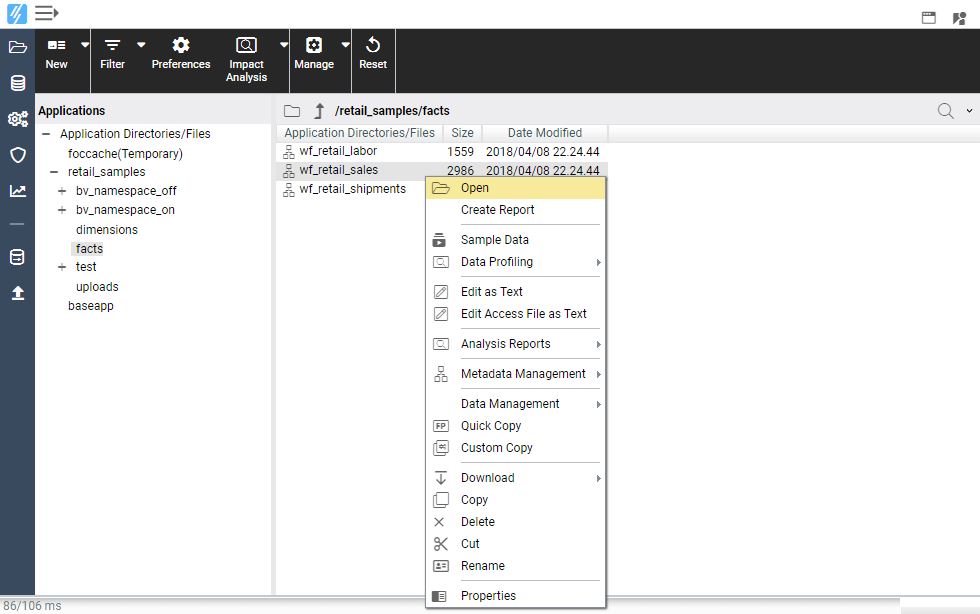
The Data Assist opens, where you can modify your synonym.
Note: When you open an existing synonym in this way, the Master File opens in BV_NAMESPACE=OFF or BV_NAMESPACE=ON mode, depending on the existing BV or DV structure.
- Make edits to the synonym, as required.
- To save your synonym, click File, and then click Save.
- Close the Reporting Server window.
Procedure: How to Delete Metadata
- Right-click the synonym that you want to delete, point
to Data Management, and then click Delete
All Data.
A confirmation window opens, alerting you that you are deleting every row of data.
- Click OK to proceed.
- To remove the synonym file from the view, right-click this synonym again and then click Delete.
- Close the Reporting server window.
| WebFOCUS | |
|
Feedback |