Working With HTML5 Chart Extensions
|
Topics: |
|
How to: |
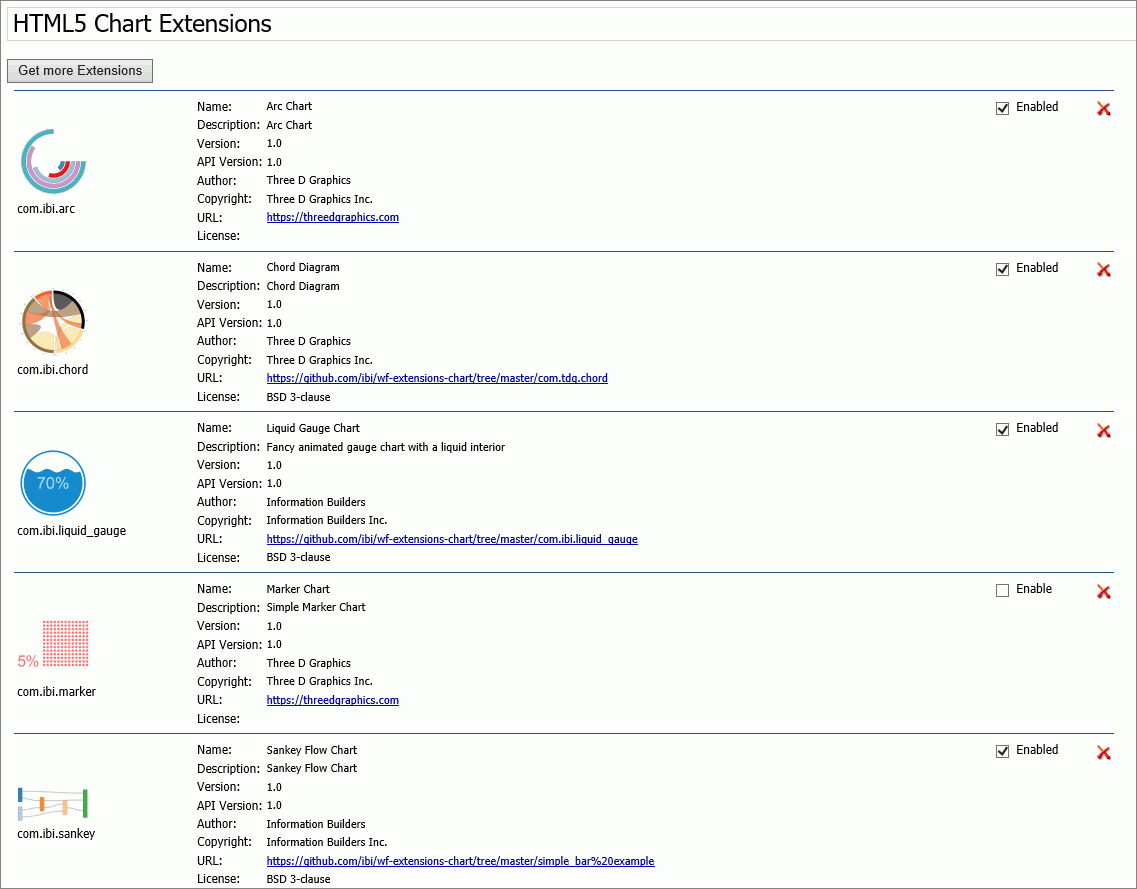
The HTML5 Chart Extensions page contains all HTML5 chart extensions currently installed in your local installation of WebFOCUS Business User Edition, as shown in the following image.

HTML5 chart extensions expand the standard set of InfoAssist charts to include customized charts tailored to very specific reporting and data visualization requirements. Features on this page allow you to upload HTML5 chart extensions, enable or disable their use in InfoAssist, and uninstall them from WebFOCUS Business User Edition when no longer needed.
Understanding HTML5 Chart Extension Entries
Each HTML5 Chart Extension entry contains details that identify a chart extension and its origin, and help you determine if a chart extension is appropriate for your installation of WebFOCUS Business User Edition.

Each entry identifies an HTML5 chart extension with a Name, Description, Version, and API Version. These details help you identify the chart extension you want to use, and the specific version of it that best matches your requirements. The Author and Copyright identify the origin of the chart extension, and the URL links you to the location where you can retrieve additional copies. License information identifies the type of license, if any, under which the chart extension is made available to you, and helps you understand any limits on the use of the chart extension and the rights and obligations licensed users have to the developer.
Understanding the HTML5 Chart Extensions Enable/Enabled Check Box
Every HTML5 Chart Extension entry includes the Enable/Enabled check box that indicates whether or not the chart extension is available for use. The use of this check box provides a second level of availability that enables managers to restrict the full availability of HTML5 Chart Extensions to those that are in active use, while retaining all other installed HTML5 Chart Extensions in readiness for when they are needed.
When this check box is cleared, it displays the Enable label to indicate that selecting the check box will make the chart extension available for use, as shown in the following image.

HTML5 Chart Extensions that have the Enable check box selected are installed, but they are not available for use.
When this check box is selected, it displays the Enabled label to indicate that the chart is already available for use, as shown in the following image.

HTML5 Chart Extensions that have the Enabled check box selected are installed and are available for chart creation in InfoAssist. WebFOCUS Business User Edition identifies the files and directories included in that Chart Extension as eligible for calls from InfoAssist, and displays an icon for that Chart Extension in the Select a Chart menu that opens from the Other command in the Chart Type group, on the InfoAssist Format tab ribbon.
Note: The HTML5 Chart Extensions page does not manage copyright or license restrictions. You are ultimately responsible for the use of any HTML5 Chart Extension you upload. Therefore, you must ensure that you have a license or permission to use any HTML5 Chart Extension before uploading it to this page.
Uploading Additional HTML5 Chart Extensions Using the Upload and Install Extensions Page
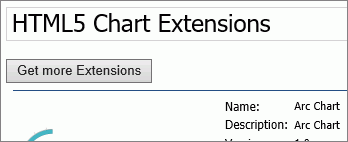
Use the Upload and Install Extensions page to install additional HTML5 Chart Extensions. To open the Upload and Install Extensions page from the main HTML5 Chart Extensions page, click Get more Extensions, as shown in the following image.

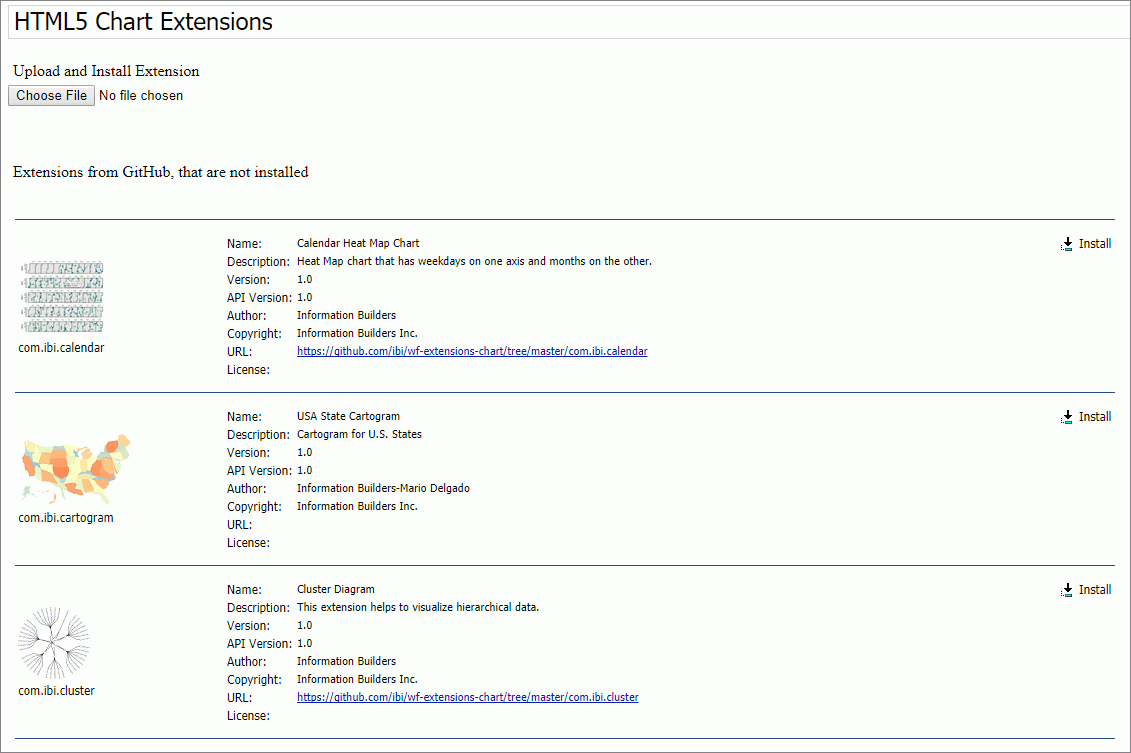
The Upload and Install Extensions page opens, as shown in the following image.

The Upload and Install Extensions page provides two ways to install additional HTML5 Chart Extensions:
- By clicking the Install Extension button
 in entries for chart extensions that are found on the Information Builders public extension GitHub page, https://github.com/ibi/wf-extensions-chart, but are not currently installed in WebFOCUS Business User Edition.
- By clicking the Choose File button
 to navigate to a folder on your local file system that contains a locally-developed HTML5 Chart Extension package in .zip
file format.
To move back to the main HTML5 Chart Extensions page from the Upload an Install Extensions page, click HTML Chart Extensions under the Application Settings Folder, or click the Back button in your browser.
Procedure: How to Upload HTML5 Chart Extensions from the Local File System
Use this procedure to upload zip files containing HTML5 Chart Extensions from your local system.
You must ensure that you have a license or permission to use any HTML5 Chart Extension before uploading it to this page.
- Sign in as a Manager and open the Administration Console.
- On the Configuration tab, under the Application Settings folder, click HTML5 Chart Extensions.
- On the HTML5 Chart Extensions page, click Get more Extensions.
- On the Upload and Install Extension page, click Choose File, as shown in the following image.

The Open dialog box opens and points to the extensions folder for your local installation of WebFOCUS Business User Edition. Typically, this is the following folder:
drive:\ibi\install_dir\config\web_resource\extensions
where:
- install_dir
- Is your WebFOCUS Business User Edition installation directory.
Note: If you downloaded your HTML5 Chart extension zip file to a different directory, navigate to that directory and file.
- Click the file containing the zipped version of the HTLM5 Chart extension you want to upload, and then click Open.
- When the HTML5 Chart Extensions page refreshes and returns you to the top, scroll down to the entry for the new HTML5 Chart Extension.
Procedure: How to Install HTML5 Chart Extensions From the IBI GitHub Page
|
How to: |
Use this procedure to upload HTML5 Chart Extensions from the public IBI GitHub extension page, https://github.com/ibi/wf-extensions-chart.
- Sign in as a Manager and open the Administration Console.
- On the Configuration tab, under the Application Settings folder, click HTML5 Chart Extensions.
- On the HTML5 Chart Extensions page, click Get more Extensions.
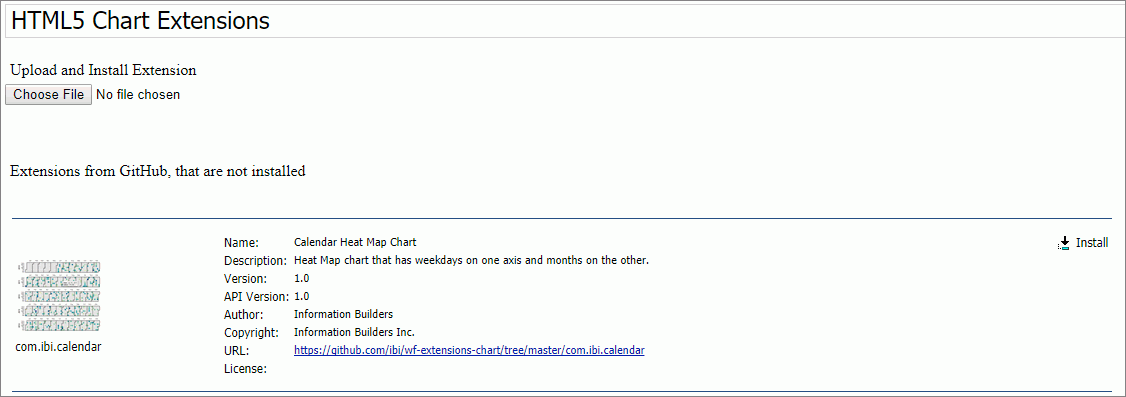
- On the Upload and Install Extension page, review the list of extensions from GitHub that are not installed, as shown in the
following image.

- If the chart extension you want to install appears in the list, click Install Extension
 .
. - When the HTML5 Chart Extensions page refreshes and returns you to the top, scroll back to your entry to confirm that the chart extension is now installed.
Procedure: How to Enable an Installed HTML5 Chart Extension
When you select the Enable check box in an HTML5 Chart Extension entry, you make it available for use in InfoAssist and in your local installation of WebFOCUS Business User Edition. You must ensure that you have a license or permission to use any HTML5 Chart Extension before making it available for use.
- Sign in as a Manager and open the Administration Console.
- On the Configuration tab, under the Application Settings folder, click HTML5 Chart Extensions.
- On the HTML5 Chart Extensions page, scroll to the entry for the HTML5 Chart Extension that you want to enable.
Note: You can also search for the chart extension by name, using the Find or Find on this page command that is supported by the browser.
- Select the Enable check box, as shown in the following image.

- When the HTML5 Chart Extensions page refreshes and returns you to the top, scroll back to your entry to confirm that the
check box is now selected.
An icon for the HTML5 Chart Extension appears in the InfoAssist Select a Chart menu, which opens when you click the Other command in the Chart Types group on the Format tab.
Procedure: How to Disable an HTML5 Chart Extension
When you clear the Enabled check box in an HTML5 Chart Extension entry, you make it unavailable for use in InfoAssist and in your local installation of WebFOCUS Business User Edition. However, the chart extension remains installed on the HTML5 Chart Extension page and can be enabled again when needed.
- Sign in as a Manager and open the Administration Console.
- On the Configuration tab, under the Application Settings folder, click HTML5 Chart Extensions.
- On the HTML5 Chart Extensions page, scroll to the entry for the HTML5 Chart Extension that you want to make unavailable.
Note: You can also search for the chart extension by name, using the Find or Find on this page command that is supported by the browser.
- Clear the Enabled check box, as shown in the following image.

- When the HTML5 Chart Extensions page refreshes and returns you to the top, scroll back to your entry to confirm that the
check box is now cleared.
The icon for the HTML5 Chart Extension no longer appears in the Select a Chart Menu that opens from the InfoAssist ribbon.
Procedure: How to Uninstall an HTML5 Chart Extension
- Sign in as a manager and open the Administration Console.
- On the Configuration tab, under the Application Settings folder, click HTML5 Chart Extensions.
- On the HTML5 Chart Extensions page, scroll to the entry for the HTML5 Chart Extension that you want to uninstall.
Note: You can also search for the chart extension by name, using the Find or Find on this page command that is supported by the browser.
- Click Delete_CHARTNAME_ Chart as shown in the following image.

- When you receive a message asking if you want to permanently delete the extension, click Yes.
- When the HTML5 Chart Extensions page refreshes and returns you to the top, scroll back to your entry to confirm that the
entry is now deleted.
The entry for the HTML5 Chart Extension no longer appears on the page.
| WebFOCUS | |
|
Feedback |