Working With Folders
|
How to: |
Folders contain all repository content. Whenever a user creates a folder, it will always be created as a private folder. If the creator is permitted the necessary privileges, folders and their contents can be shared with other users or published for general use.
Folders have both titles and file names. The title is typically displayed to users. The file name is used as an internal reference to provide an unambiguous context. Titles can be duplicated within a container, but file names cannot.
The folder path may have up to 1,040 characters for the path information (not including the object name), and up to 64 characters for the object name. For example, a folder may be named: /WFC/Repository/AmericaBank/Finance. In this example, /WFC/Repository/AmericaBank/ is 28 characters and Finance is 7 characters.
Procedure: How to View Folder Properties
In order to view the properties of a folder, right-click a folder in the Resources tree or content area of the Home page, and then click Properties. The Properties panel opens, displaying the information in the following table.
|
Item |
Description |
|---|---|
|
General Tab |
|
|
Language |
Displays the language in which the folder and its content were created. The list attached to this field contains all languages made available by your code page selection. |
|
View All |
Opens the Language Properties dialog box that identifies the list of available languages and the default language selected for the folder. The default language specified in this dialog box is the language in which the folder and its contents were created and are displayed, by default. The folder name and description appear next to the selected default language option. |
|
Title |
Displays the title that appears on the folder when it is displayed in the Resources tree or content area. This is the title by which end users identify the folder, and is typically based on the contents in it. |
|
Name |
Displays a unique internal reference to the folder. This is the name used to identify the folder for internal operations. This field is dimmed and unavailable by default. Click the Change Name icon next to it to make this field available for name changes. |
|
Summary |
Displays a detailed explanation that provides additional information about the folder. |
|
Path |
Displays the full repository path of the parent folder. |
|
Created |
Displays the date and time the folder was created. |
|
Modified |
Displays the date and time the folder was last modified. and the ID of the user who last modified the folder. |
|
Accessed |
Displays the date and time the folder was last accessed by the Properties, Run, or Run Deferred commands, or by any of the edit tools used to update the folder. It also displays the ID of the user or tool that last accessed the folder. |
|
Owner |
Displays the ID of the User to whom the folder is currently assigned. |
|
Publish |
Specifies whether the folder and its contents are published or not. |
|
Show |
Specifies whether to display the folder to users who are not permitted to create content in it. This option is primarily used when the folder needs to be made temporarily unavailable to end users who would otherwise be permitted to view or work with the content in the folder. |
|
Advanced Tab |
|
|
Folder Properties |
|
|
Automatically create My Content folders |
When this check box is selected, a My Content folder is created for users with the My Content Folder privilege, giving the user a place to save the personal reports, charts, or documents that they may create using InfoAssist or other report and distribution features, such as Save Parameter reports. |
|
Automatically open |
If this check box is selected, when you open the Home page, this domain folder is automatically expanded in the Resources tree to display the My Content folder and the other folders that this folder contains. In addition, the content area automatically displays the folders and items assigned to this folder. |
|
Explorer/Portal Properties Group |
|
|
Sort order |
Specifies the order in which the folder is listed in the Resources tree and in the content area. |
Procedure: How to Create a Folder
- On the Home page, in the Resources tree, click the parent folder that will contain the new folder.
Or
In the breadcrumb trail, click the link to the parent folder that will contain the new folder.
- In the New Folder dialog box, type the title for the new folder, as shown in the following
image.
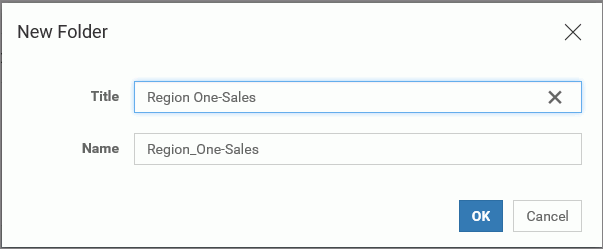
As you type, the description you type in the Title field is automatically assigned to the Name field and adjusted to conform to format rules for file names. The Name field automatically converts any spaces or special characters you type in the Title field into underscore characters. If you type an unbroken string of multiple special characters, such as &&&, in the Title field, the Name field automatically converts them into a single underscore character. If you prefer, you can modify the Name, later.
- Click OK.
The new folder appears in your selected location in the Resources tree and in the content area of the Home page.
- In order to add an optional summary description of the folder:
- Right-click the new folder, and then click Properties.
- On the Properties panel, type the description in the Summary field.
- Click Save to save the description, and then click Cancel to close the Properties panel.
Procedure: How to Publish a Folder
In the Resources tree or content area of the Home page, right-click a folder, and then click Publish.
The Resources tree refreshes and no longer displays the folder name in italics. The content area refreshes, removes the border from the folder, and displays the folder icon in full color.
Procedure: How to Unpublish a Folder
In the Resources tree or content area of the Home page, right-click a folder, and then click Unpublish.
The Resources tree refreshes and displays the folder name in italics. The content area refreshes, displays a border around the folder, and displays the folder icon in gray.
Procedure: How to Duplicate a Folder
In the Resources tree or content area of the Home page, right-click a folder and then click Duplicate.
In the Resources Tree, a duplicate folder appears beneath the original folder. In the content area, the duplicate folder appears immediately to the right of the original or below it. The name and title of the duplicate folder are the same as those of the original, appended with an underscore and an integer that increases each time the folder is duplicated.
Note: The Duplicate command creates a copy of the folder in the same location as the original. Use the Copy and Paste commands if you need to move a copy of a folder to a different location.
Procedure: How to Cut or Copy and Paste a Folder
- In the Resources tree or content area of the Home page, right-click a folder, and then click Cut if you want to move the folder, or click Copy if you want to create a copy of the folder and leave the original folder in place.
- In the Resources tree, click the folder that represents the new location. Expand the tree to display the new location if necessary.
or
If the new location appears on the Breadcrumbs trail, click the folder that represents the new location.
- In the Resources tree, right-click the folder that represents the new location, and then click Paste.
or
Right-click anywhere in the content area of the new location, and then click Paste.
The Resources tree and the content area refresh and display the folder.
Folder names must be unique within a specific location. If you paste the folder to a different parent folder, its name remains the same, as long as no folder of that name already exists in the new parent. If a folder of that name already exists, or if you pasted the copy of the folder into the same folder as the original, the name of the copy is the same as the original, appended with an underscore and an integer that increases each time you paste the folder. Folder titles are updated in the same way as folder names.
Procedure: How to Change a Folder Title
- In the Resources tree or content area of the Home page, right-click a folder, and then click Properties.
- On the Properties panel, type the new Title in the Title field, and then click Save.
The folder name is updated. If the new name changes the position of the folder in alphabetical order, the folder is also relocated on the Resources tree and within the content area.
- When your updates are complete, click Cancel to close the Properties panel.
Procedure: How to Delete a Folder
- In the Resources tree or content area, right-click a folder, and then click Delete.
- When you receive a message asking you to confirm the decision to delete the folder, click OK.
The Resources tree and the content area refresh and remove the deleted folder.
| WebFOCUS | |
|
Feedback |