Resource Analyzer Reporting
|
How to: |
For all platforms, Resource Analyzer reporting is accessed from the Web Console.
Procedure: How to Access Resource Analyzer Reports
To access Resource Analyzer reports:
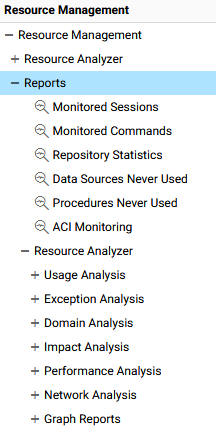
- Launch the server Web Console.
- Click Resource Management on the
toolbarsidebar and expand the Reports and Resource Analyzer folders, as shown
in the following image.
Procedure: How to Run Resource Analyzer Reports
To run Resource Analyzer reports:
- Expand the Reports folder on the tree in the navigation pane.
- Right-click the desired report in the tree and click Run.
- The Report Filter window opens. Make any desired changes and click View Report. For more information, see Report Filters.
Procedure: How to Submit a Report
To submit a report:
- Expand the Reports folder on the tree in the navigation pane.
- Right-click the desired report in the tree and click Submit.
The Report filter for Repository Statistics pane opens.
- Make any desired changes from the filtering options provided. For more information on these options, see Report Filters.
- From the calendar icon and the drop-down menu, specify a date and time to execute the report.
- Click Submit Report to submit the report to the deferred queue.
Procedure: How to View a List of Submitted Reports
To view a list of submitted reports that have been run in deferred mode:
- Expand the Reports folder on the tree in the navigation pane.
- Right-click the desired report in the tree and click View Submitted.
The Deferred List pane opens, showing a list of submitted reports.
If you right-click an item in the list, the following options are available:
- View. Opens the report.
- Download. Saves the selected report to your Downloads folder. In Windows, the default location of this folder is C:\users\username\Downloads.
- Delete. Deletes the selected item.
Procedure: How to Schedule a Report
You can schedule reports to run and be automatically distributed. To schedule a report:
- Expand the Reports folder on the tree in the navigation pane.
- Right-click the desired report in the tree, point to Schedule and E-Mail, and click Add job.
The Report filter for the selected report opens, as shown in the following image.
- Select your desired filtering conditions and click Next.
The Manage Schedule and E-Mail pane opens, as shown in the following image.
The Manage Schedule and E-Mail pane has the following options:
- Schedule Status
-
Determines if there is a schedule and if so, whether the schedule is active or inactive.
- Log and output destinations
-
These options control where the log information from the job should be sent when the job finishes.
The following options are available:
- ETLLOG. The log is sent to the DataMigrator log.
- EDAPRINT. The log is sent to the Server log.
- E-Mail. The log is sent as an attachment to an email message if specified in Job Properties.
- Send HTML output as inline message. When selected, if any stored procedures called by the flow generate an output, the message is included as message text instead of as an attachment. This option is only available in the E-Mail On Completion section.
Multiple options can be selected. ETLLOG and E-Mail are selected by default.
Note:- If the job is run from the DMC or Web Console, information will go to the console log regardless of this setting.
- The E-Mail On Start and E-Mail On Completion options are not relevant to the Resource Management Archive job and should not be used.
- Enable
-
Select this to enable when an email should be sent.
- Mail to
-
The email addresses where the messages will be sent. Place each email address (or user ID configured on the server with an associated email address) on a new line with no separators.
- Advanced
-
Select this option to get the following options:
- Mail to addresses defined in procedure. You can send the messages to email addresses defined in the procedure by either typing in the location of the procedure, or clicking the ellipsis button and manually selecting it from the Select Procedure dialog box.
- Importance. Select the importance for the e-mail from the drop-down menu. Choices are Low, Normal, or High.
- Subject. The subject line of the message.
- E-Mail Message. The body of the message.
- If you
select
Active or
Inactive from the Schedule Status drop-down menu,
the Manage Schedule and E-Mail for procedure pane opens with more fields, as
shown in the following image.
The Manage Schedule and E-Mail for procedure pane contains the following additional fields and options:
- Schedule Type
-
Determines whether a process flow will execute once, on a recurring basis, on several specific days (multi-day), or when the server starts.
- Interval Type
-
Specifies the interval in which a process flow will be executed. For example, if you select Month as your Interval Type, and select 2 as your Interval Number, the flow will execute every two months. This option is only available if the schedule type is set to Recurring.
- Interval Value
-
Specifies the frequency at which a process flow will be executed. For example, if you select Week as your Interval Type, and select 2 as your Interval Value, the flow will execute every two weeks. This option is only available if the schedule type is set to Recurring.
- Start Date
-
Specifies the start date for the execution of the process flow.
- Start Time
-
Specifies the start time for the execution of the process flow using 24-hour time.
- Specify Stop Time
-
Allows you to specify an end time for the execution of the process flow using 24-hour time. This option is only available if the schedule type is set to Run Once or Multi-Day.
- Specify End Date
- Allows you to specify an end date and time for the execution of the process flow. This option is only available if the schedule type is set to Recurring or Multi-Day.
- End Date
-
Specifies the end date for the execution of the process flow. This option is available if Specify End Date is selected.
- End Time
-
Specifies the end time for the execution of the process flow using 24-hour time. This option is available if Specify End Date is selected.
- Days of the Week
-
Specifies the day of the week on which the process flow will be executed. This option is only available if the schedule type is set to Recurring or Multi-Day.
- Days of the Month
-
Specifies the day of the month on which the process flow will be executed. This option is only available if the schedule type is set to Recurring or Multi-Day.
- Intraday Start
-
Specifies the beginning of the daily time span of the process flow using 24-hour time. This option is only available if the schedule type is set to Recurring and the interval type is set to time, such as Minutes.
- Intraday End
-
Specifies the end of the daily time span of the process flow using 24-hour time. This option is only available if the schedule type is set to Recurring and the interval type is set to time, such as Minutes.
- Run on Holidays
-
Specifies the option to execute the process flow on desired holidays.
The following options are available:
- Skip. Excludes run on desired holidays.
- Only. Only run on desired holidays.
This option is only available if the schedule type is set to Recurring or Multi-Day.
- Click
Set.
A confirmation dialog box opens.
- Click OK.
Procedure: How to View Scheduled Reports
To view the details of a scheduled report:
- Expand the Reports folder on the tree in the navigation pane.
- Right-click the desired report in the tree, point to Schedule and E-Mail, and click List job.
The Scheduled jobs pane for the selected report opens, as shown in the following image.

If you right-click a drill-down item in a column, the following options are available:
- Job name Column
-
- Filters. Opens the Report filter pane for that enables you to update the filters for the selected report.
- View Reports. Opens a pane that shows when the scheduled report was run. If you right-click an item in the list, the following options
are available:
- View. Opens the report.
- Download. Saves the selected report to your Downloads folder. In Windows, the default location of this folder is C:\users\username\Downloads.
- Delete. Deletes the selected item.
- Schedule Column
-
- Manage Schedule. Opens the Manage Schedule and E-Mail for procedure pane.
Procedure: How to Delete Scheduled Reports
To delete a report that has been scheduled to run:
- Expand the Reports folder on the tree in the navigation pane.
- Right-click the desired report in the tree, point to Schedule and E-Mail, and click Delete job.
The Delete Scheduled Reports pane for the selected report opens.
- Select the scheduled jobs you want to delete by selecting the checkbox next to its name. To select all listed reports, select the checkbox in the header.
- Click Delete.
| WebFOCUS | |
|
Feedback |