Facilitating Report Manipulation
|
Topics: |
Normally, a web server returns an entire report to a browser. The browser waits until it receives all of the report before displaying it.
On-demand paging allows you to download one page of a report that is up to 99999 pages long to a browser instead of downloading the entire report at once. The web server holds the remaining pages until the user requests them. This feature shortens the time the user waits to see the first page of a report. It is especially effective for long reports.
On-demand paging is implemented in the WebFOCUS Viewer. It requires that report output be formatted as HTML, which is the default setting for a request submitted through the WebFOCUS Client.
The following is a report displayed in the WebFOCUS Viewer.
Navigating a Report With the Viewer
|
How to: |
When you run a report designated for On-Demand Paging, the Viewer opens automatically and displays the first page of the report. The Viewer consists of two panes: the Report Pane and the Viewer Control Panel, as shown in the following image.
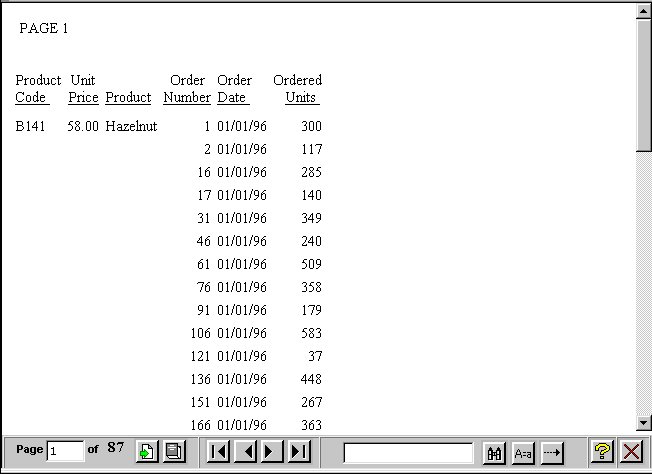
The Report Pane is the larger pane and contains one page of report output. When you first run a report, the Report Pane contains the first page of report output. The Viewer Control Panel contains the controls that allow you to display specific pages, deliver the entire report to your web server, and search your document for particular strings of information.
Syntax: How to Enable the Viewer
SET WEBVIEWER = {OFF|ON}or
ON TABLE SET WEBVIEWER {OFF|ON}where:
- OFF
-
Disables on-demand paging. downloads the entire report to a standard browser window. OFF is the default value.
- ON
-
Enables on-demand paging. downloads the first page of a report to the browser in the Viewer. The number of lines displayed at one time depends on Windows desktop settings (resolution).
Example: Enabling the Viewer
The procedure and launch page for this example are run in . They must be tested and run in this environment.
- Create a procedure
named ONDEMAND, which displays an order report for a store in the
Viewer.
Procedure:
SET WEBVIEWER=ON
TABLE FILE CENTORD
PRINT ORDER_NUM ORDER_DATE
BY STORE_CODE
WHERE STORE_CODE EQ '1003DC'
ON TABLE SET PAGE-NUM OFF
ON TABLE SET STYLE *
TYPE=REPORT, GRID=OFF,$
ENDSTYLE
END
- Create a launch page from which a user can run the report.
- Run the launch page,
and click the link. The report displays in the Viewer.
Opening and Closing the Viewer
|
How to: |
|
Reference: |
You can specify a target frame in which to open the Viewer, and a home page that displays when you close the Viewer.
Syntax: How to Open the Viewer in a Target Frame
SET WEBVIEWTARG = {target_frame|OFF}
where:
- target_frame
-
Is the name of an existing frame in the browser or one of the following reserved HTML target frames:
- _blank
-
Opens the Viewer in a new browser window. This is the default for reports that do not have accessibility enabled.
- _self
-
Opens the Viewer in the same frame as the anchor.
- _parent
-
Opens the Viewer in the immediate parent frame that contains the anchor.
- _top
-
Opens the Viewer in the current browser window.
- OFF
-
Opens the Viewer in the frame from which you ran the report. This is the default for reports that have accessibility enabled.
Note: For more information on enabling accessibility, see ACCESSIBLE.
Syntax: How to Display a Home Page When You Close the Viewer
SET WEBVIEWHOME = {home_URL|OFF}
where:
- home_URL
-
Is a valid URL that displays an HTML page when you close the Viewer.
- OFF
-
Displays a blank browser window when you close the Viewer. You must enter another URL to run another report. OFF is the default value.
Reference: Closing the Viewer
The Close button, located on the Control Frame, closes the Viewer and removes the report from the web server. The page the browser displays next depends on the WEBVIEWTARG and the WEBVIEWHOME settings, as follows:
- If you set WEBVIEWTARG to _blank, the window that contained the Viewer is removed. The browser does not display any page in any frame, and the WEBVIEWHOME setting has no effect.
- If you set
WEBVIEWTARG to any other value, the result of clicking Close depends
on the WEBVIEWHOME setting:
- If you set WEBVIEWHOME to a URL, the browser displays the page associated with the URL in the frame that the Viewer occupied.
- If you set WEBVIEWHOME to OFF, the browser displays a blank page.
Controlling Button Display on the Viewer
|
How to: |
You can issue commands that specify whether the Viewer displays the Close, Help, and All Pages buttons.
Syntax: How to Control Whether The Close Button Displays
SET WEBVIEWCLOSE = {OFF|ON}
or
ON TABLE SET WEBVIEWCLOSE {OFF|ON}
where:
- ON
-
Displays the Close button. ON is the default value.
- OFF
-
Does not display the Close button.
Syntax: How to Control Whether The Help Button Displays
SET WEBVIEWHELP = {OFF|ON}
or
ON TABLE SET WEBVIEWHELP {OFF|ON}
where:
- ON
-
Displays the Help button. ON is the default value.
- OFF
-
Does not display the Help button.
Syntax: How to Control Whether The All Pages Button Displays
SET WEBVIEWALLPG = {OFF|ON}
or
ON TABLE SET WEBVIEWALLPG {OFF|ON}
where:
- ON
-
Displays the All Pages button. ON is the default value.
- OFF
-
Does not display the All Pages button.
Procedure: How to Enable the Goto Last Page Button
- From Internet Explorer, click the Tools menu and select Internet Options.
- The Internet Options dialog box opens.
- From the
Temporary Internet files box, click Settings.
The Settings dialog box opens.
- Click the Every visit to the page radio button.
- Click OK to apply the change and exit the Settings dialog box.
- Click OK to exit the Internet Options dialog box.
Using the Viewer Control Panel
|
Topics: |
|
How to: |
The Viewer Control Panel, as shown in the following image, (located at the bottom of the window) contains the controls you use to navigate through the report and to search for a string in the report. The Viewer Control Panel navigational controls allow you to display the next or previous page, the first or last page, or a specific page. You use the searching function to have the Viewer locate a search string you specify within all report pages.

Note: When specifying a search string, you must specify the actual number of spaces between characters because HTML displays a single space, even when multiple spaces are used between characters.
Procedure: How to Navigate Through a Report
The Viewer Control Panel offers several ways to view pages in your report:
- To display a specific
page:
- Enter a page number
in the Page input box, as shown in the following image.

- Click Go to Page,
as shown in the following image.

- Enter a page number
in the Page input box, as shown in the following image.
- To display the previous
or the next page in sequence, click Previous or Next,
as shown in the following image.

- To
display the first or last page of the report, click First
Page or Last Page, as shown in
the following image.

- To download the entire
report to the browser as a single document, click All
Pages, as shown in the following image.

- To close the Viewer, click Close, as shown in the following
image.

Searching a Report
|
How to: |
The Viewer Control Panel contains controls that offer several ways to search your report. Using the Viewer search controls, you can select a string of information, such as a phrase that occurs in your report or a group of numbers, and search for each occurrence of that string. You can further customize your search by matching capitalization of words exactly (a case-sensitive search) or by controlling the direction of your search (either forward or backward from your starting point in the report). Use these controls to search your report:
- To perform a case-sensitive
search, click Match Case, as shown in the
following image.

- To search backward
in a report, click Search Backward, as shown
in the following image.

- To locate a specific
string, type the string you want to search for and click Find,
as shown in the following image.

Procedure: How to Search the Report
- Enter the string in the Search input box.
- Click Match Case if
you want to perform a case-sensitive search.
Notice that the Viewer displays the Match Case button with a red line across it to indicate that it is active.
- To begin
your search, click:
- Search
Backward to search for the string from the current page
back to the first page.
Or
- Find to search from the current page to the end of your report.
The Viewer searches the report, underlines the first occurrence of the string, and opens the display to the top of the page on which it appears. If the underlined occurrence of the string is not visible, scroll down the page until it appears in the window of the Viewer.
- Search
Backward to search for the string from the current page
back to the first page.
- Click Find again to search for another occurrence of the string.
Example: Using the Viewer Control Panel to Search
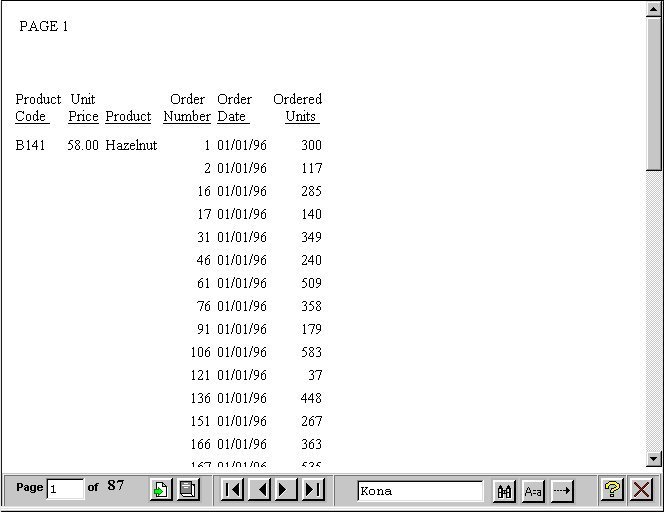
You want to use the Viewer Control Panel to navigate a long report called Coffee Sales to find occurrences of the string "Kona," a type of coffee that you sell. After you run the report, displays the first page of the report in the Viewer.
- To search for sales
of Kona, type Kona in the input box and click Find,
as shown in the following image.
The Viewer returns your report with the first occurrence of your search string underlined, as shown in the following image.
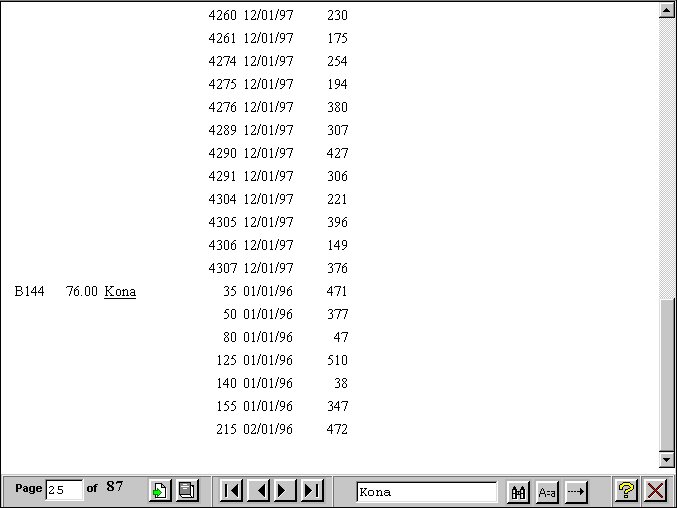
- Click Find again to locate the next occurrence of Kona.
Printing With On-Demand Paging
|
How to: |
You must clear the browser cache before printing a report locally using the Print button on the browser toolbar. You must also activate the window by clicking it before using the Print button.
Use the procedure that applies to your browser to clear the cache.
Procedure: How to Clear the Cache in Microsoft Internet Explorer
- Select Internet Options from the Tools menu.
- On the General tab, for Temporary Internet Files, select Delete Files.
| WebFOCUS | |
|
Feedback |