Configuring Security and Authentication Settings
|
How to: |
WebFOCUS enables you to configure security and authentication settings for WebFOCUS Open Portal Services through the WebFOCUS Administration Console.
The ops286.war and opsgw.war files are located in the following folder of your WebFOCUS installation:
<drive>:\ibi\WebFOCUS82\webapps
Note: Security and authentication configuration settings for WebFOCUS Open Portal Services are stored in the securitysettings-portlet.xml file, which is located in the following folder of your WebFOCUS installation:
<drive>:\ibi\WebFOCUS82\config\securitysettings-portlet.xml
Procedure: How to Enable IP Address Access
To enable IP address access using the WebFOCUS Administration Console:
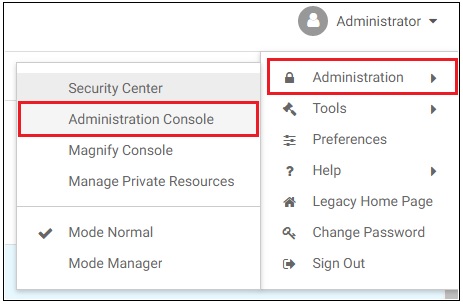
- Access the WebFOCUS Administration Console from the WebFOCUS Home page, as shown in the following image.
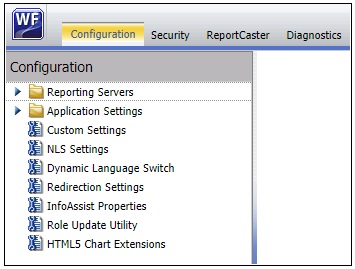
The WebFOCUS Administration Console opens, as shown in the following image.
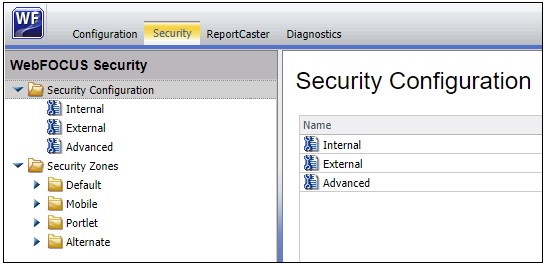
- Click the Security tab, as shown in the following image.
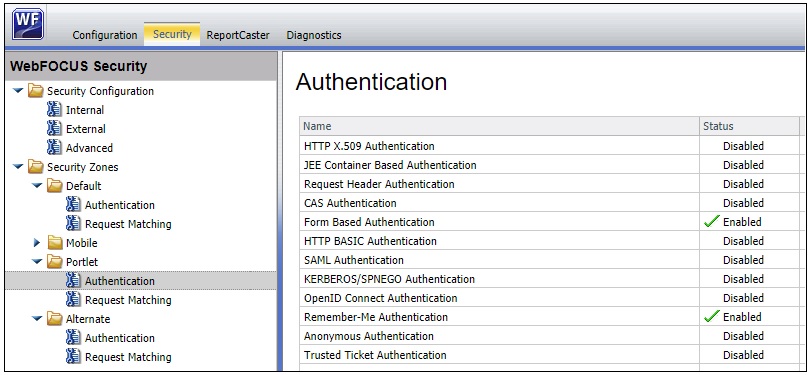
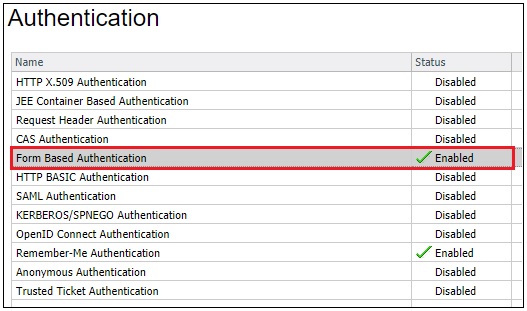
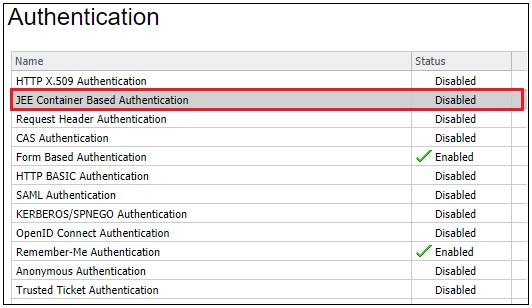
- In the left pane, expand Security Zones, Portlet, and then select Authentication, as shown in the following image.
- Double-click Form Based Authentication, as shown in the following image.
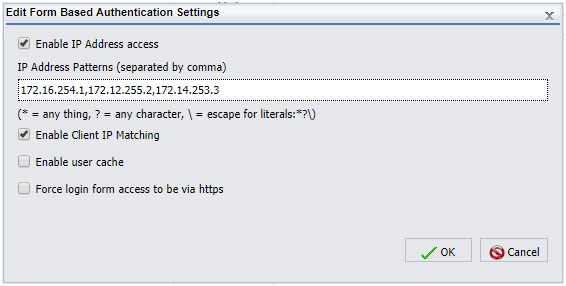
The Edit Form Based Authentication Settings dialog opens, as shown in the following image.
Perform the following steps:
- Select the Enable IP Address access checkbox.
- In the IP Address Patterns field, specify the IP address or addresses for which you want to allow access (validated connections).
Use a comma character (,) if you are specifying multiple IP addresses.
- Click OK.
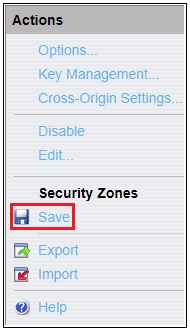
- Click Save in the right pane, as shown in the following image.
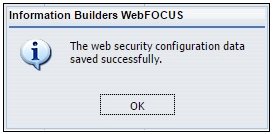
A message dialog displays indicating that the configuration was saved successfully, as shown in the following image.
- Click OK.
A message dialog displays indicating that you must reload your web application to implement your new changes, as shown in the following image.
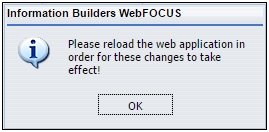
- Click OK.
- Reload (restart) your web application.
Procedure: How to Strip the Domain Prefix and Suffix From a User ID
If you are using Windows authentication to connect to your portal environment (for example, as user IBI\john_smith), then you can enable the setting described in this procedure to strip the domain prefix and suffix from a user ID.
Note: You must define your Managed Reporting user ID (mr_user_id) in the basedir directory as WINDOWS_DOMAIN\mr_user_id.
Trimming a Prefix
When enabled, this setting strips the Windows ID, and the portal user is logged in to Managed Reporting as mr_user_id. When disabled (default), the Windows ID is not stripped, and the portal user is logged in as WINDOWS_DOMAIN\mr_user_id.
Trimming a Suffix
If the portal environment you are accessing uses an authentication provider that separates a user ID (prefix) from a domain (suffix) with the “@” character (for example, mr_user_id@abc.com), then you must enable the setting described in this procedure. In this case, the suffix after the “@” character is trimmed, and the portal user is logged in as mr_user_id.
To strip the domain prefix and suffix from a user ID using the WebFOCUS Administration Console:
- Access the Security tab in the WebFOCUS Administration Console as described in Steps 1 to 3 in How to Enable IP Address Access.
- Double-click JEE Container Based Authentication, as shown in the following image.
The Edit JEE Container Based Authentication Settings dialog opens, as shown in the following image.
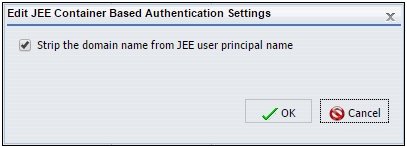
- Select the Strip the domain name from JEE user principal name checkbox.
- Click OK.
- Click Save in the right pane, as shown in the following image.
A message dialog displays indicating that the configuration was saved successfully, as shown in the following image.
- Click OK.
A message dialog displays indicating that you must reload your web application to implement your new changes, as shown in the following image.
- Click OK.
- Reload (restart) your web application.
| WebFOCUS | |
|
Feedback |