Creating an Active Technologies Report
|
Topics: |
|
How to: |
An active report is a self-contained report that is designed for offline analysis.
Procedure: How to Create an Active Technologies Report
With in Report mode, you can perform this procedure in Query Design view or Live Preview.
- On the status bar, in the Output Types menu, click active report or active PDF.
- Populate
the report with your data in one of the following ways:
- Drag the dimension fields and measure fields onto the canvas.
- Drag the dimension fields and measure fields into the appropriate field containers in the Query pane.
Active Technologies Report Menu Options
Menu options for an active report are described in the following table.
- Send as E-mail
- Save Changes
- Export to XML (Excel) when active cache is disabled
|
Option |
Definition |
|---|---|
|
Sort Ascending |
Sorts the column in ascending order. |
|
Sort Descending |
Sorts the column in descending order. |
|
Filter |
Filters the data. Options are:
|
|
Calculate |
Calculation types that you can apply to the column:
For numeric fields, you can also apply:
|
|
Chart |
Creates an active chart from the report. Options are Pie, Line, Column, and Scatter. |
|
Rollup |
Lists the fields available to create a table. |
|
Pivot (Cross Tab) |
Lists the fields available to create a Pivot table. |
|
Visualize |
Adds visualization bars to, or removes them from, the selected column. The Visualize option is available for numeric data columns. |
|
Hide Column |
Suppresses the display of the selected column in the report. |
|
Show Columns |
Lists the names of the columns that are hidden in the report, allowing you to individually restore a column. Select the name of a specific column in the hidden columns list to restore that column to the report. |
|
Freeze Column |
Freezes the report at a particular point so that columns to the left of the freeze point remain in view while the user scrolls through the other report columns. Note: If the report can be fully viewed in the browser window, freeze is not applied. The Freeze column option is not available for expandable report (Accordion) views. |
|
Unfreeze All |
Unfreezes the columns. |
|
Grid Tool |
Opens the Grid Tool, which you can use to change the column order, select multiple columns to sort ascending or descending, hide and show columns, add a calculation result to a column, and add subtotals to the active report. |
|
Chart/Rollup Tool |
Opens the Chart/Rollup Tool, which you can use to select multiple group fields to generate the chart or rollup table. The Chart/Rollup Tool contains a list of columns available in the active report to add to Group By and Measure fields. Drag the columns into the field that you want. |
|
Pivot Tool |
Opens the Pivot Tool, which you can use to select multiple group fields to generate the chart or pivot table. The Pivot Tool contains a list of columns available in the active report to add to Group By, Across, and Measure fields. Drag the columns into the field that you want. |
|
Show Records |
Opens the Show Records menu option to list the number of records available for display per page in the report. Select a number (for example, 10) to display, per page. Default displays the number of records (lines) per page that is specified in the WebFOCUS report procedure. |
|
Comments |
Options to display comments under cells or hide indicators for comments in the active report output. |
|
Send as E-mail |
Enables you to save the current state of the active report and send the report as email. Note: To use this feature, you must have ActiveX enabled in your browser security settings. This feature is only supported in Internet Explorer. |
|
Save Changes |
Saves the current state of the active report. When you save an active report using the browser Save as option, the report is saved in its original default state. In the browser Save as dialog box, we recommend that you select the Webpage, HTML Only save option to ensure that the page is saved properly. Note: To use this feature, you must have ActiveX enabled in your browser security settings. This feature is only supported in Internet Explorer. |
|
Export |
When active cache is enabled, exports all records or filtered only records to HTML, CSV, Excel, or PDF. Note: active cache is enabled on an active report when you click Pages On Demand on the Format tab, in the Navigation group. When active cache is disabled, exports all records or filtered only records to HTML, CSV, or XML (Excel). To use this feature, you must enable ActiveX in your browser security settings. |
|
|
Prints all records or filtered only records. |
|
Window |
Displays reports in a cascade or separate tabs. |
|
Restore Original |
Restores the active report to the default state specified in the report procedure. |
Active Technologies Cell Menu Options
|
Option |
Definition |
|---|---|
|
Drill down |
Enables you to drill down one level in the hierarchy of your data source. This option displays for reports that have Auto Drill enabled. |
|
Drill up |
Enables you to drill up one level in the hierarchy of your data source. This option displays for reports that have Auto Drill enabled. |
|
Restore Original |
Restores the active report to the default state specified in the report procedure. |
|
Auto Links |
Displays a list of target reports that are linked to the Auto Link enabled report. This option displays for reports that have Auto Linking enabled. |
|
Comments |
Enables you to add comments about data in your report. The result is an annotation that displays when you hover over it at run time. |
|
Highlight Value |
Enables you to highlight a particular value in your report. |
|
Highlight Row |
Applies highlighting to the selected row in your report. |
|
Unhighlight All |
Removes any applied highlighting from values or rows in your report. |
|
Filter Cell |
Enables you to filter the output, showing only a selected row of data. |
|
Remove Cell Filter |
Removes any applied cell filters. |
Configuring Active Technologies Report Options
|
Topics: |
You can configure active report options, including menu options, based on user role, through the active report options dialog box.
You can access the dialog box on the Format tab, in the Features group, by clicking the active report options button. The button is available when active report or active PDF is selected as the output type.
The active report options dialog box contains the following tabs:
- General
- Menu Options
- Colors
- Advanced
General Tab
Use the General tab to set common properties specific to active reports.
The General tab contains the following options:
Display. This area contains options to set the window to cascade or tabs, and options to freeze columns.
- Window. Select the window setting. The options are Cascade and Tabs.
- Freeze Columns. Select the columns you would like to freeze. You can also select None.
Page Options. This area contains options to set the number of records per page, enable the display of page information, edit the alignment, and set the location of the page information.
- Records Per Page. Select or type the number of records that you would like to display per page. The default value is 57.
- Display Page Information. Select this option to display page navigation information. Clear this option to disable the display of page navigation information.
- Alignment. Click the appropriate button to set the alignment of the page navigation information. Options are Left, Center, and Right.
- Location. Select the location for the page navigation information. The options are Top Row and Bottom Row.
Chart Options. This area contains options that pertain to charts when the output format is active PDF.
Note: Chart Options do not display when the output format is active report.
- Legend (check box). Select this option to collapse the legend if necessary. Clear this option if you do not want the legend to collapse.
- Legend (menu). Select
the location for the legend. The choices are:
- Bottom Left
- Bottom Center
- Bottom Right
Menu Options Tab
Use the Menu Options tab to select a user type and which options to display in the menu.
The Menu Options tab contains the following options:
- User Type. The
options are Power, Analyst, Basic, and Custom.
- Power. This is the default user type. It enables all functionality.
- Analyst. This user type has the following functionality: Show Records, Freeze, Hide/Unhide, Export, Sorting, Pivot, Filter, Calculations, Chart, Visualize, Restore Original, Save Changes, and Accordion.
- Basic. This user type has the following functionality: Show Records, Freeze, Hide/Unhide, Sorting, Filter, Calculations, Visualize, and Restore Original.
- Custom. If you select a combination of options that does not match one of the existing user types (Power, Analyst, Basic), the User level name that appears in the User Type field is Custom. This is not a default user type or a selectable user type. It indicates that options for this user do not match any of the existing user types.
The options available according to user type include the following:
- Show Records. Shows all records or specific numbers of records.
- Freeze. Freezes and unfreezes columns.
- Hide/Unhide. Hides and shows columns.
- Export. Exports data to HTML, CSV, Excel, or PDF if active cache is enabled, or to HTML, CSV, or XML (Excel) if active cache is disabled.
- Sorting. Sorts data in ascending or descending order.
- Pivot. Lists the fields available to create a Pivot table.
- Window Type. Shows windows as cascade or tabs.
- Send as Email. Enables you to save the current changes and send a report as email.
- Print. Prints all records or filtered-only records.
- Advanced Tools. Accesses the Chart/Rollup, Pivot, and Grid Tools.
- Filter. Opens the Filter Selection dialog box.
- Calculations. Performs the following calculations: Sum, Avg, Min, Max, Count, Distinct, % of Total.
- Chart. Converts a report to a pie, line, bar, or scatter chart.
- Visualize. Adds data visualization bars to a report.
- Rollup. Performs rollup on data.
- Comments. Adds comments.
- Restore Original. Restores the active report to the default state specified in the report procedure.
- Save Changes. Saves the current changes.
- Accordion. Produces accordion reports.
- Grid Tool. Opens the Grid Tool dialog box.
Colors Tab
Use the Colors tab to select colors for various objects on the report.
The Colors tab contains the following options:
Page. This area contains options to set the colors for the font and background of the page text.
- Font. Opens the Color dialog box, where you can select the font color.
- Background. Opens the Color dialog box, where you can select the background color for the page text.
Row Selection. This area contains options to set the colors that appear when you point to or select a row on the report.
- Hover. Opens the Color dialog box, where you can select the color that the row becomes when you hold the mouse over the row.
- Selected. Opens the Color dialog box, where you can select the highlight color that the row becomes when you use the highlight option.
Visual. This area contains options to set the colors for the data visualization bars.
- Positive. Opens the Color dialog box, where you can select the color for a data visualization bar that represents a positive number.
- Negative. Opens the Color dialog box, where you can select the color for a data visualization bar that represents a negative number.
Calculations. This area contains options to set the colors for values in a calculation.
- Font. Opens the Color dialog box, where you can select the font color for the calculation.
- Background. Opens the Color dialog box, where you can select the background color for the calculation.
Menu. This area contains options to change the color of the menu.
- Normal
- Font. Opens the Color dialog box, where you can select the color for the text of the options on the column menus.
- Background. Opens the Color dialog box, where you can select the background color for the column menus.
- Border. Opens the Color dialog box, where you can select the color for the border of the column menus.
- Hover
- Font. Opens the Color dialog box, where you can select the color for the text of the options on the column menus when you point to them.
- Background. Opens the Color dialog box, where you can select the background color that appears behind options on the column menus when you point to them.
Advanced Tab
Use the Advanced tab to control the number of rows retrieved from active cache and to add security settings.
Note: active cache is enabled when you select active report as the output type, and click Pages On Demand on the Format tab, in the Navigation group.
The Advanced tab contains the following options:
active cache. Enables a report to cache the data in a binary file and return the data to the output window in pre-set increments.
- Rows Retrieved. Select the number of rows retrieved in the output. The default value is 100.
Security. This area allows you to set a password to access the report and enable expiration by date or by days. This option is only available for the active report output.
Note: When setting security options for active reports, be aware that security options can be set for each individual component on the canvas, but only one password can be set for the entire document.
Freezing Column Headings in Active Reports
|
How to: |
When working with In-Document Analytics (Active Technologies) reports, you can freeze column headings. The Freeze option in the GUI tools allows you to define a scroll area within the data of your report and lock the column heading titles in place, enabling you to scroll through the data within the container. Report headings, footings, and grand totals are also locked, so that these also stay in view while you scroll the data in your report. This is particularly useful when you are creating a large report, for which there may be multiple pages.
When you enable the column title freeze feature and run your report, a thin scroll bar displays to the right side of the report, as shown in the following image.
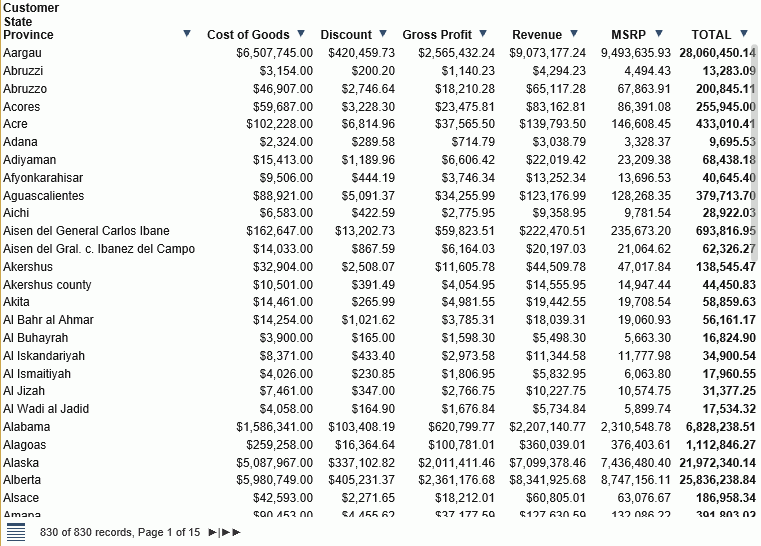
When you mouse over the thin scroll bar, it turns into a full scroll bar, making it easier to scroll through your report data. This scroll bar is shown in the following image.
If your report has more columns than can fit in the output container, you can employ the horizontal scroll bar at the bottom of your report.
Note: Scroll bars do not display if there is no scrollable data. Thus, if the data displayed fits the size of the container, scroll bars do not display.
You can enable the column heading freeze feature for In-Document Analytics reports in the GUI tools using the Freeze button on the Format tab of the ribbon, in the Navigation group. Enabling the Freeze option will add HFREEZE=ON in the stylesheet section of the report procedure, as shown in the following example.
ENGINE INT CACHE SET ON
SET PAGE-NUM=NOLEAD
SET SQUEEZE=ON
-DEFAULTH &WF_HTMLENCODE=ON;
SET HTMLENCODE=ON

SET HTMLCSS=ON
-DEFAULTH &WF_EMPTYREPORT=ON;
SET ARGRAPHENGINE=JSCHART
SET EMPTYREPORT=ON
SET EMBEDHEADING=ON
SET GRAPHDEFAULT=OFF

-DEFAULTH &WF_SUMMARY='Summary';
-DEFAULTH &WF_TITLE='WebFOCUS Report';
TABLE FILE wfretail82/wf_retail_lite
SUM WF_RETAIL_LITE.WF_RETAIL_SALES.COGS_US
WF_RETAIL_LITE.WF_RETAIL_SALES.DISCOUNT_US
WF_RETAIL_LITE.WF_RETAIL_SALES.GROSS_PROFIT_US
WF_RETAIL_LITE.WF_RETAIL_SALES.REVENUE_US
WF_RETAIL_LITE.WF_RETAIL_SALES.MSRP_US
BY WF_RETAIL_LITE.WF_RETAIL_GEOGRAPHY_CUSTOMER.STATE_PROV_NAME
ON TABLE PCHOLD FORMAT AHTML
ON TABLE ROW-TOTAL
ON TABLE NOTOTAL
ON TABLE SET CACHELINES 100
ON TABLE SET AUTOFIT OFF
ON TABLE SET GRWIDTH 1
ON TABLE SET STYLE *
INCLUDE=IBFS:/FILE/IBI_HTML_DIR/ibi_themes/Warm.sty,$
TYPE=REPORT, TITLETEXT=&WF_TITLE.QUOTEDSTRING, SUMMARY=&WF_SUMMARY.QUOTEDSTRING, ARGRAPHENGINE=JSCHART, HFREEZE=ON, $
ENDSTYLE
END

-RUN
Once you have enabled the column heading freeze feature, you must run your report to view the report with scroll bars.
Procedure: How to Freeze Column Titles in Reports
You can freeze column headings in your In-Document Analytics (Active Technologies) reports.
- Open InfoAssist.
- Build your report.
- Set the output format to Active Report (AHTML).
- On the Format tab, in the Navigation group, click Freeze.
- Run the report to view the frozen column titles.
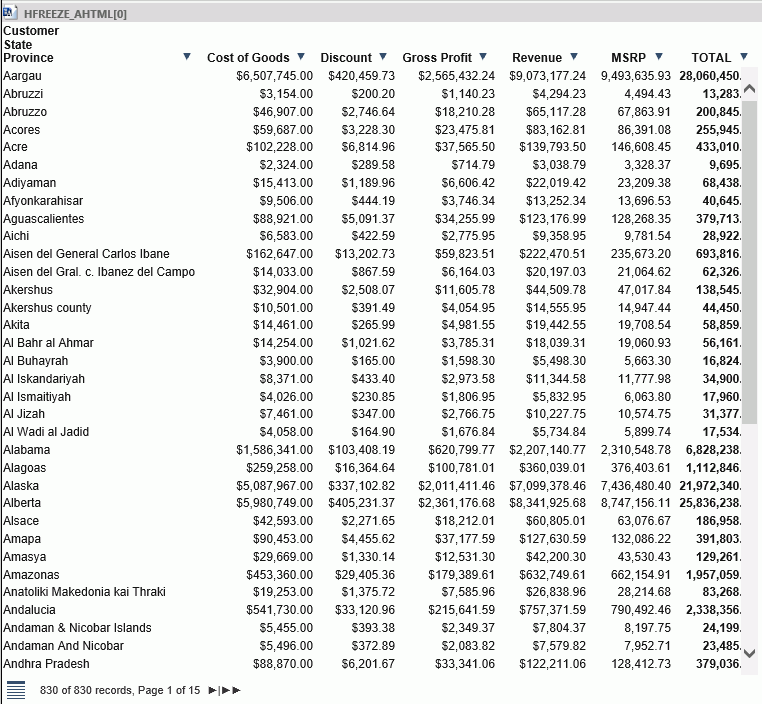
- A scroll bar displays, enabling you to scroll through your data, vertically, as shown in the following image.
Note: If you have numerous columns in your report, you can employ the horizontal scroll bar at the bottom of the report.
| WebFOCUS | |
|
Feedback |