Creating a Google Project
|
How to: |
A Google project must be available before you can configure the Google Analytics Adapter.
Procedure: How to Create a Google Project
- Enter the following URL in a web browser:
https://console.developers.google.com/project
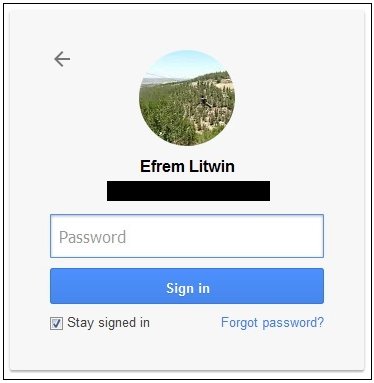
If you are not already signed into Google, a Sign in dialog for the Google Cloud Platform opens, as shown in the following image.

- Enter an email address for the Google account that has
administrative rights to the Google Analytics environment, and then
click Next.
- Enter a valid password for the Google account, and then
click Sign In.
The Projects screen opens, as shown in the following image.

- Click CREATE PROJECT.
The New Project screen opens, as shown in the following image.
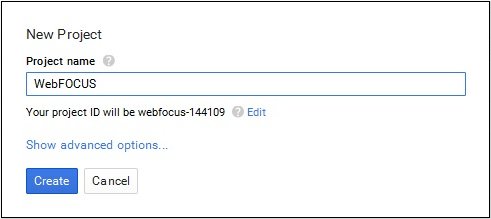
- Enter a name for your new project and then click Create.
The Library screen opens, as shown in the following image.
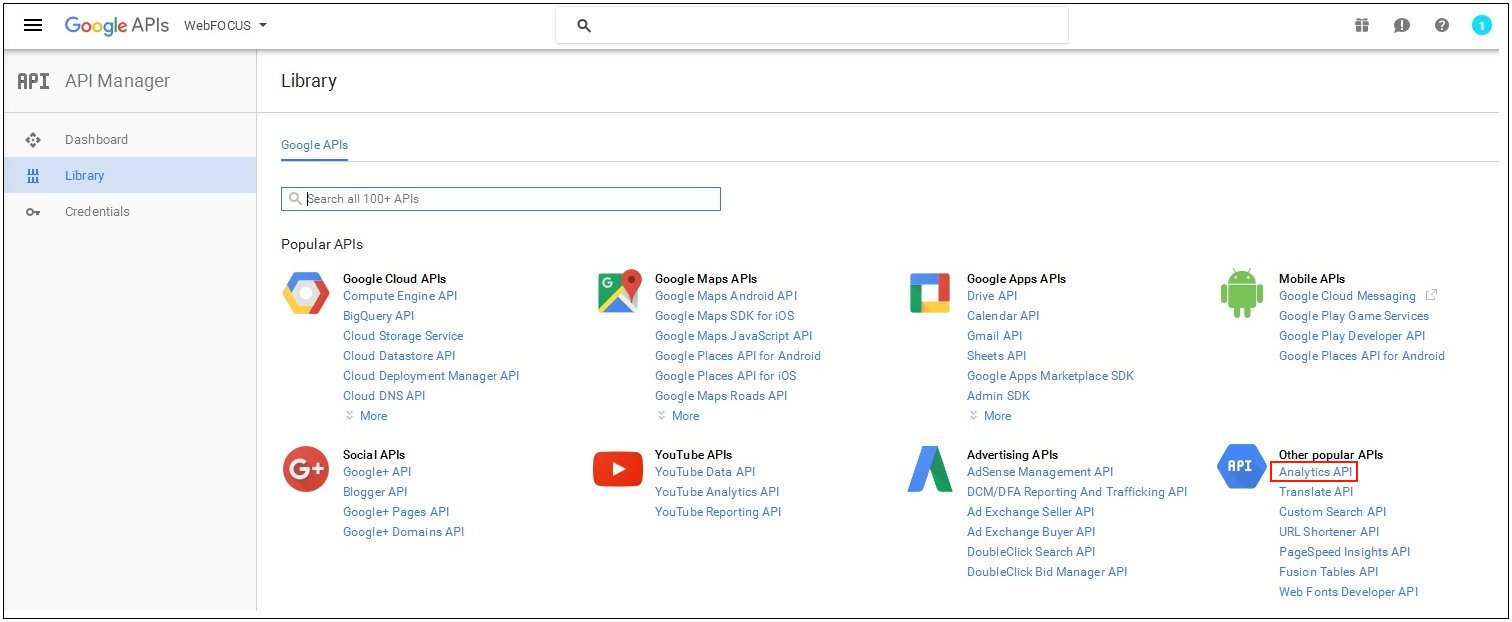
- Click Analytics API under the Other
popular APIs group.
The Analytics API screen opens, as shown in the following image.
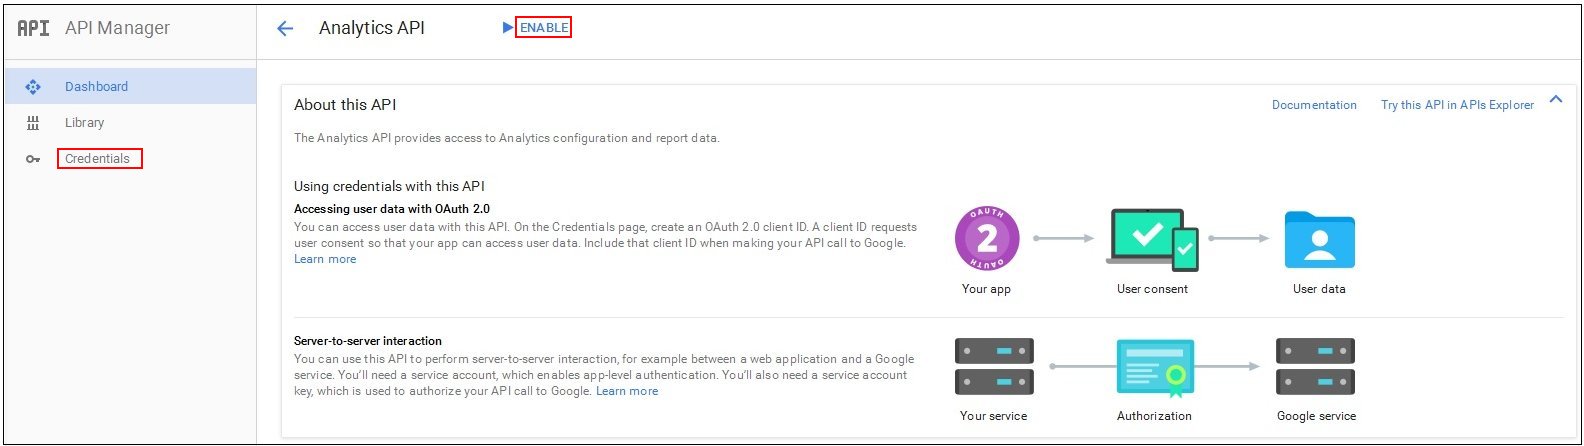
- Click ENABLE.
- Click Credentials in the left
pane.
The Credentials screen opens, as shown in the following image.
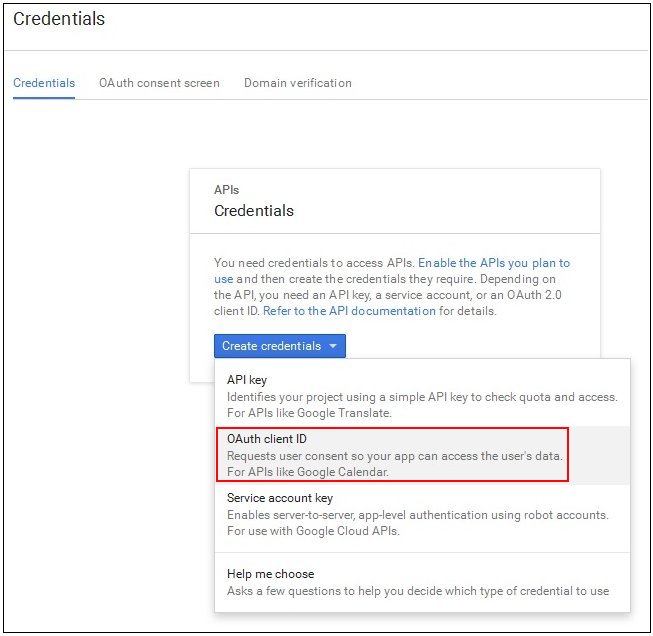
- Click the Create credentials drop-down
list and select OAuth client ID.
The Create client ID screen opens, as shown in the following image.
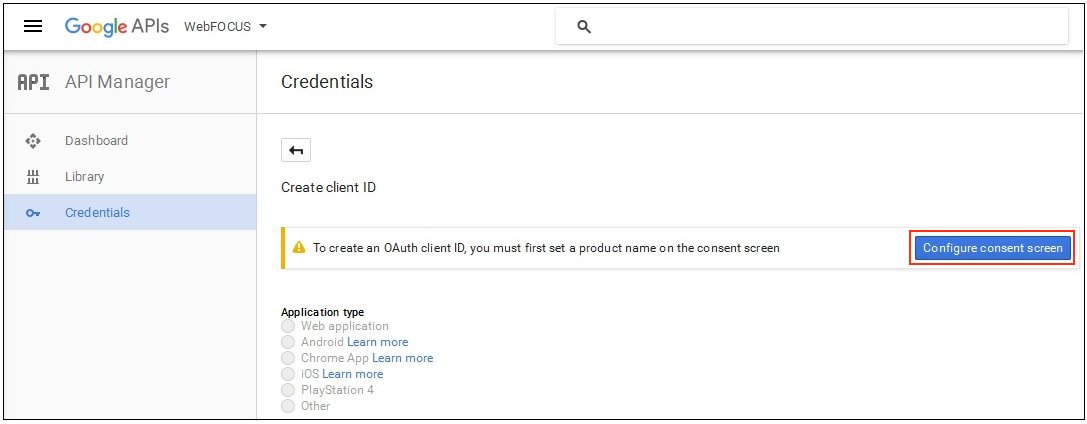
- Click Configure consent screen.
The OAuth consent screen opens, as shown in the following image.
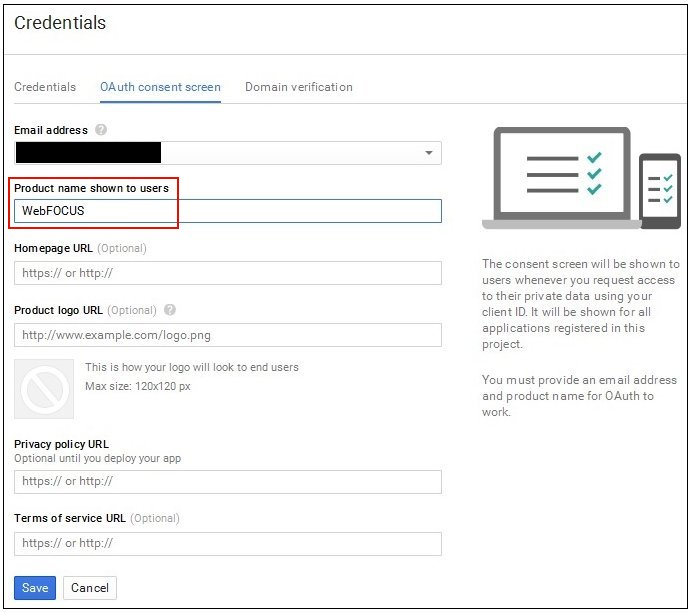
- Enter a value in the Product name shown to users field
and click Save.
The Application type screen opens, as shown in the following image.
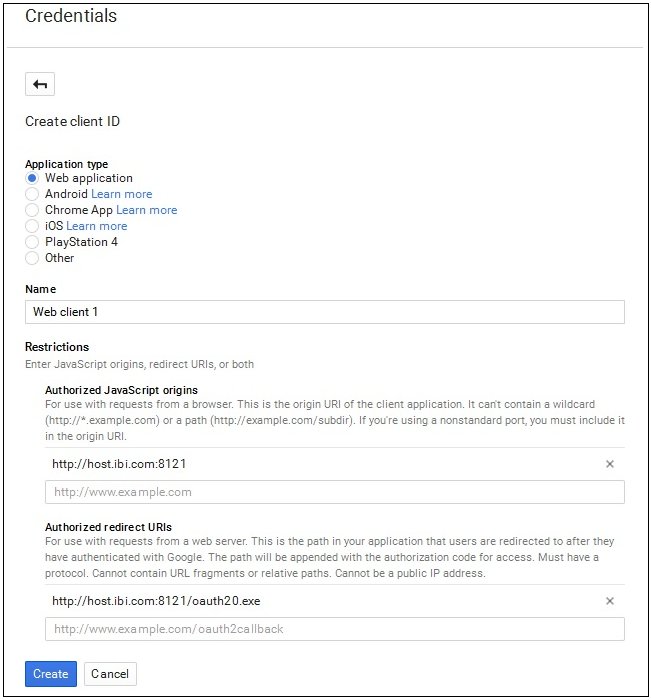
- Perform the following steps:
- Select Web application from the list of application types.
- Enter the host name and port used to access the WebFOCUS Reporting
Server Web Console in the Authorized JavaScript origins field.
For example:
http://host.ibi.com:8121
If the WebFOCUS Reporting Server is installed as a standalone server, then http://localhost should be specified as the value in the Authorized JavaScript origins field.
- Enter the host name and port used to access the WebFOCUS Reporting
Server Web Console with oauth20.exe in the Authorized redirect URIs field.
For example:
http://host.ibi.com:8121/oauth20.exe
If the WebFOCUS Reporting Server is installed as a standalone server, then http://localhost/oauth20.exe should be specified as the value in the Authorized redirect URIs field.
- Click Create.
The OAuth client screen opens, which displays your client ID and client secret values, as shown in the following image.
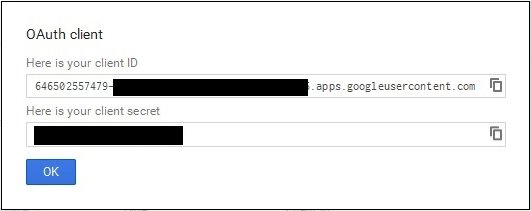
The client ID and client secret values are required to configure the Google Analytics Adapter.
- Click OK.
You are now ready to obtain the Web Profile ID for a website within the Google Analytics environment.
| WebFOCUS | |
|
Feedback |