Using Sample Data to Create and Schedule an Alert
A data-driven Alert is an event that is prompted by a guideline that you define. This guideline can vary from the simple to the complex. The following tutorial describes how to create a simple Alert that is triggered when the cost of goods exceeds the revenue for a brand. This type of Alert could help a company decide whether they should continue to carry a specific brand, based on the money loss throughout a given timeframe.
To follow this tutorial, you must have access to the WebFOCUS Retail sample data source.
Example: Creating and Scheduling an Alert
- Sign in to WebFOCUS as an administrator or developer.
- Launch WebFOCUS Alert Assist in one of the following ways:
- From the WebFOCUS Home Page, on the actions bar, click Alert
 . Proceed to step 5.
- From the Legacy Home Page, in the Resources tree, right-click the domain or folder where you want the alert to reside, point to New, and then click Alert.
The Tool Setup dialog box opens. It provides options for selecting a Reporting Server and Application Paths.
Note: User access to the Tool Setup dialog box to specify Reporting Server properties is controlled by a WebFOCUS security privilege. For information on WebFOCUS security privileges, see the WebFOCUS Security and Administration manual.
- From the WebFOCUS Home Page, on the actions bar, click Alert
- In the Tool Setup dialog box, select the server where
the sample data is loaded, and assign the Application where your
data resides.
Note: The Tool Setup dialog box is only available on the Legacy Home Page. On the WebFOCUS Home Page, you must set a Reporting Server and Application Paths on the folder level in the Properties prior to creating content.
- Click OK.
The Alert Assist tool opens in a new browser window, as shown in the following image.
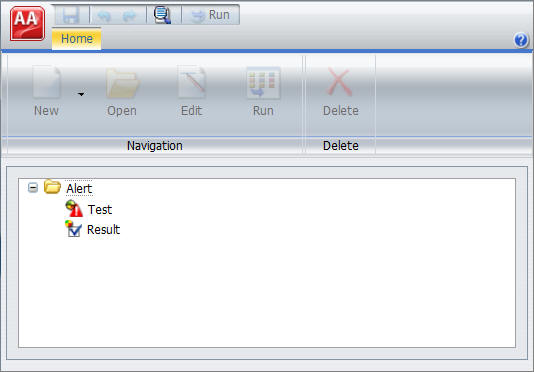
- Click the Test node.
- On the Home tab,
in the Navigation group, click New,
and then click WebFOCUS Test.
WebFOCUS opens.
- From the Open dialog box, choose the wf_retail Master file.
- Add the
following fields to your report:
- Product Category
- Brand
- Cost of Goods
- Revenue
Before you complete your report, you must add the Where condition that defines the criteria that you want to be met.
- On the Data tab,
in the Filter group, click Filter.
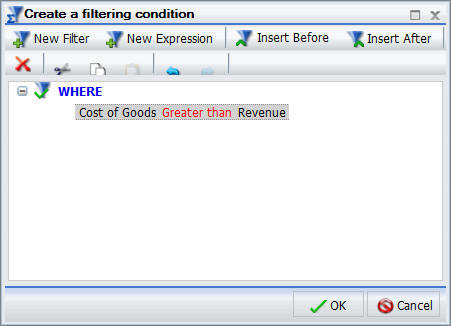
The Create a filtering condition dialog box opens.
- Double-click the Double-click or press F2
to edit! text.
The drop-down menus for Fields and Subqueries, Operators, and Values open.
- Make the following selections:
- In the Field drop-down menu, click Cost of Goods.
- In the Operators drop-down menu, click Greater than.
- In the Value drop-down menu, click Field, and then select Revenue.
The following image shows the finished Where condition.
- Click OK.
- Save your
report and close .
Your report now shows under the Test node in the Alert Assist browser window.
- Click the Result node.
On the Home tab, in the Navigation group, point
to New, click New Report,
and then click Report.
WebFOCUS opens.
Since your Alert Test is checking for revenue loss, in this tutorial you want the final report to have a field that highlights the loss. This field is not available by default. You can create it.
- From the Open dialog box, choose the wf_retail Master file.
- On the Data tab,
in the Calculation group, click Detail.
The Detail Field (Define) dialog box opens.
- In the Field input box, type Loss.
- In the expressions field, create the
following expression, as shown in the image below:
WF_RETAIL.WF_RETAIL_SALES.REVENUE_US -
WF_RETAIL.WF_RETAIL_SALES.COGS_US
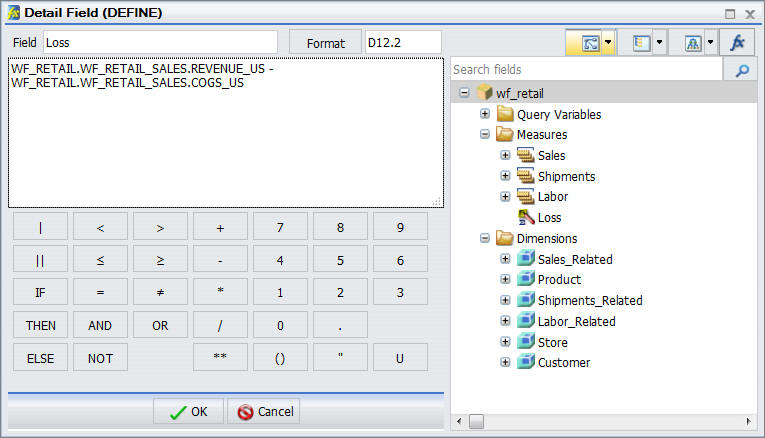
You can type the expression directly into the expression field or choose the fields from the data tree.
- Click OK.
The Data pane refreshes and now displays the new field, Loss.
- Add the
following fields to your report:
- Brand
- Quantity,Sold
- Loss
- Sale,Quarter
To ensure that the Alert Result generates the correct report when the test criteria is met, you must add the same Where condition as the one you added to the Alert Test.
- Repeat steps 8-11 to add the Where condition.
You can style the report that gets distributed by adding a header.
- On the Home tab,
in the Report group, click Header
& Footer, and then click Report Header.
The Header & Footer dialog box opens.
- Type Brand Revenue Loss 2015.
- Click OK, and close the Header & Footer window.
- Save your
report, and close .
Once both Test and Result are completed, you can save the Alert procedure.
- In the Alert
Assist browser window, click the Save button.
The Save As dialog box opens.
- In the Title
field, type Brand Revenue Loss Alerts, and
then click Save.
Your new Alert now displays in the Resources tree and can be scheduled.
You can schedule the report to be distributed through email, FTP server, report library, repository, or sent directly to a printer. In this tutorial, you want a monthly email to be sent.
- From the WebFOCUS Home Page or Legacy Home Page, right-click the Alert that you created, point to Schedule,
and then click Email.
The ReportCaster Basic Scheduling tool opens, as shown in the following image.
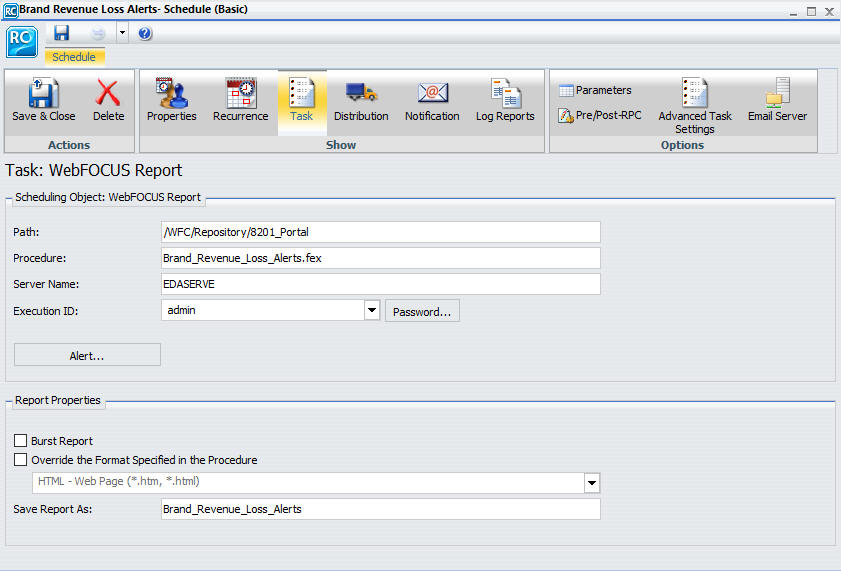
- Under the
Scheduling Object area, click Alert.
The Alert Options dialog box opens.
- Click Continue
After Alert and then click OK.
This means that the schedule continues to run at the specified time and distribute the report each time that the Alert test is true. Other options include Automatically Reset, Deactivate Schedule After Alert, and Delay. For more information about these options, see the ReportCaster Guide.
- Click Properties.
- In the Summary area, type This Alert procedure monitors the revenue loss by brand.
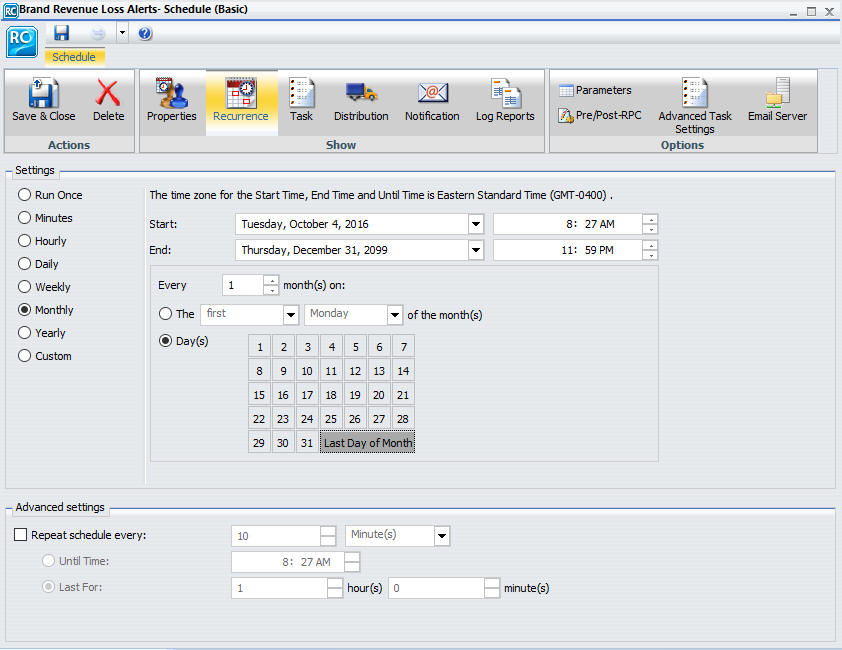
- Click Reoccurrence. In this example,
you want to schedule the Alert procedure to run monthly on the last
day of every month, as shown in the following image.
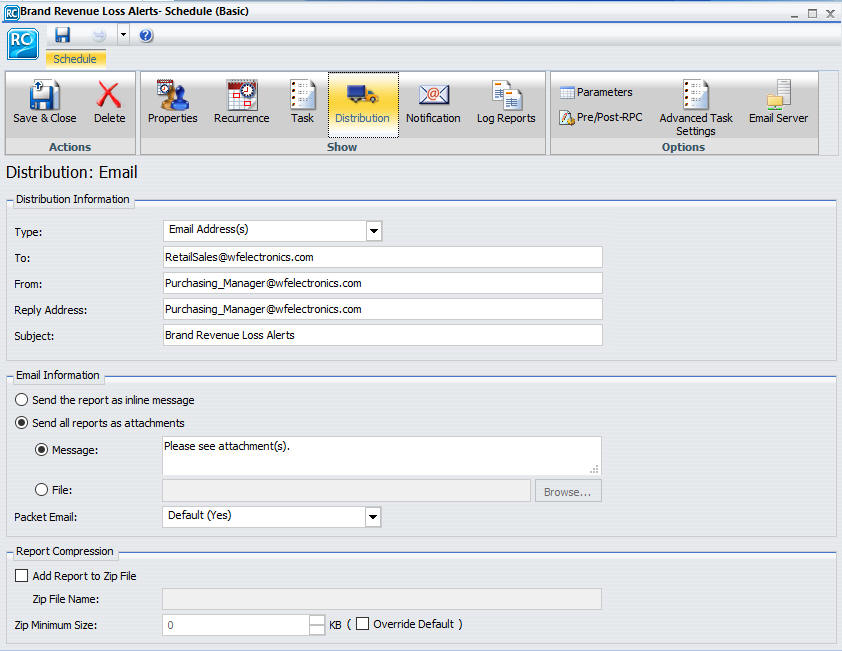
- Click Distribution.
- Complete
the To, From, and Reply Address fields with the email addresses.
In this tutorial, you can use your own email address to test the
Alert. In the Subject field, type Brand Revenue Loss
Alerts.
The following image shows an example of the Distribution tab.
Additionally, you can set notifications of the Alert distribution. Click Notification and fill in the fields, as required.
- Click Save.
The Save As dialog box opens.
- In the Title
field, type Brand Revenue Loss Alert Schedule and
click OK.
The Alert Schedule now displays in the Resources tree.
- Close the ReportCaster Basic Scheduling Tool.
- To test
the Alert, before it is scheduled to run, right-click the Alert Schedule,
and then click Run.
A prompt will ask you if you want to run the schedule.
- Click OK.
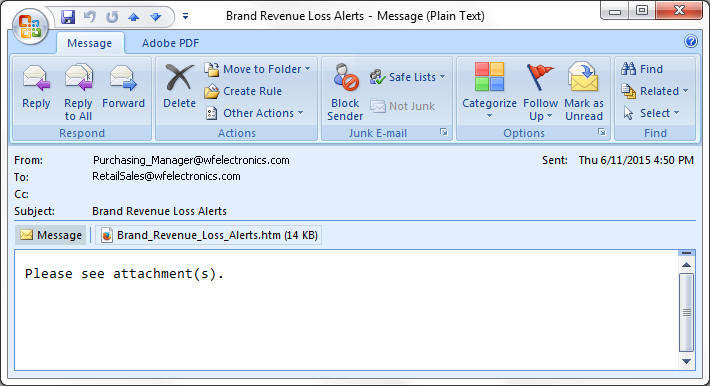
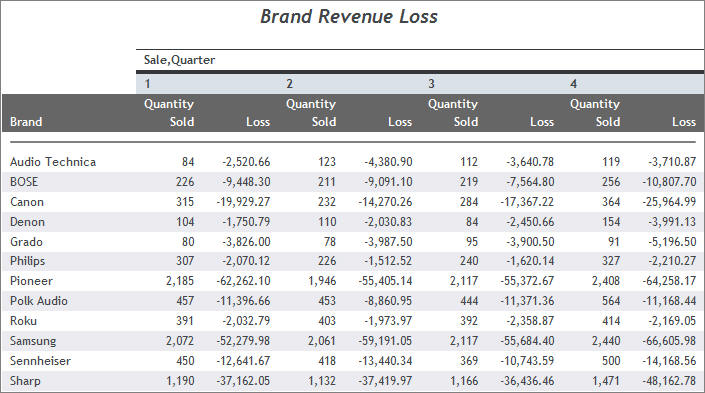
The email addresses that you identified earlier will receive the Alert Report, shortly.
The following images show examples of the Alert email and Alert report.
| WebFOCUS | |
|
Feedback |