Creating New Domains and Folders
|
How to: |
Your Home Page is the central location for all WebFOCUS tasks. Setting it up in a way that is convenient, secure, and efficient helps you get the most out of your work. The default view of the Home Page opens the content area, and provides access to the available domains. Domains and folders that are located in the Resources tree organize all of your content items. Authorized users can create additional domains or folders, as well as customize the default structure of their view.
Note: The full view of the resources, in which the servers are listed as folders, is only available from the Legacy Home Page. To access the full view, on the Legacy Home Page, right-click Domains, point to View, and then click Full View.
Procedure: How to Create a Domain
- In the Resources tree, click Domains.
- On the actions bar, click Domain, as shown in the following image.
The New Domain dialog box opens.
- From the Type drop-down list, click the type of a domain you want
to create.
The options include:
- Enterprise domain. Supports installations of WebFOCUS that affect a single enterprise and are organized by department, and content, within that enterprise.
- Tenant domain. Supports installations of WebFOCUS that affect multiple enterprises, and are organized by the tenant clients of a software as a service vendor.
- Type a Title for your domain.
The Name field populates with the same text as the Title, automatically. You can edit the Name at any time.
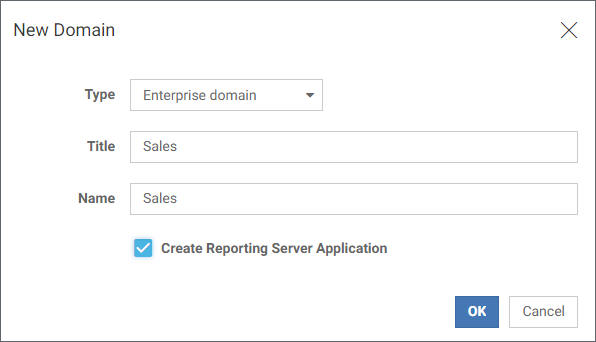
- Select the Create Reporting Server Application check box if you want
to add an application folder to the Reporting Server for your new domain.
An example of a new Sales Enterprise Domain is shown in the following image.
- Click Create.The content area refreshes, and your new domain now appears in the Resources tree. Expand the new domain in the Resources tree to view the My Content and Hidden Content folders. These folders are automatically created with the new domain.
- My Content. Stores all of your personal folders and content. You can share these items to make them available to other users. To share
a resource, right-click the item and then click Share.
Note: Shared resources appear in a Shared Content folder for users with which you shared the resources.
- Hidden Content. Store all of your current procedures, utility items, and other resources that you do not want to show to other users.
Additionally, by default, four new user groups are automatically created in the Security Center. Those users include Basic Users, Advanced Users, Developers, and Group Administrators. By assigning users to these groups, you can quickly grant privileges according to these predefined roles. Sales domain users that were created in the Security Center are shown in the following image.
For more information about domains and users, see the WebFOCUS Security and Administration technical content.
- My Content. Stores all of your personal folders and content. You can share these items to make them available to other users. To share
a resource, right-click the item and then click Share.
Procedure: How to Create a Folder
- In the Resources tree, select the domain where you want to create a folder.
- On the actions bar, click
Folder.
The New Folder dialog box opens.
- Type a Title for your folder.
The Name field populates with the same text, automatically. You can edit the Name at any time.
- Click Create.
The new folder is created and is now available in the Resources tree. Unlike a new domain, a new folder is not published by default, so when it first appears in the Resources tree, it appears with grayed-out icon and dotted border. Additionally, the title shown in the Resources tree is italicized. An example of a new folder is shown in the following image.

To publish a new folder, right-click it, and then click Publish. By default, when you publish a folder, you automatically publish all its contents as well.
| WebFOCUS | |
|
Feedback |