Configuring SAML Authentication
|
Topics: |
This section describes how to configure Security Assertion Markup Language (SAML) authentication as a single sign-on (SSO) login between Salesforce.com and WebFOCUS. Doing so prevents you from having to log on to Salesforce.com and WebFOCUS separately.
Enabling the Identity Provider
- Log on to Salesforce.com.
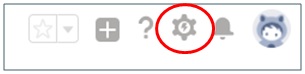
- Click the gear icon to access the Setup menu, as shown in the following image.
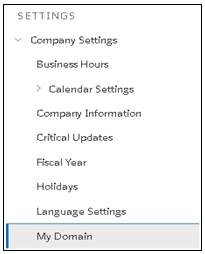
- In the left pane under SETTINGS, expand Company Settings and then click My Domain, as shown in the following image.
The My Domain pane opens, as shown in the following image.
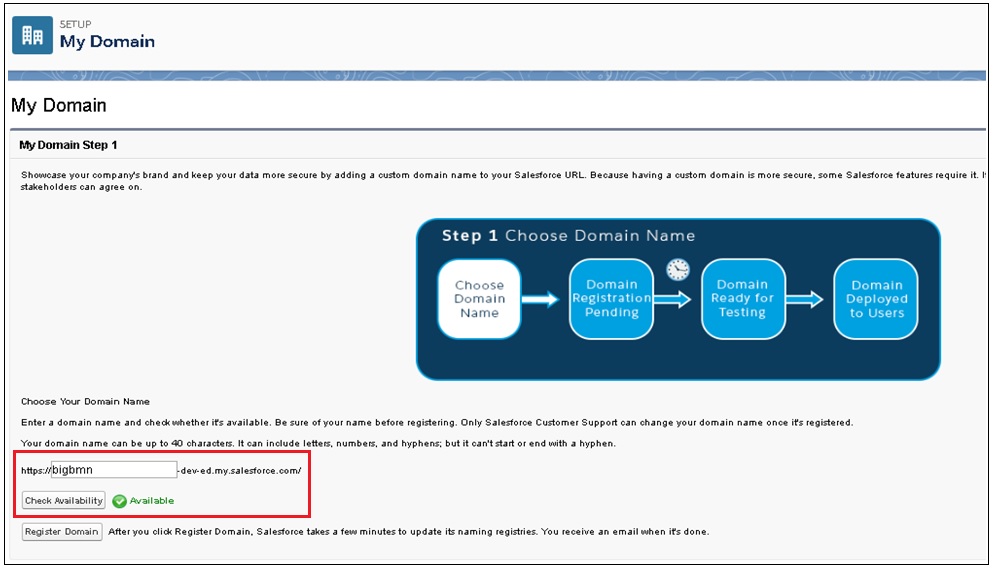
- Specify your domain name, and then click Check Availability.
- Once your domain has been verified, click Register Domain.
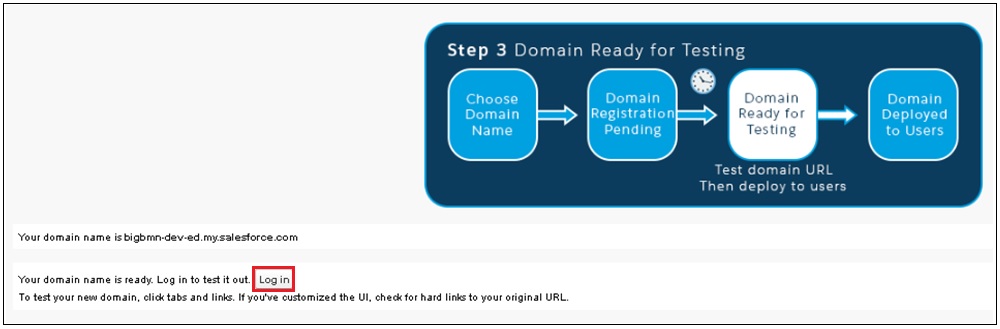
- Once your domain has been registered, log in to the domain by clicking Log in, as shown in the following image.
- In the left pane, expand Security Controls and select Identity Provider, as shown in the following image.
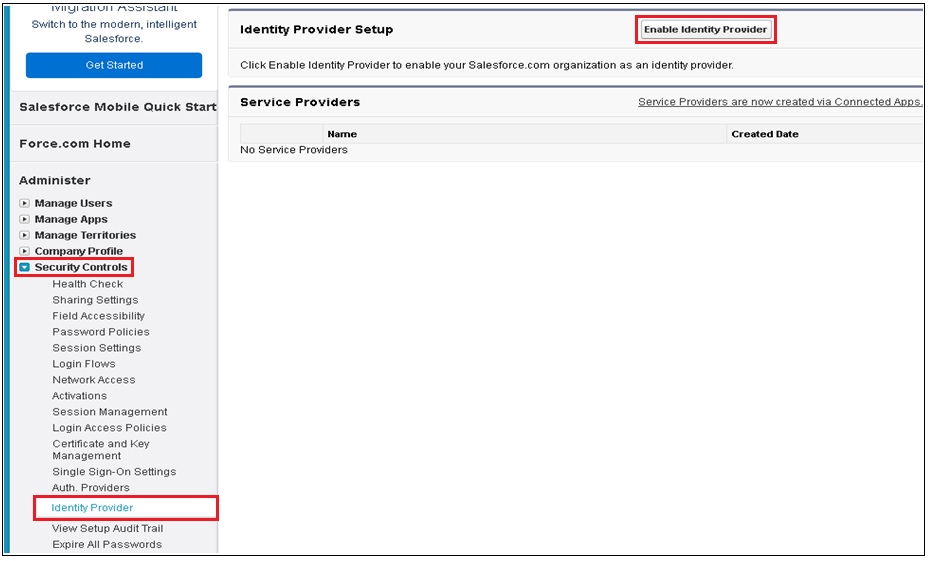
- Click Enable Identity Provider.
The following screen is displayed.

- Click Save.
The following screen is displayed, which provides details regarding the Identity Provider, metadata, and the certificate.

- Click Download Metadata.
Copy the metadata into the following WebFOCUS directory:
\ibi\WebFOCUS82\config\was\saml
This metadata will be used to configure WebFOCUS for the XML file that is used by the Identity Provider.
The specific names of the files are not important, but configuration values in the securitysettings.xml file must reference the correct metadata file.

Configuring WebFOCUS and Generating the wfspMetadata.xml File
At a high level, this process consists of the following steps:
- Creating a key pair to be used for WebFOCUS signing and encrypting (keytool command).
- Importing a Salesforce.com certificate (keytool command).
- Generating the wfspMetadata.xml file.
- Configuring WebFOCUS to utilize the wfspMetadata.xml and SalesforceMetadata.xml files.
To configure WebFOCUS and generate the wfspMetadata.xml file:
- Navigate to the WebFOCUS Administration Console and click the Security tab.
- In the left pane, expand Security Zones, Default, and then click Authentication.
- In the right pane, click Key Management.
The Key Management dialog opens.
- Specify the password for the Keystore.
- Click Add.
The Certificate Alias and Password dialog opens, as shown in the following image.
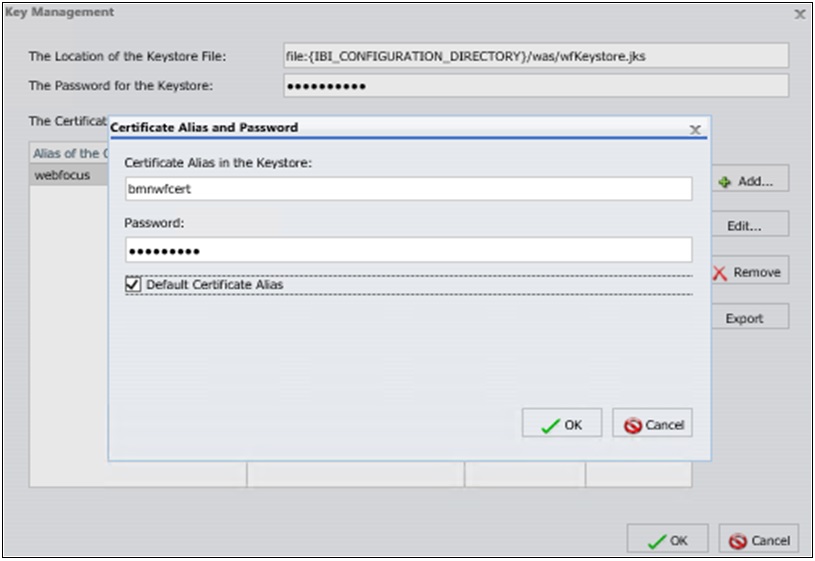
- Specify the alias and password for the certificate in the corresponding fields, and then click the Default Certificate Alias check box.
The password for the Keystore, alias of the certificate, and password for the certificate, are all in the keytool step for generating the key.
- Click OK to save your changes and close the Certificate Alias and Password dialog.
- Click OK to save your changes and close the Key Management dialog.
- From the Authentication pane, right-click SAML Authentication and select Edit from the context menu, as shown in the following image.
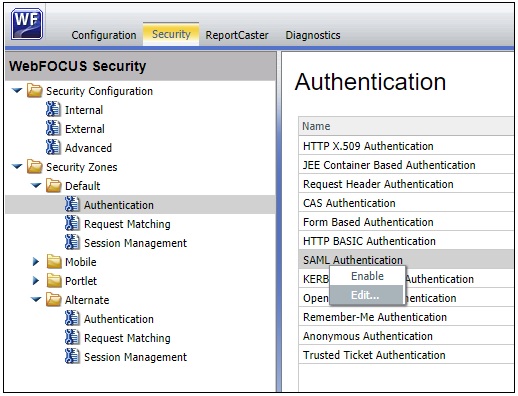
The Edit SAML Authentication Settings dialog opens, as shown in the following image.
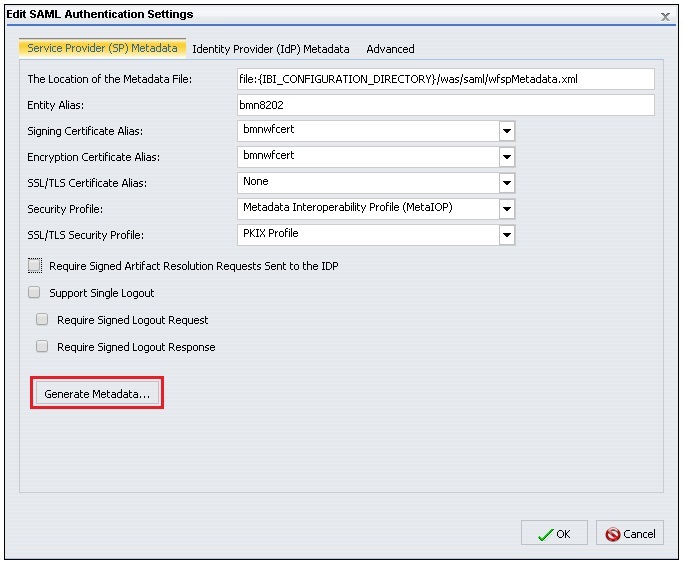
- Specify values for the following parameters:
- Entity Alias
- Signing Certificate Alias
- Encryption Certificate Alias
- Deselect the Support Single Logout check box.
If this option remains selected, logging out from WebFOCUS will automatically log you out from Salesforce.com.
- Leave the default values for all of the remaining parameters.
Note: The same signing and encryption certificates are used in this example, but two different certificates could also be used, if configured originally using the keytool command.
- Click Generate Metadata.
The Service Provider (SP) Metadata Generation dialog opens, as shown in the following image.
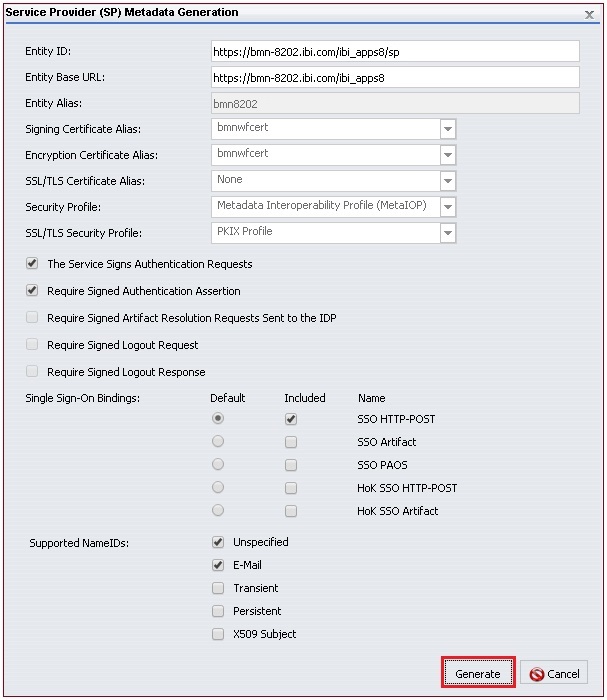
- Click Generate.
Note: If there were any issues with the passwords for the Keystore or certificate, a JSON file is returned and not the wfspMetadata.xml file.
- Copy the wfspMetadata.xml file to the following WebFOCUS directory:
config\was\saml
Provide this file to your ADFS administrator for their use in the configuration of ADFS.
- Enable the Alternate Authentication Zone to allow you to sign in to WebFOCUS from the local machine using forms-based authentication and not SAML. Doing so will allow you to fix any configuration issues.
- In the Default Authentication Zone, disable Form Based Authentication, Anonymous Authentication, and enable SAML Authentication, as shown in the following image.
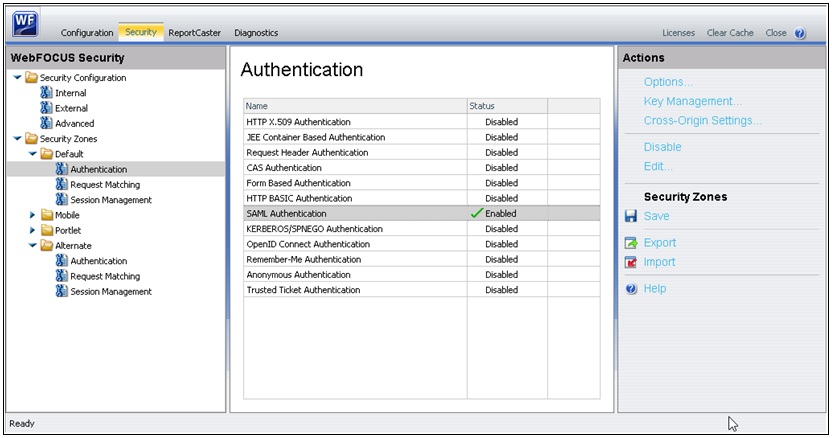
- Click Save.
- Restart your application server so these changes can take effect.
However, do not attempt to sign in until completing the steps described in the next section.
Configuring WebFOCUS as a Service Provider for Salesforce.com
To configure WebFOCUS as a service provider for Salesforce.com:
- Log on to the new domain you created for Salesforce.com.
- In the left pane under Administer, expand Security Controls and select Identity Provider.
- Click Service Providers are now created via Connected Apps. Click here, as shown in the following image.

The New Connected App dialog opens, as shown in the following image.
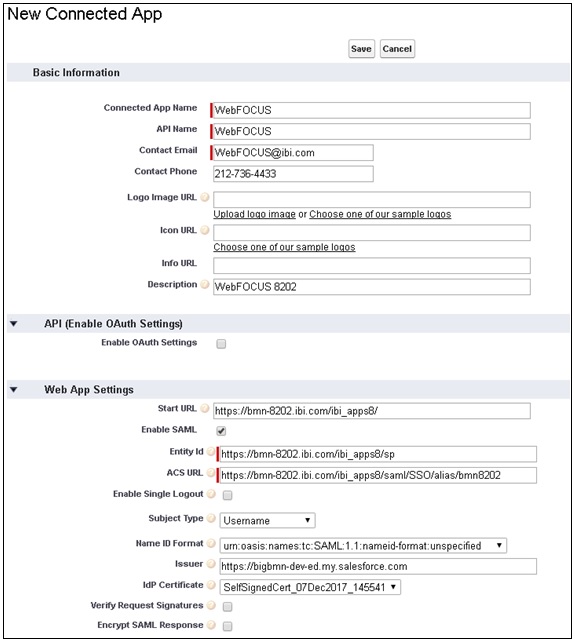
Note: If you select the Enable SAML check box in the Web App Settings section of this dialog, then the SAML information that must be entered is displayed. You should copy this information from the wfspMetadata.xml file, as Salesforce.com does not provide the ability to upload WebFOCUS metadata as some other Identity Providers.
- Values for the Assertion Consumer Service (ACS) URL and Entity ID should be copied from the wfspMetadata.xml file.
You can search for entityID within the wfspMetadata.xml file.
- Click Save to save these configuration settings.
- Click the gear icon to access the Setup menu, as shown in the following image.
- In the left pane under PLATFORM TOOLS, expand Apps, Connected Apps, and then Manage Connected Apps.
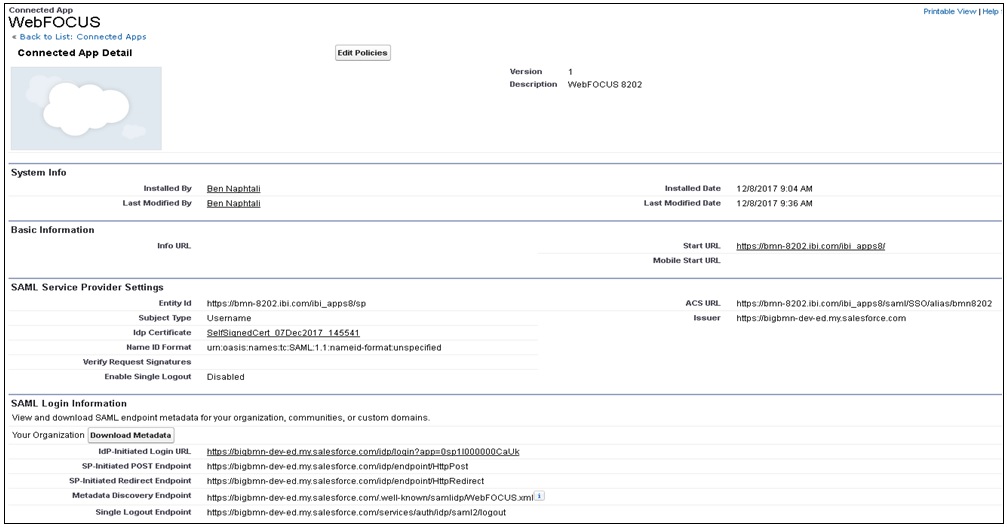
- Select the Label of the Connected App that was created (for example, WebFOCUS).
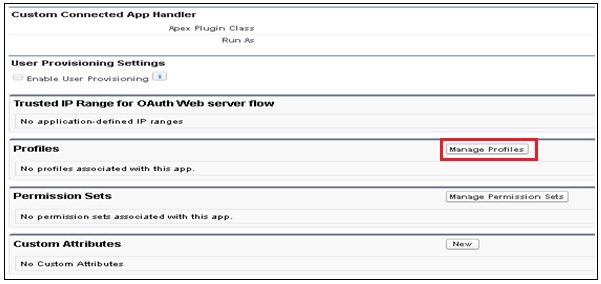
The configuration pane for the Connected App (WebFOCUS) is displayed, as shown in the following image.
To allow users to be able to access WebFOCUS as a Service Provider, you must add profiles to this Connected App.
- Scroll down and select Manage Profiles, as shown in the following image.
The Application Profile Assignment dialog opens, as shown in the following image.
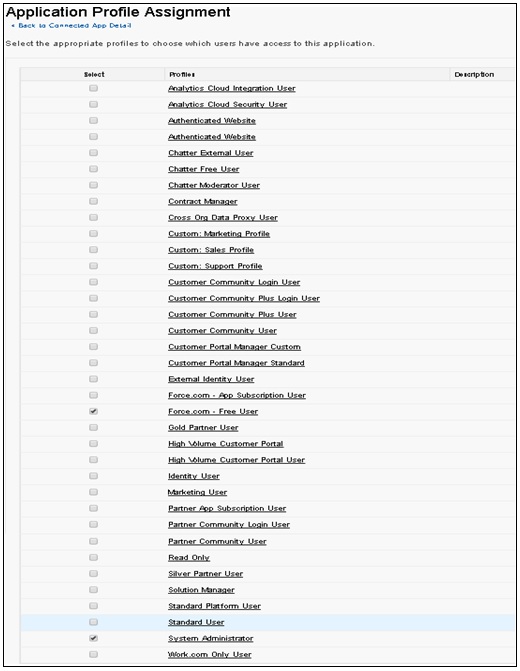
- Select the user(s) that will access WebFOCUS using Salesforce.com as a SAML authentication provider, and then click Save.
- Return to the configuration pane for the Connected App (WebFOCUS), as shown in step 8.
The profiles you assigned to the Connected App (WebFOCUS) are now listed under the Profiles section, as shown in the following image.

- You can test logging on to WebFOCUS by using the URL you configured.
https://server.ibi.com/ibi_apps/
Redirect to your Salesforce.com login page.
- Enter your Salesforce.com user credentials.
You are redirected to WebFOCUS. This is a Service Provider initiated login (login from WebFOCUS).
- If you log on to Salesforce.com using its URL, then any WebFOCUS content will also be logged on from the back-end.
This is an Identity Provider initiated login.
| WebFOCUS | |
|
Feedback |